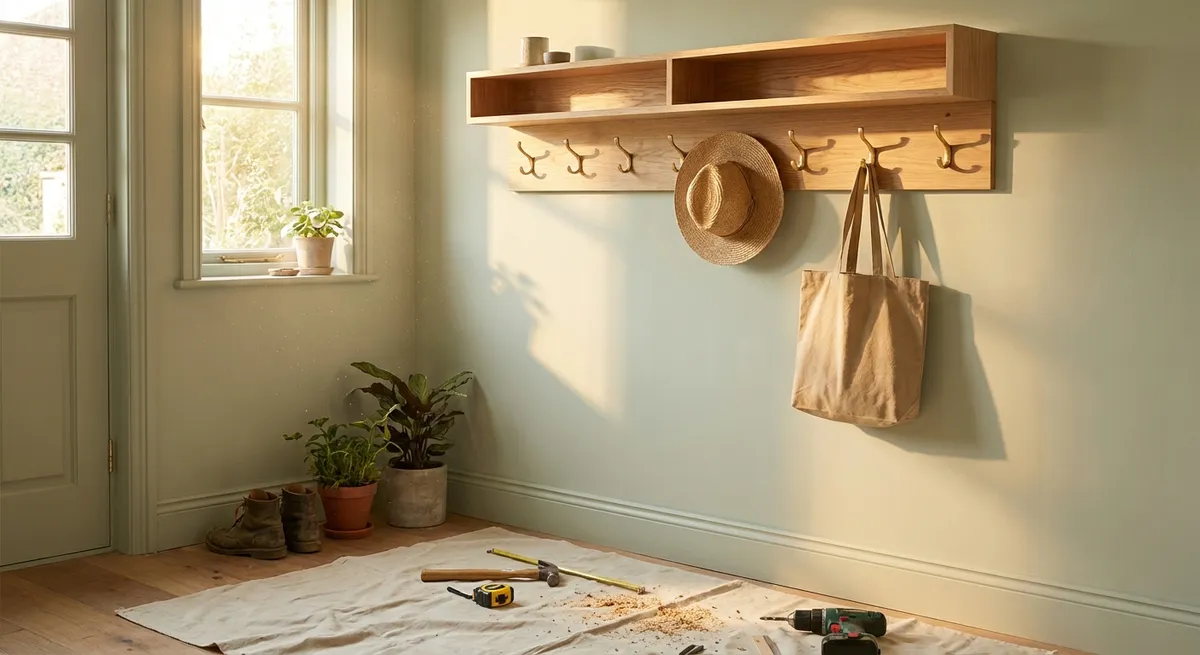
A simple peg rail with a slim shelf can instantly make an entry, hallway, bedroom, or bath feel more organized and intentional. It’s a great first “real build” project: you’ll practice measuring, cutting, drilling, and finishing—but you won’t need a workshop full of tools. This guide walks you through building and installing a clean, modern peg rail with a small shelf that looks custom and works hard.
Use it for coats, bags, towels, or even mugs in the kitchen. The design is flexible, so you can tweak the length, number of pegs, and finish to match your space.
Plan Your Design and Choose Materials
Before you start cutting anything, get clear on where this peg rail will live and what it needs to hold.
Decide on location and length. Measure the wall where you plan to install the rail. A common length is 24–48 inches, but you can go longer if the wall is wide and you have enough studs to fasten into. Leave a few inches of clearance on either side so it doesn’t look cramped.
Choose your board size. A simple, sturdy setup is:
- Back board: 1x4 or 1x6 (actual thickness about ¾", height 3½" or 5½")
- Shelf: 1x4 or 1x6, matching the back board or slightly shallower
Select wood type. Pine and poplar are affordable and easy to work with. If you want the grain to pop for a stained finish, consider oak or maple. Avoid warped or twisted boards—sight down the length at the store and choose the straightest pieces.
Pick your pegs. You can:
- Buy premade wooden shaker pegs or dowel pegs
- Cut your own from hardwood dowel (¾" to 1" diameter works well)
- 2–3 wood screws long enough to reach studs (2½" is typical)
- Short wood screws to attach shelf to back board (1¼" or similar)
- Wood glue
- Sandpaper (120, 180, and 220 grit)
- Finish: paint, stain + polyurethane, or clear coat
Gather basic hardware and supplies:
Finally, mark an estimated peg layout based on use. For coats and bags, 4–6 inches between pegs is comfortable; for towels or lighter items, you can go closer.
Cut the Boards and Dry Fit Your Layout
Now you’ll cut your main pieces and check proportions before committing to holes and glue.
Mark your cuts. Use a tape measure and pencil to mark the final length on both the back board and the shelf. For a clean look, cut both boards to exactly the same length.
Cut safely. Using a miter saw, circular saw, or even a handsaw with a miter box:
- Clamp the board when possible so it doesn’t move
- Keep hands well away from the blade path
- Let the saw reach full speed before cutting, and don’t force the cut
Lightly sand cut edges with 120–150 grit to remove splinters. Don’t fully finish-sand yet; you’ll do that after drilling and assembly.
Dry fit the layout:
- Place the back board flat on a work surface
- Set the shelf on top, aligned with the back edge so it creates a shallow ledge
- Space your pegs along the front face of the back board, centered vertically
Adjust spacing visually. Aim to have the end pegs a couple of inches in from the edges to avoid a “crowded” look. When you’re happy with the layout, lightly mark peg center points with pencil.
Double-check scale in the actual room:
- Hold (or temporarily tape) the boards together on the wall at the intended height
- Stand back and see how the proportions look
- Adjust length or peg count if needed before you drill anything
Drill for Pegs and Mounting: Accuracy Matters
Careful measuring and drilling make the difference between “DIY charm” and “clean, pro-looking build.”
Lay out peg positions. On the front face of the back board:
- Draw a light centerline horizontally where the pegs will sit (for a 1x4, this is around 1¾" from either long edge).
- Measure and mark peg centers along that line, using consistent spacing.
- Use a combination square or ruler to ensure all marks line up.
Drill peg holes:
- Use a drill bit sized to match your peg tenon or dowel diameter (often ½"–¾")
- Clamp the board to keep it from moving
- Hold the drill as perpendicular to the board as possible; a simple drill guide or a small square placed next to the bit helps keep it straight
- Drill to a depth slightly deeper than the peg tenon (use painter’s tape on the bit as a depth stop)
Test-fit each peg. They should slide in with some resistance but not require hammering. If too tight, gently twist the bit in the hole by hand or lightly sand the peg ends.
Add mounting holes:
- Flip the board over and mark two or three locations where you’ll screw into studs (aim for one near each end and one in the center for longer rails).
- Drill clearance holes from the front, sized for your mounting screws.
- On the front side, use a larger bit or countersink bit to create a shallow recess so screw heads sit below the surface—you’ll fill these later.
If you’re not certain where the studs are, you can:
- Use a stud finder and transfer those measurements to the board, or
- Plan to use heavy-duty wall anchors instead of going directly into studs (for lighter loads)
Assemble, Sand, and Finish for a Clean Look
Once the drilling is done, you can put everything together and make it look polished.
Attach the shelf:
- Run a thin, continuous bead of wood glue along the top back edge of the back board.
- Set the shelf board on top, flush with the back and ends.
- Clamp the boards together to keep them aligned while you add screws.
- From the back side, drill pilot holes through the back board into the shelf every 8–12 inches.
- Drive short wood screws through these holes to mechanically secure the shelf.
Insert the pegs:
- Add a small amount of wood glue inside each peg hole.
- Twist each peg into place so the glue spreads evenly.
- Wipe away any squeeze-out with a slightly damp cloth.
- Ensure all pegs are aligned vertically; sight across them and adjust before the glue sets.
- Start with 120–150 grit to smooth joints and remove pencil marks.
- Move to 180, then 220 grit for a smooth, touch-friendly surface.
- Lightly break sharp edges by running sandpaper along corners at a 45° angle; this makes the piece feel more finished and helps the finish wear better.
- For paint: Apply a primer, let dry, then 1–2 coats of high-quality interior paint, lightly sanding between coats if needed.
- For stain: Wipe or brush on, let it penetrate per the directions, then wipe off excess; follow with a clear polyurethane or water-based topcoat.
- For a natural look: Use a clear water-based polyurethane or an oil/wax blend.
Do your finish sanding:
Apply your finish:
Let everything cure fully according to the product instructions before hanging anything on the pegs.
Secure the Peg Rail to the Wall
Installation is where your peg rail becomes a truly useful piece of storage—take a few minutes to do this part solidly.
Find your mounting height. Common choices:
- For coats and bags: 60–66 inches from floor to peg centers
- For kids’ rooms: 42–48 inches (or mix heights if installing multiple rails)
- For bathrooms (towels): 48–54 inches
- Use a stud finder to mark stud centers along the wall.
- Confirm by driving a small finish nail or a very small pilot hole where indicated—solid resistance usually means you’ve hit a stud.
- Hold the peg rail against the wall at the chosen height.
- Line up your predrilled mounting holes with stud positions where possible.
- Use a level across the top to ensure the rail is straight.
- Lightly mark the wall through each mounting hole.
Locate studs:
Transfer measurements:
Predrill and mount:
- For stud mounting: Drill pilot holes into the studs at your marks.
- For non-stud areas: Install appropriate wall anchors rated for the expected load.
- Hold the rail in place (a helper or temporary support screws can make this easier).
- Drive the mounting screws through the rail and into the studs or anchors until snug, but don’t overtighten and crush the wood.
Hide the screw heads:
- Fill the recessed screw holes with wood filler (for paint) or color-matched filler (for stain).
- Lightly sand once dry and touch up with paint or finish.
Give the installation a slight tug test by gently pulling on the rail and a couple of pegs. If anything feels loose or flexes noticeably, upgrade your anchors or add another screw into a stud.
Five Key Steps Recap (Quick Reference)
For a fast refresher, here are the five core build steps DIY enthusiasts can follow and adapt for future wall projects:
Plan and Measure:
Decide location, length, and height. Choose board size and wood type. Sketch peg spacing based on what you’ll hang.
Cut and Dry Fit:
Cut back board and shelf to length. Lay out shelf and pegs on the board to confirm spacing and proportions before drilling.
Drill Accurately:
Mark peg centers clearly, drill straight peg holes to proper depth, and add countersunk mounting holes where you’ll fasten to studs or anchors.
Assemble and Finish:
Glue and screw the shelf, glue in pegs, sand progressively, and apply your chosen finish. Let it cure fully.
Mount Securely:
Locate studs, drill appropriate pilot holes, use proper screws/anchors, level the rail, and fill over screw heads for a clean final look.
Follow this sequence and you’ll not only end up with a solid peg rail—you’ll also build core skills (measuring, drilling, joining, finishing, and mounting) that transfer directly to shelves, bathroom racks, kitchen rails, and more.
Conclusion
A wall-mounted peg rail with a slim shelf is one of those small projects that can transform how a room feels and functions. You get extra storage, a spot to style decor, and a clean, intentional look, all from a straightforward build that doesn’t require advanced tools.
Once you’ve done one, it’s easy to customize future versions: paint one to match trim in a hallway, build a shorter version as a kids’ backpack station, or make a deeper shelf for a mini entry display. The same five-step process—plan, cut, drill, assemble, mount—will carry you through a lot of practical DIY projects around your home.
Sources
- [U.S. Consumer Product Safety Commission – Home Safety Guides](https://www.cpsc.gov/Safety-Education/Safety-Guides) - General guidance on safe use of tools and home fixtures, useful when planning and executing DIY projects safely.
- [This Old House – How to Hang Shelves](https://www.thisoldhouse.com/woodworking/21016796/how-to-hang-shelves) - Covers practical techniques for locating studs, choosing anchors, and securely mounting wall storage.
- [Family Handyman – How to Use a Drill](https://www.familyhandyman.com/project/how-to-use-a-drill/) - Step-by-step drilling tips that help improve accuracy and safety when making peg and mounting holes.
- [Lowe’s – How to Sand Wood](https://www.lowes.com/n/how-to/how-to-sand-wood) - Explains grit progression, hand vs. power sanding, and achieving a smooth surface before finishing.
- [Minwax – Wood Finishing Tips](https://www.minwax.com/wood-projects/wood-finishing-how-to) - Manufacturer guidance on choosing and applying stains and clear finishes for durable, attractive results.
Key Takeaway
The most important thing to remember from this article is that this information can change how you think about DIY Projects.


