Building or upgrading your toolkit doesn’t have to mean buying everything at the hardware store. The goal is simple: own tools that actually help you finish real projects—safely, efficiently, and without constant frustration.
This guide walks you through a practical, no-fluff setup: what to buy, why it matters, and how to use and maintain it. You’ll also get five step-by-step mini-guides for common DIY situations so your tools don’t just sit in a box.
Start With a Core Toolkit, Not a Random Pile of Tools
Most people collect tools one sale at a time and end up with duplicates, missing sizes, and a drawer full of “almost right” gear. It’s better to think in terms of a core system that covers the most common home tasks: fastening, measuring, cutting, drilling, and safety.
Start by defining the kinds of projects you actually do or want to do in the next year (e.g., hanging shelves, fixing loose hinges, light electrical like swapping outlets, basic wood projects, small plumbing fixes). Once you know your likely tasks, you can prioritize tools that support them instead of chasing everything at once. Focus on a mix of hand tools (for precision and control) and power tools (for speed and versatility).
A solid starter set will usually include: a quality screwdriver set, claw hammer, tape measure, combination square, utility knife, adjustable wrench, a basic socket set, pliers, a cordless drill/driver, and a small level. Add safety gear—safety glasses, hearing protection, dust masks or respirators, and work gloves—at the same priority level, not as an afterthought. You’ll upgrade and expand over time, but this foundation will cover a surprising amount of work.
Choosing the Right Hand Tools (So You Don’t Re-Buy Them Later)
Good hand tools are worth paying for once. Cheap options tend to round off screws, slip when you apply force, or wear out quickly. A few smart upgrades up front will save you money and frustration.
For screwdrivers, look for a set that includes multiple sizes of Phillips and flathead, plus a precision set for electronics or small hardware. Magnetic tips help hold screws in awkward positions. For a hammer, a 16 oz claw hammer with a comfortable, non-slip grip is a versatile choice for framing nails, picture hooks, and light demo.
Pliers are the quiet workhorses of DIY. At minimum, get: combination (slip-joint) pliers, needle-nose pliers for tight spots, and locking pliers (like Vise-Grips) for stubborn bolts or as a temporary clamp. A tape measure with a standout (how far the blade extends before bending) of at least 7–9 feet is much easier to use when working alone. Finally, don’t skip a good utility knife with replaceable blades—dull blades cause more accidents than sharp ones because they require more force and slip more easily.
If you’re on a tight budget, prioritize tools you’ll use in nearly every project: a hammer, multi-bit screwdriver, tape measure, utility knife, and pliers. Buy the best you can reasonably afford in those categories, then fill in gaps over time.
Power Tools That Give You the Most Capability per Dollar
You don’t need a full workshop to do serious DIY. A few carefully chosen power tools can turn frustrating, slow jobs into straightforward tasks. Start with a cordless drill/driver; it’s the single most useful power tool for most homeowners.
Choose a drill with at least 18V (or 20V max) and lithium-ion batteries. Two batteries are ideal so you can keep working while one charges. Look for an adjustable clutch (so you don’t strip screws), variable speed, and a ½" chuck for flexibility with drill bit sizes. Once you choose a brand, you’re usually buying into their battery system, so think ahead about other tools you might want later (impact driver, circular saw, oscillating tool, etc.).
A few other highly useful tools as you progress: an oscillating multi-tool (great for flush cuts, trimming door jambs, scraping, and detail work), a random orbital sander (for smoothing wood and paint prep), and a basic circular saw (for cutting plywood and boards). If you mostly assemble furniture and hang things on walls, you can postpone the saws and sander and invest in better drill bits, driver bits, and stud-finding tools.
Think in terms of kits, not one-off tools. A quality drill with a case, charger, spare battery, and a set of bits (wood, metal, masonry, and driver bits) is far more valuable than a bare tool that needs multiple extra purchases just to be usable.
Smart Storage and Organization So You Can Actually Find Things
Even the best tools are useless if you can’t find them. A simple organization system beats a fancy one you never maintain. The goal is fast access and obvious “homes” for everything.
Start with a basic toolbox or tool bag for your core hand tools. Keep your most-used items (screwdriver, hammer, tape measure, utility knife, pliers) in easy reach. Less frequently used tools can live in labeled bins or drawers. Use small organizers with compartments for screws, anchors, nails, and miscellaneous hardware—dumping them all in a jar guarantees frustration later.
Wall-mounted pegboards or rail systems can be a game changer in garages or basements. Hang frequently used tools at eye level and outline or label their spots so they go back to the same place. For power tools, consider a small shelf plus a charging station where batteries and chargers live together.
Label everything. Masking tape and a marker are enough. Label bins by category (“Electrical,” “Plumbing,” “Furniture Hardware,” “Picture Hanging”). The goal is to cut decision time: you should know where to look and where to put things back without thinking. This also helps you see what you actually use—and what you can skip buying next time you’re tempted by a sale.
Maintain and Upgrade: Keeping Tools Working Like New
Basic maintenance keeps your tools accurate and safe, and it doesn’t take much time. After messy jobs, wipe down hand tools with a rag and mild cleaner to remove dirt, grease, or drywall dust. Dry them thoroughly to prevent rust. Lightly oil any pivot points on pliers or adjustable wrenches with a drop of machine oil.
For cutting tools (utility knives, saw blades, drill bits), dullness is your enemy. Replace utility knife blades regularly; they’re cheap and safer when sharp. When drill bits start smoking, squealing, or taking much longer to cut, sharpen or replace them. For battery-powered tools, avoid fully draining lithium-ion batteries often; partial charge cycles are healthier long-term.
Periodically inspect power tools for frayed cords (on corded tools), cracked housings, or loose parts. Check safety labels and guards—never remove guards on saws or grinders. Store tools in dry areas; damp basements or sheds can cause rust and corrosion quickly.
As you gain experience, upgrade strategically. Replace the tools that annoy you or limit your work first: maybe a better drill/driver, a more accurate level, or a quality stud finder. Over time, you’ll build a setup tuned to how you work, not just what was on sale.
5 Practical Step‑by‑Step Guides for Everyday DIY Tool Use
These mini walk-throughs show how to use your tools on real home tasks.
1. How to Drill a Clean Hole in a Wall Without Guessing
- Confirm what’s behind the wall. Use a stud finder to locate studs and mark them lightly with a pencil; this keeps you from drilling into random spots or hitting wires where they’re less likely to be.
- Choose the right bit and size. Match the drill bit to what you’re drilling into (masonry bit for brick/concrete, wood bit for studs/drywall) and match size to your anchor or screw instructions.
- Mark and stabilize. Mark your drilling point with a pencil. If drilling into drywall, lightly press your drill against the wall and hold it level; if your drill has a level bubble, use it.
- Drill slowly at first. Start at low speed to create a shallow pilot divot without the bit wandering. Once the bit is centered and stable, increase speed and steady pressure—don’t force it.
- Stop at the right depth. Use a depth stop or wrap tape around the bit at the desired depth as a visual cue. Once you reach the tape, stop, back the bit out with the drill still spinning, and clean dust from the hole before inserting anchors or hardware.
2. How to Safely Use a Cordless Drill as a Screwdriver
- Pick the correct driver bit. Match the bit to the screw head (Phillips, Torx, square, etc.) and size. A loose fit leads to stripped screws.
- Set the clutch. Turn the clutch ring to a lower number for delicate work (small hinges, outlet covers) and higher for heavier tasks (framing, lag screws). This prevents overdriving and stripping.
- Align the drill straight. Hold the drill so the bit is straight in line with the screw. A crooked angle increases the chances of cam-out (slipping) and damage.
- Start slow with firm pressure. Squeeze the trigger gently to start the screw, applying steady forward pressure. Once the screw is biting into the material, you can increase speed slightly.
- Stop before over-tightening. As soon as the screw head is flush (or reaches the desired depth), release the trigger. If you hear the clutch clicking rapidly, it’s already at its torque limit—back off and reset if needed.
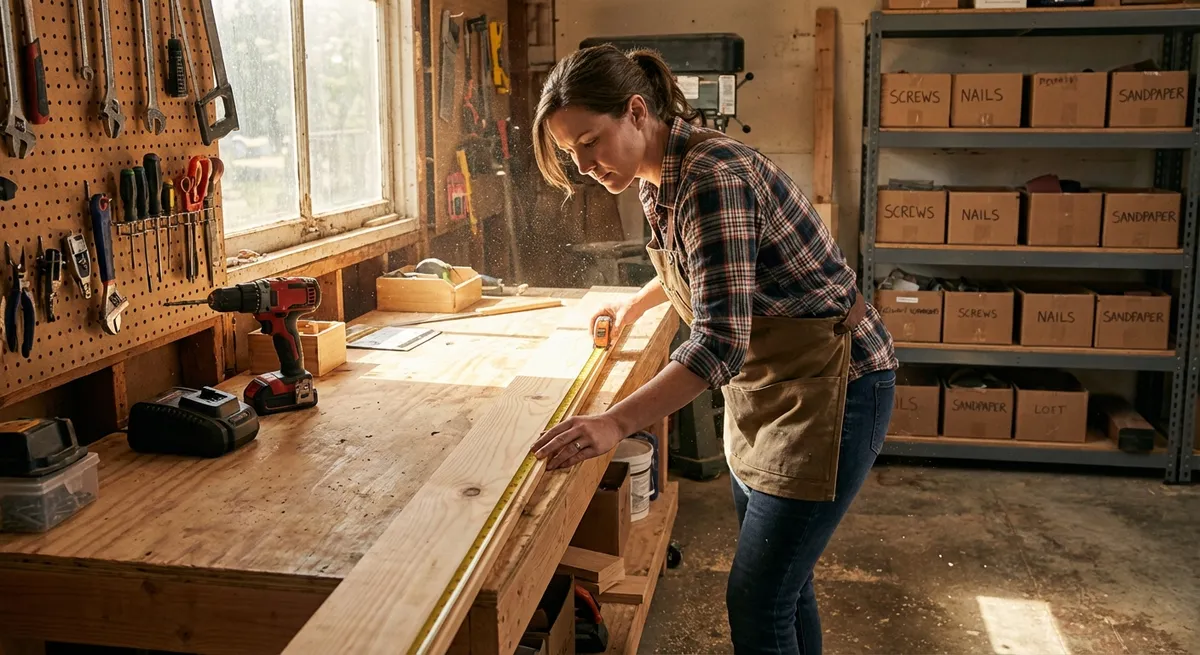
3. How to Measure and Mark Accurately for Wall-Mounted Shelves
- Decide height and spacing. Hold the shelf or bracket up to get a visual sense of height, then measure from the floor or a nearby reference point (like a countertop) to pick a consistent number.
- Mark the first bracket location. Use a tape measure to mark the vertical height and a small horizontal pencil line where the top of the bracket will sit.
- Find and mark studs. Use a stud finder to locate studs along that height line. Mark centerlines of studs with a light vertical line; this gives you solid wood to anchor into.
- Use a level for alignment. Place a level on the top mark for the first bracket and extend the line horizontally to where the second bracket will go. This ensures the brackets (and shelf) are level with each other.
- Pre-drill and double-check. Hold each bracket in place along the level line, mark screw holes, and pre-drill pilot holes. Before driving screws, hold the level across both brackets one more time to confirm alignment.
4. How to Swap a Worn Utility Knife Blade Safely
- Prepare a safe surface. Work on a clear, flat surface and keep your non-dominant hand away from the blade area. Have a small container or heavy cardboard ready to hold used blades.
- Lock the blade retracted. Slide the blade fully into the handle and engage any safety lock if your model has one. This prevents accidental extension while opening the housing.
- Open the knife according to instructions. Many knives have a screw, latch, or button to open the casing. Follow the markings or manual; don’t force it.
- Remove and dispose of the old blade carefully. Grasp the dull blade by the non-sharp edges, slide it out, and place it immediately into your blade container or wrap it in thick tape before trashing.
- Install the new blade and reassemble. Insert the new blade in the correct orientation (matching the original), ensure it seats fully, then close and lock the housing. Test the slide a few times to make sure the blade extends and retracts smoothly.
5. How to Set Up a Basic Tool Bag for Fast Grab-and-Go Repairs
- Choose a sturdy, open-style bag or box. A soft tool bag with internal pockets or a top-opening toolbox works well; avoid ultra-small boxes that force you to dig around.
- Decide on your “always carry” tools. Include your primary screwdriver(s), hammer, tape measure, utility knife, pliers, adjustable wrench, small level, and a pencil. These cover most quick fixes.
- Add a small hardware kit. Use a small organizer box for assorted screws, wall anchors, picture hooks, wire nuts, and a few zip ties. Keep it in the bag so it’s always with your tools.
- Include basic safety gear. Slip a pair of safety glasses and light work gloves into a side pocket. That way you’re not tempted to “just do it quickly” without protection.
- Give everything a fixed spot. Use pockets and elastic loops so the same tools live in the same spot. After each job, put everything back immediately so your bag is always ready for the next call.
Conclusion
Good tools don’t have to be expensive or complicated—they just need to be the right tools, used the right way, for the real projects you tackle at home. Start with a focused core kit, add power tools that genuinely expand what you can do, and keep your setup organized and maintained.
Over time, you’ll spend less energy hunting for tools and more time actually fixing, building, and improving your home. That’s the real payoff of a thoughtful toolkit: fewer headaches, better results, and projects that move from “someday” to “done.”
Sources
- [U.S. Consumer Product Safety Commission – Power Tool Safety](https://www.cpsc.gov/safety-education/safety-guides/tools-and-power-equipment/power-tool-safety) - Guidance on safe use of power tools and common hazards to avoid
- [Occupational Safety and Health Administration (OSHA) – Hand and Power Tools](https://www.osha.gov/hand-power-tools) - Official safety standards and best practices for tool use and maintenance
- [Family Handyman – Must-Have Tools for Homeowners](https://www.familyhandyman.com/list/must-have-tools-for-homeowners/) - Practical overview of essential tools and why they matter for common home projects
- [This Old House – How to Use a Drill/Driver](https://www.thisoldhouse.com/tools/21017659/how-to-use-a-drill-driver) - Detailed instructions on using a cordless drill/driver effectively and safely
- [Lowe’s – How to Use a Stud Finder](https://www.lowes.com/n/how-to/use-a-stud-finder) - Step-by-step guidance on locating studs correctly before drilling or mounting items
Key Takeaway
The most important thing to remember from this article is that this information can change how you think about Tools & Equipment.


