If your counters, nightstands, or entry tables are covered in chargers and cables, a hidden charging station is one DIY project that delivers a big quality‑of‑life upgrade. It’s simple, beginner‑friendly, and completely customizable to your space. This guide walks you through planning, building, and safely wiring a discreet charging hub that keeps devices powered without visual chaos.
Plan Your Charging Station (Location, Power, and Capacity)
Before you grab tools, decide exactly what you want this station to do and where it should live.
First, choose a location close to an existing outlet: a kitchen drawer, entry cabinet, nightstand, or console table works well. Make sure there’s enough depth to hold a power strip and devices without overheating or cramming cords. Think about how many devices you charge daily—phones, tablets, earbuds, watches, maybe a laptop—and count both now and “future you” a year from today.
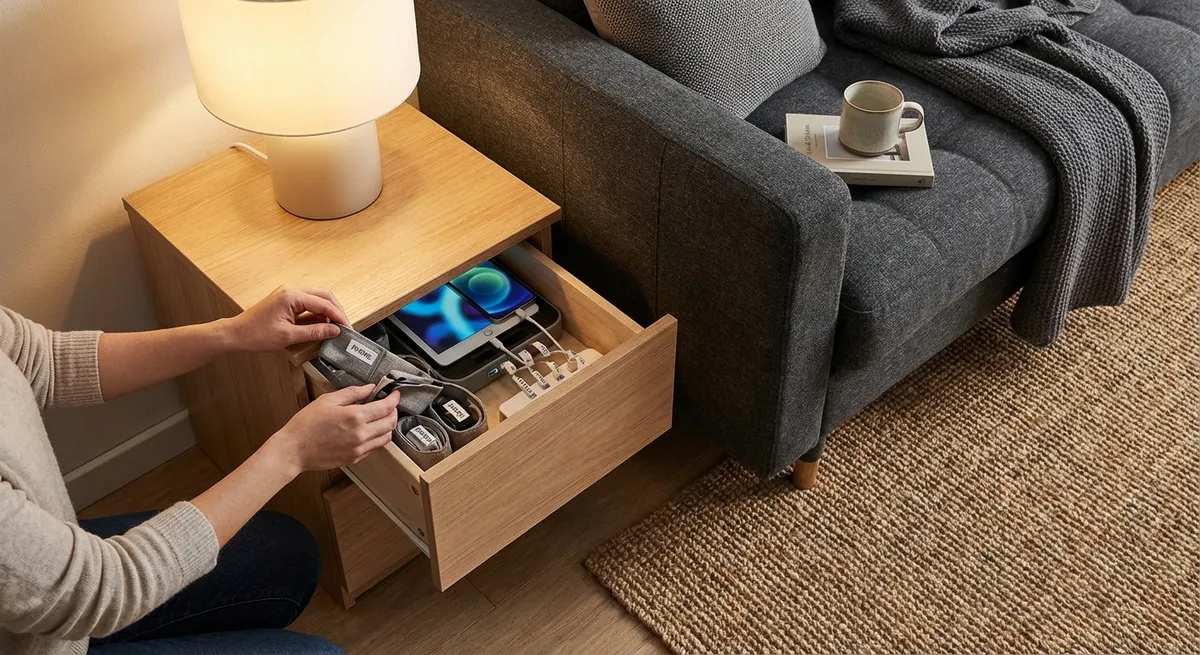
Next, decide whether you want a drawer‑based station (hidden when closed), a cabinet or cubby (good for families), or a tabletop box with a lid (great in open spaces). Measure your space carefully: width, depth, and height. Sketch a simple plan showing where the power strip will sit, where cables will exit, and how devices will rest or stand.
Finally, verify you’re not overloading a single circuit. For typical phone/tablet charging, a standard 15‑amp circuit is fine, but avoid connecting high‑draw appliances to the same power strip. Choose a UL‑listed power strip or surge protector with overload protection, and plan to plug only low‑wattage charging bricks or USB chargers into it.
Gather Materials and Tools (Keep It Simple and Safe)
With a plan in place, gather everything you need before you start cutting or drilling. For most setups, you’ll want a small power strip or surge protector, short USB cables or magnetic charging leads, and a mix of USB‑A and USB‑C ports depending on your devices. Shorter cables reduce tangles and help keep the station neat.
For the structure, you can repurpose an existing drawer, cabinet, or box, or build a simple wooden box from 1x6 or 1x8 boards and a thin plywood bottom. You’ll need basic tools: a drill, drill bits, a hole saw or spade bit (¾"–1½"), sandpaper, measuring tape, pencil, and safety glasses. A jigsaw can help if you need to enlarge openings or trim interior dividers.
To manage heat and cables, pick up rubber grommets or cable bushings for any holes you drill, a few adhesive cable clips, and some reusable cable ties or Velcro straps. If you plan to paint or stain, choose a low‑VOC finish and allow adequate drying time before plugging in electronics. Above all, avoid modifying the power strip itself—no opening cases, splicing cords, or bypassing safety features.
Step 1: Mark and Drill Cable Pass‑Through Holes
Start by clearing the drawer, cabinet, or box you’re using. Remove any existing liners or organizers so you can see bare wood or the base surface. Set your power strip inside and experiment with placement: it should sit toward the back or side, with enough space for plugs and bricks without bending cords sharply.
Once you like the layout, mark where the main power cord needs to exit the furniture to reach the wall outlet. This is your primary pass‑through hole. Use a drill and appropriate size hole saw or spade bit (typically 1–1¼" for a power cord with plug) and drill slowly, keeping the drill perpendicular to the surface to avoid tear‑out. Use a scrap block of wood on the back side if possible to support the material.
If you want separate paths for individual charging cables—say, from the drawer interior to the top surface—mark those locations next. Drill smaller holes (around ¾") for USB cables, trying to place them toward the rear so they’re less visible in daily use. Sand the edges of all holes lightly to remove splinters, then press in rubber grommets or bushings to protect the cables from abrasion and give the project a clean, finished look.
Step 2: Secure the Power Strip and Organize the Interior
With your pass‑through holes drilled, place the power strip in its final position. You want it secured so it doesn’t slide around when you open or close a drawer or cabinet door. Many power strips include mounting slots on the back; you can use short screws in the base or wall of the cabinet and hang it on them, leaving space for airflow. Alternatively, use heavy‑duty mounting tape or small brackets, following weight and heat guidelines from the manufacturer.
Route the main cord through the large pass‑through hole toward the wall outlet, leaving enough slack that movement of the drawer or door won’t stress the cord. Inside the station, plug in only the chargers you actually use—resist filling every outlet “just because.” Use adhesive cable clips along the side or back to hold charging bricks and keep cables from bunching up.
Bundle excess cord lengths with Velcro straps or reusable ties, avoiding tight coils that can trap heat. If your drawer or cabinet is deep, consider adding a simple raised platform or divider to keep devices off the floor of the space and allow air to circulate underneath. The goal is a layout where nothing pinches, cords aren’t under tension, and you can unplug or replace a charger without disassembling the whole station.
Step 3: Create Device Slots, Stands, or Dividers
A good charging station doesn’t just hide cables; it gives each device a clear “home.” This keeps screens from scratching each other and makes it obvious when something is missing. You can keep this step simple or get creative based on your skill level.
At the simplest level, reuse an existing file sorter, plate rack, or bamboo dish rack as a device stand inside a drawer or on a shelf. These provide upright slots for phones and tablets and take seconds to install. For a more custom fit, cut thin strips of wood or plywood to create dividers sized for your devices. Glue or nail them into a base board that fits snugly inside the drawer or box.
Align slots with your pre‑drilled cable holes so each device’s charging port is close to where the cable emerges. Label each slot subtly (e.g., “Tablet,” “Work Phone”) with a paint pen or label maker to prevent family arguments or mix‑ups. Make sure taller devices like tablets or e‑readers have enough height clearance when the drawer or lid is closed, and double‑check nothing presses on power buttons or side switches when the station is in use.
Step 4: Route and Label Cables for Easy Use
Now connect your charging cables and fine‑tune the cable management. Start by plugging each USB or magnetic cable into its charger, then feed the device end through the appropriate grommeted hole toward the device slot or surface. Leave just enough length above the surface for comfortable connection and disconnection; excess slack should stay hidden inside.
Use small adhesive cable clips or stick‑on cable “docks” near each slot to hold the connector when not in use—this prevents them from slipping back through holes or disappearing under other items. If you have a mix of connector types (Lightning, USB‑C, micro‑USB), label each cable near the device end with a small tag, heat‑shrink label, or colored tape system everyone in the home can understand.
If you’re setting up a family station, consider reserving one or two cables as “flex” lines that are longer and can reach out of the drawer or onto the countertop for guests or occasional devices. Keep these organized with a magnetic cable holder or a simple hook so they don’t tangle with the fixed lines. Once everything is arranged, gently open and close the drawer or door several times to confirm cables move freely, don’t snag, and don’t tug on chargers or plugs.
Step 5: Finish, Test, and Use It Safely
Before powering everything up, check your work with a safety mindset. Confirm that the power strip is UL‑listed (or equivalent recognized safety mark), all cables are in good condition with no cracks or exposed wires, and ventilation is adequate—especially if you close the drawer or lid while devices are charging. Avoid lining the inside with thick fabrics or foam that could trap heat around chargers.
Plug the power strip into the wall outlet, then plug in one device at a time to confirm each cable and slot works as intended. Watch for any signs of overheating: chargers that become extremely hot, unusual smells, or discoloration. If you notice anything concerning, unplug immediately and replace the suspect charger or cable with a higher‑quality, certified option that matches your device’s requirements.
Finally, establish some basic house rules: don’t plug space heaters, hair tools, or other high‑draw appliances into the same strip as your electronics; don’t cover the station with heavy items; and unplug the entire unit if you’re leaving home for extended periods. Consider adding a small surge protector with USB outputs designed specifically for electronics if you live in an area with frequent power fluctuations. A quick seasonal check—tightening clips, replacing worn cables—will keep your hidden charging station reliable, safe, and clutter‑free for years.
Conclusion
A hidden charging station is a compact DIY upgrade that pays off daily. By planning the layout, drilling clean pass‑throughs, securing a safe power strip, and giving each device a dedicated spot, you turn cable chaos into a simple routine: plug in, close the drawer, and walk away. It’s an approachable project for most DIY skill levels, easy to adapt to any room, and a smart way to protect your gear while making your home feel calmer and more organized.
Sources
- [U.S. Consumer Product Safety Commission – Extension Cords and Power Strips](https://www.cpsc.gov/safety-education/safety-guides/home/extension-cords) - Safety guidelines for using power strips and avoiding overloads
- [National Fire Protection Association (NFPA) – Electrical Safety in the Home](https://www.nfpa.org/Education-and-Research/Home-Fire-Safety/Electrical) - Recommendations on safe use of electrical devices and cords
- [UL Research Institutes – What Is UL Certification?](https://www.ul.org/resources/what-does-ul-listed-mean) - Explains UL listing and why certified electrical products matter
- [Apple Support – About Genuine Apple Chargers and Accessories](https://support.apple.com/en-us/HT204566) - Information on safe, certified charging accessories for Apple devices
- [U.S. Department of Energy – Reducing Electricity Use and Costs](https://www.energy.gov/energysaver/reducing-electricity-use-and-costs) - Broader context on managing home electricity use efficiently
Key Takeaway
The most important thing to remember from this article is that this information can change how you think about DIY Projects.


