Getting into DIY doesn’t mean buying every tool you see on sale. A reliable setup is about choosing the right gear, learning how to use it safely, and taking care of it so it lasts. This guide walks you through practical, step‑by‑step ways to build, organize, and maintain your tools so every project feels smoother and less stressful.
Step 1: Start With a Core Tool Kit That Actually Matches Your Projects
Before buying anything else, get clear on what you’ll really use in the next 6–12 months. Painting a room, hanging shelves, fixing loose hinges, assembling furniture, or replacing light fixtures all rely on the same core tools.
Focus on tools that earn their keep across many projects:
- Measuring & marking: tape measure (25 ft), combination square, carpenter’s pencil, permanent marker.
- Cutting & shaping: utility knife with extra blades, handsaw (or compact pull saw), sanding block or sanding sponge.
- Fastening: 16 oz hammer, screwdrivers (at minimum: Phillips #2 and flathead), adjustable wrench, hex key set.
- Power basics: a cordless drill/driver with a small set of bits, plus a set of drill bits for wood and metal.
- Safety gear: safety glasses, hearing protection, dust mask or respirator (for sanding/painting), work gloves.
How to build this kit step-by-step:
- Write down 3–5 projects you want to do soon. List the tools each one needs. Circle the tools that repeat. Those are your priorities.
- Buy mid-range, not cheapest. For tools you’ll use often (drill, tape measure, screwdriver set), choose a reputable brand in the middle of the price range—not the bargain bin, not the pro contractor line.
- Skip single‑purpose gadgets. Multi-use tools (like an adjustable wrench) often beat niche tools you’ll use once.
- Upgrade slowly as you learn. Start with basic versions of tools. If you hit their limits repeatedly, then upgrade.
- Borrow or rent for rare items. Items like tile saws, large sanders, and nailers are usually better to rent until you know you’ll use them more than once or twice.
Step 2: Choose Between Cordless and Corded Tools the Smart Way
Modern cordless tools are powerful, but they’re not always the smartest first purchase. Matching tools to real‑world use will save you money and frustration.
When cordless makes sense:
- You often work in spots without easy outlets (attics, yards, older basements).
- You need mobility—climbing ladders, moving around tight spaces, working outdoors.
- The tool is used in short bursts, like a drill/driver, impact driver, or oscillating multi‑tool.
When corded makes more sense:
- You need continuous power for longer jobs (extended sanding, cutting thick lumber, big demolition).
- The tool is heavy‑draw (some saws, shop vacs, older style sanders).
- You don’t want to manage batteries or wait on charging.
Step-by-step approach to building a cordless system that makes sense:
- Pick one battery platform. Choose a major brand and stick with it so your batteries and chargers are compatible.
- Start with a drill/driver kit. Most brands bundle a drill, two batteries, and a charger—this is often the cheapest way to enter a system.
- Add bare tools, not more kits. Once you have batteries, buy “tool‑only” versions (no extra batteries or chargers) to save money.
- For high‑draw tools, compare specs. Check amp‑hours (Ah) and voltage, and read about runtime and power in real‑world use.
- Keep a corded backup for heavy work. A corded circular saw or sander can be a smart backup when batteries run low mid‑project.
Step 3: Set Up a Simple, Safe Work Area Before You Start Any Project
A good work area instantly makes your tools more effective—and your projects safer. It doesn’t need to be fancy; it needs to be organized, lit, and stable.
You’re aiming for:
- A stable work surface (folding workbench, sturdy table, or two sawhorses and a solid board).
- Enough lighting to clearly see cuts, edges, and markings.
- A way to secure materials (clamps, bench vise, or even sturdy spring clamps).
- A clear path to walk, with cords and tools out of the way.
Step-by-step to set up a basic, safe workspace:
- Choose your spot. Garage, basement, driveway, or even a balcony with a weatherproof mat can work. Prioritize ventilation if you’re painting or cutting.
- Create a stable surface. If you don’t own a workbench, use two sawhorses plus a thick plywood sheet or a solid door slab as a temporary top.
- Add basic clamping. Get at least two medium‑size clamps; they make cutting, gluing, and drilling much safer and more accurate.
- Manage cords and trip hazards. Route cords along walls when possible, and use a single heavy‑duty extension cord for multiple corded tools (one at a time).
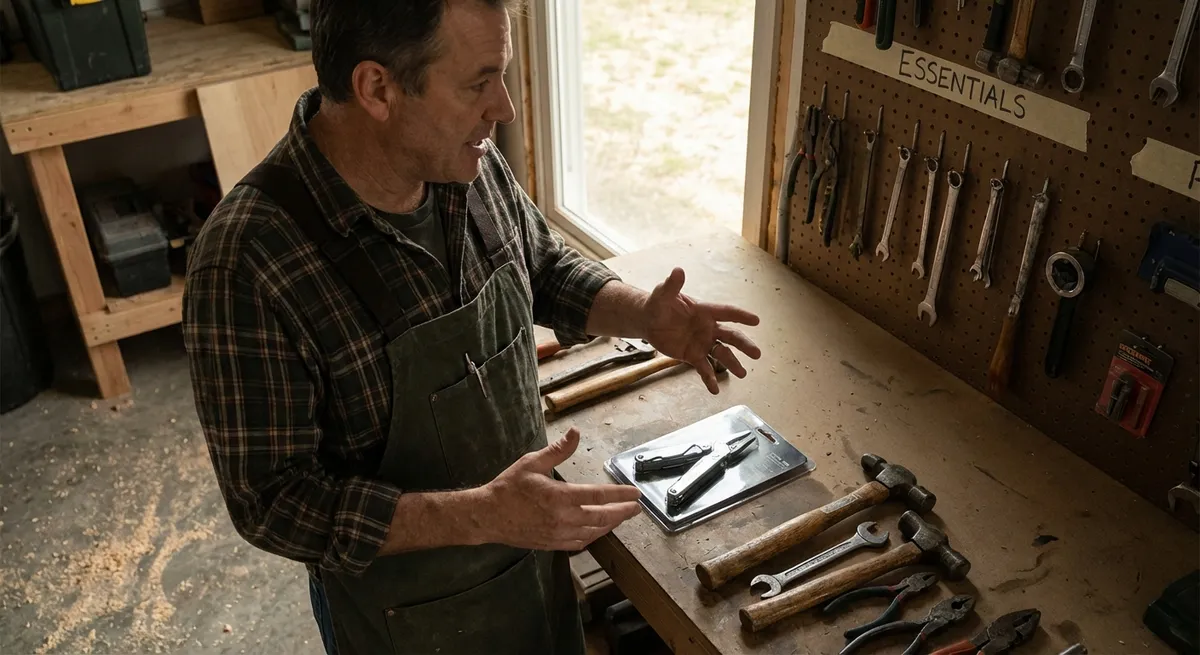
- Organize tools by “zones.” Keep cutting tools in one spot, fasteners and bits in another, measuring/marking together, and safety gear in easy reach. This reduces time hunting for what you need.
Step 4: Maintain and Store Tools So They Stay Accurate and Ready
Well‑maintained tools are safer and work better. Blunt blades slip, rusted tools seize, and dull bits burn wood instead of cutting it. A few maintenance habits will keep everything ready when you are.
Focus on three main areas: cleanliness, sharpness, and protection.
What to do step-by-step:
- Clean as you go. Wipe dust off tools with a dry rag after use. Use a slightly damp cloth for handles and cases; keep water away from metal parts.
- Protect metal from rust. Lightly oil metal surfaces on hand tools (pliers, wrenches, saw blades) with a little machine oil or a rust‑preventative spray. Wipe off the excess.
- Keep blades and bits sharp.
- Replace utility knife blades regularly.
- Sharpen or replace handsaw blades when cuts start to feel slow or rough.
- For drill bits, consider a small bit‑sharpening tool if you use them often.
- Store tools in a dry place. Avoid leaving tools on concrete floors (they attract moisture). Use shelves, hooks, or a pegboard to keep tools off the ground.
- Label and sort small parts. Use divided organizers or clear containers for screws, anchors, nails, and specialty fasteners. Label by size and type so you don’t rebuy what you already own.
Bonus habit: Keep a simple DIY “log” on your phone or a notebook. When a tool acts up (battery weak, bit dull, blade chipped), jot it down and fix or replace it before the next project.
Step 5: Learn to Use Key Tools Correctly Before You’re “In the Middle” of a Project
Most DIY frustration comes from trying to figure out a tool mid‑project. Spending even 15–30 minutes learning a tool in a low‑stress setting pays off quickly in better results and fewer mistakes.
Start with these commonly used tools:
- Cordless drill/driver
- Stud finder
- Tape measure and combination square
- Utility knife
- Orbital sander or basic finishing sander
How to practice step-by-step, using a drill/driver as an example:
- Read the quick‑start sections of the manual. Focus on settings: torque ring, speed settings, and drill vs. drive mode.
- Practice on scrap material. Use spare 2x4s or plywood. Mark where you want screws to go and practice driving them until you can sink them flush without stripping the head.
- Try different bits and anchors. Practice drilling pilot holes and using wall anchors in scrap drywall (or an offcut from a home center).
- Experiment with torque settings. Start low and increase until the screw sinks properly. This helps you avoid overdriving screws into soft wood or drywall.
- Repeat for other tools.
- With a tape measure, practice consistent marking from both ends of a board.
- With a sander, try moving slowly with even pressure—don’t press down hard, let the tool do the work.
- With a utility knife, make multiple light passes instead of trying to cut through in one go.
The goal isn’t to become a pro overnight. It’s to feel confident enough that the tool helps your project instead of slowing you down.
Conclusion
A good DIY tool setup isn’t about owning the biggest collection—it’s about having the right tools, knowing how to use them, and keeping them ready for the next job. Start with a practical core kit that fits your real projects, invest in one cordless platform if it makes sense, set up a simple workspace, maintain your gear, and practice with your most-used tools before you need them.
Do this, and each project becomes less guesswork and more “I know exactly what to grab and how to use it.” That’s the point where home improvement starts feeling manageable—and even enjoyable.
Sources
- [Consumer Reports: How to Buy the Right Tools for DIY Projects](https://www.consumerreports.org/home-garden/tools/how-to-buy-the-right-tools-for-diy-projects-a5779165924/) - Overview of essential homeowner tools and what to look for when buying.
- [Family Handyman: Essential Tools for the Homeowner](https://www.familyhandyman.com/article/essential-tools-for-homeowners/) - Practical breakdown of core hand and power tools for common home projects.
- [OSHA: Hand and Power Tools Safety](https://www.osha.gov/hand-power-tools) - Official safety guidelines for selecting, using, and maintaining tools.
- [Lowe’s: How to Choose a Cordless Power Tool System](https://www.lowes.com/n/buying-guide/cordless-power-tool-buying-guide) - Explanation of battery platforms and factors to consider when buying cordless tools.
- [This Old House: How to Set Up a Workshop](https://www.thisoldhouse.com/shops/21016750/how-to-set-up-a-workshop) - Guidance on creating an efficient and safe home workspace for tools and projects.
Key Takeaway
The most important thing to remember from this article is that this information can change how you think about Tools & Equipment.


