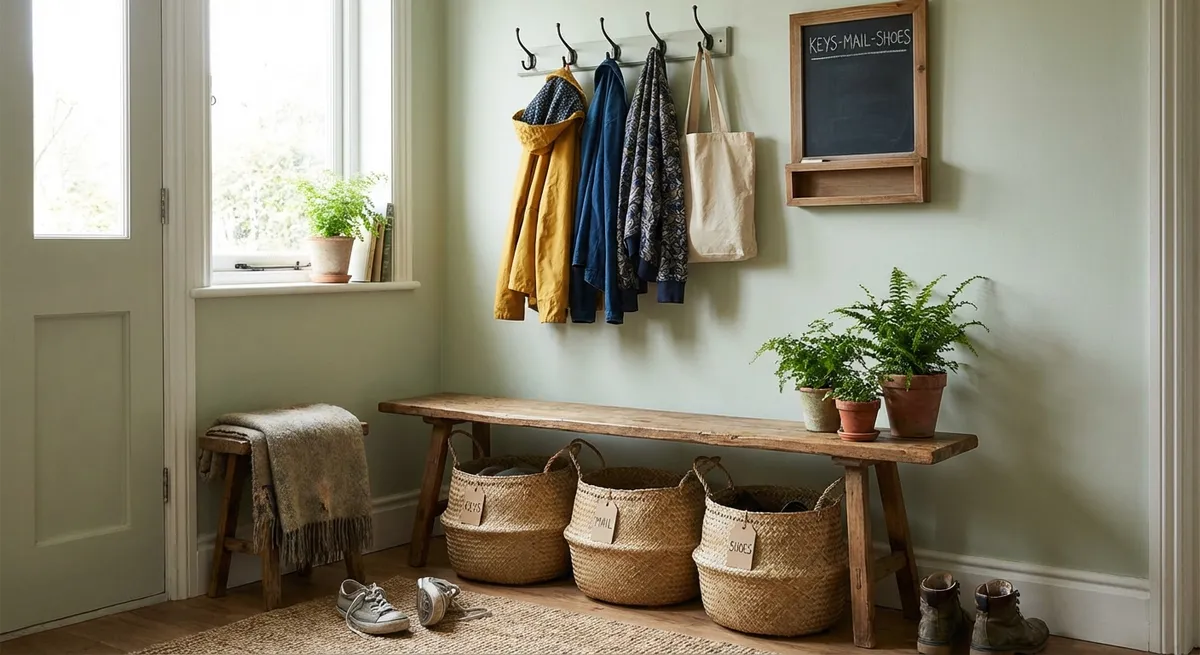
If your front door area is a dumping ground for keys, bags, shoes, and mail, you’re not alone. A small DIY entryway “drop zone” can turn that chaos into a functional, good‑looking landing spot you use every day. This project doesn’t require advanced skills or expensive tools—just a bit of planning and some basic materials. Below you’ll find a straightforward walkthrough, from measuring and planning to mounting hooks and benches, so you can create a custom setup that fits your space and how you live.
Step 1: Plan the Space and Layout
Before you buy anything, take a few minutes to figure out what your entryway really needs to handle.
Measure the width of the wall you’ll use and note any obstacles like light switches, vents, or baseboard heaters. Decide what must live here: shoes, bags, dog leash, keys, mail, umbrellas, or sports gear. This helps you choose the right mix of hooks, shelves, and storage bins instead of guessing at the store. Sketch a simple front view of the wall on paper and mark rough locations for a small bench or shoe rack, a key hook shelf, and maybe a top shelf for baskets or hats. Aim to keep hooks between about 60–70 inches from the floor so adults can reach them easily without coats dragging on the ground. If you share the home with kids, plan a lower row of hooks at their height so they can hang their own things. Finally, think about walking flow: you should still be able to enter, turn, and move without bumping into furniture or snagging coats.
Step 2: Gather Materials and Tools
With a rough layout in mind, you can choose materials that match your budget and skill level.
For a basic drop zone, you’ll usually need wall hooks or a hook rack, a narrow bench or shoe rack, a small shelf with or without key hooks, and a couple of baskets or bins. For wall mounting, plan on using wood screws and wall anchors, or better yet, fasten into studs where possible. You’ll want a tape measure, pencil, level, drill/driver, screwdriver bits, and a stud finder; a small hand saw or jigsaw may be needed if you’re cutting boards to length. If you’re building a simple bench from lumber, select boards that are straight and free of deep cracks or loose knots, and pick up sandpaper and wood finish or paint. When choosing hooks and hardware, check the package for weight ratings if you’ll hang heavy bags or winter coats. If you rent, choose removable options or mount into existing trim where patching holes later is easier and less noticeable.
Step 3: Install a Simple Wall-Mounted Hook Rail
Hooks are the heart of an entryway drop zone—this step makes your space instantly more functional.
Start by marking the height where you want your hooks using a pencil and a level to draw a light horizontal line. Use a stud finder along that line to locate studs; mark their centers. If your hook rail can align over at least one stud, plan to screw directly into the stud for strength, then use quality wall anchors for the remaining screws. Pre-drill holes through the hook rail at stud locations and any extra spots where you’ll use anchors. Hold the rail to the wall along your level line, mark those hole positions, then drill pilot holes into studs and the correct size holes for anchors where needed. Insert the anchors, position the rail, and drive the screws until snug, checking level again before tightening fully. Finally, attach individual hooks if they’re not pre‑mounted and lightly tug on the rail to confirm it’s solid enough to handle daily use.
Step 4: Add a Compact Bench or Shoe Station
A place to sit and stash shoes keeps piles off the floor and makes getting out the door easier.
If you’re using a ready‑made bench or shoe rack, check the dimensions against your measured wall and assemble it according to the manufacturer’s instructions. Leave at least a few inches between the bench and the door swing so it doesn’t get bumped. For a basic DIY bench, you can use a solid wood panel or a 2×12 board as a top, supported by simple legs or sturdy crates on either end. Attach legs securely with wood screws, pre‑drilling to avoid splitting. Sand any rough edges and apply a coat of paint, stain, or a clear protective finish so dirt and moisture wipe off easily. Place shallow trays or mats under the bench to catch wet shoes and protect flooring. If your bench is tall or tips easily, consider using small L‑brackets at the back to secure it to the wall for safety, especially in homes with kids or pets.
Step 5: Create a Simple Command Center for Keys and Mail
Finishing your drop zone with a modest “command center” keeps small, easily lost items under control.
Mount a small shelf with hooks or a dedicated key rack above or beside the main hook rail, at a comfortable reach. Use the same process as before: mark height, level, locate studs if possible, and use appropriate anchors if not. Reserve one hook strictly for keys so they always have a home; this habit alone reduces daily stress. On the shelf, place one small tray or shallow box as an “inbox” for mail and important papers instead of letting them spread out on counters. A small magnet board or pinboard beside the shelf can hold appointment cards, school notices, and takeout menus without cluttering the surface. Try not to overload this area with decorations—leave enough room for the items you’ll use every day. Step back and test the setup: walk in as if you’re arriving home, hang your bag and coat, drop keys and mail, and adjust positions until the motions feel natural and efficient.
Conclusion
A DIY entryway drop zone doesn’t have to be complicated to make a big difference in daily life. With a short planning session, a few basic materials, and careful mounting, you can turn a messy threshold into a streamlined, reliable landing spot. Hooks handle the bulk of the clutter, a compact bench tames shoes, and a small command center keeps keys and mail where you can always find them. Once the basics are in place, you can fine‑tune the look with paint, labels, or baskets—but the real win is a front door area that finally works the way you need it to.
Sources
- [U.S. Consumer Product Safety Commission – Anchor It!](https://www.anchorit.gov) - Guidance on safely securing furniture and fixtures to prevent tip‑overs
- [Lowe’s – How to Hang Shelves](https://www.lowes.com/n/how-to/hang-shelves) - Step‑by‑step instructions for using wall anchors and finding studs
- [The Home Depot – How to Install Wall Hooks](https://www.homedepot.com/c/ah/how-to-install-wall-hooks/9ba683603be9fa5395fab9014f7a609) - Practical tips on choosing and mounting different types of hooks
- [This Old House – Entryway Organization Ideas](https://www.thisoldhouse.com/entryways-mudrooms/21015180/entryway-organization-ideas) - Inspiration and layout ideas for functional entry spaces
Key Takeaway
The most important thing to remember from this article is that this information can change how you think about DIY Projects.


