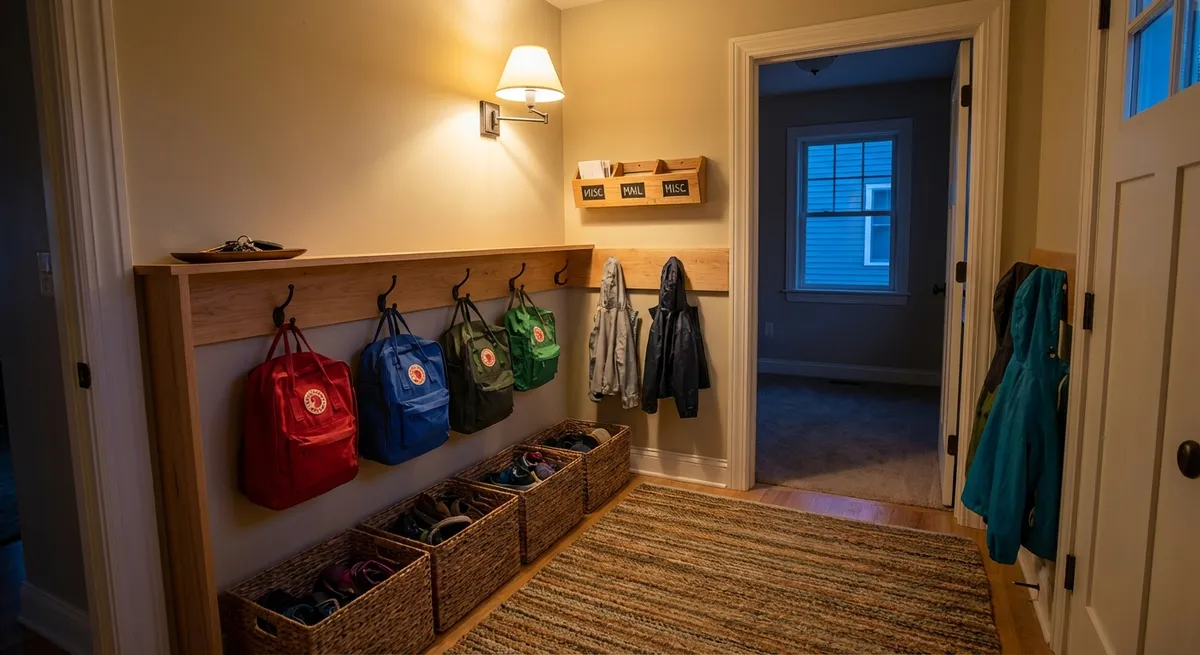
A cluttered entryway makes every day feel more chaotic than it needs to be. Shoes pile up, keys go missing, and mail lands everywhere except where it should. A basic “drop zone” can fix a lot of that—without needing custom built-ins or a full remodel. This project walks you through creating a simple, clean entry setup with hooks, a bench, and organized storage using off‑the‑shelf parts and basic tools.
Plan Your Space and Layout
Before you buy anything, spend a few minutes studying how you actually use your entry. Do shoes stack up by the door, or do you bring them to a closet? Do you dump bags on chairs, or drop keys on the nearest flat surface? Your drop zone should match your habits, not fight them.
Measure the wall where you want your setup: width, floor‑to‑ceiling height, and distance to the nearest door trim or corner. Note where outlets, switches, or vents are so you don’t block them. Decide the core pieces you need: key hooks, a shoe area, a spot for mail, and possibly a place for daily bags or backpacks. Sketch a simple layout on paper: bench or shoe storage along the bottom, hooks above, and one or two small storage items higher up. This quick planning prevents buying random storage pieces that don’t work together or fit your space.
Step 1: Gather Tools and Materials
Getting everything ready before you start keeps the project moving and helps avoid mistakes. You won’t need advanced tools—most DIYers can handle this with basic gear.
You’ll need:
- Tape measure and pencil
- Level (2–4 ft is ideal)
- Stud finder
- Drill/driver with appropriate bits
- Wall anchors (for areas without studs, rated for at least 25–50 lb)
- Screws appropriate for your wall type (drywall, plaster, masonry)
- Pre‑made coat rack or individual wall hooks
- A ready‑made bench or a sturdy low shelf that can double as a bench
- Bins or baskets that fit under or on the bench
- A small wall shelf or mail holder (optional)
Before buying, check the weight ratings of hooks, anchors, and shelves. If you’ll hang heavy backpacks or a loaded purse, make sure the hardware is sized for that load. Lay everything out in the entry so you can visualize the finished setup and confirm it fits the available space.
Step 2: Mark Heights and Hook Positions
Good layout makes the difference between something that looks thrown together and something that feels intentional. Think about who’s using the drop zone. For adults, coat hooks usually work well around 66–70 inches from the floor. For kids, you may want a second, lower row around 42–48 inches so they can reach their own hooks.
Use your tape measure and pencil to lightly mark a horizontal reference line where the hooks will go. Place a piece of painter’s tape along that line if it helps you see it better. Hold your coat rack or hooks against the wall at that height to check how they look from different angles in the room. If you’re using individual hooks, space them about 4–6 inches apart for light use (keys, hats) and 6–9 inches apart for coats and bags. Step back and make any adjustments before you drill anything. Confirm that the planned hook positions won’t interfere with door swings or hit anyone walking by.
Step 3: Find Studs and Install Secure Anchor Points
Proper fastening is about safety as much as appearance. Start by using the stud finder along your marked line to locate studs behind the drywall. Mark stud centers with a small vertical pencil mark. If your coat rack or hooks line up with a stud, that’s ideal—fasten at least one screw into solid wood for maximum strength.
For spots where there’s no stud, use wall anchors that match your wall type. For drywall, plastic expansion anchors or threaded self‑drilling anchors work for medium loads; if you expect heavy bags or multiple coats, consider toggle or strap toggles for extra strength. Drill pilot holes sized for your anchors at your hook or rack mounting points. Insert anchors flush with the wall, then hold your hooks or rack in place and drive screws through the mounting holes into the anchors and studs. Use your level before fully tightening to keep everything straight.
Step 4: Add Bench and Under‑Bench Storage
A simple bench turns the area from “just hooks” into a true landing zone. It gives you a place to sit while you put on shoes and keeps the floor from becoming a pile zone. Choose a bench or low shelf that’s roughly 16–19 inches high (standard chair height) and deep enough for adults to sit comfortably—around 14–18 inches. Make sure it can handle the combined weight of whoever will use it.
Position the bench under the hooks, leaving enough space above so hanging coats don’t drag across the seat. If the bench can tip easily or wobble, secure it to the wall using L‑brackets or anti‑tip hardware, especially if kids will be climbing on it. Slide a couple of baskets or bins under the bench for shoes, sports gear, pet leashes, or seasonal items. Label them if you want to keep categories clear: “Daily Shoes,” “Sports,” “Dog Gear,” etc. This keeps the visible area tidy without requiring perfect organization every day.
Step 5: Add Small Storage for Mail and Keys
The last piece is solving the “small stuff” that tends to disappear—keys, wallets, sunglasses, and incoming mail. A tiny wall shelf, rail with small hooks, or a dedicated mail holder above one end of the bench works well. Mount it far enough to the side that people sitting on the bench don’t bump their heads, but close enough to the door that you naturally reach for it when you come in.
Plan a simple system: keys on a dedicated hook, mail in one slot, outgoing items (like bills or forms) in another. Mount the shelf or holder using the same approach as the hooks: locate studs where possible, otherwise use appropriate anchors. Keep this storage small on purpose—too much surface area tends to attract clutter. Finish by adding only what you truly need daily: a small tray for loose items, a hook for a frequently used bag, maybe a single decorative item to make the space feel intentional without crowding it.
Conclusion
A practical entryway drop zone doesn’t require carpentry skills or custom cabinetry—just a clear plan, a few solid storage pieces, and careful mounting. By combining hooks, a stable bench, and focused small‑item storage, you turn that first few feet inside your door into a space that works with your daily routines. Once this setup is in place, you’ll notice fewer lost keys, less shoe clutter, and a calmer start and end to your day.
Sources
- [U.S. Department of Housing and Urban Development – Home Improvements and Structural Changes](https://www.hud.gov/topics/home_improvements) - General guidance on planning safe and functional home improvements
- [This Old House – How to Install Wall-Mounted Hooks](https://www.thisoldhouse.com/woodworking/21017604/how-to-install-wall-mounted-hooks) - Practical tips on anchoring hooks and racks securely in different wall types
- [Family Handyman – How to Use Wall Anchors](https://www.familyhandyman.com/project/how-to-use-wall-anchors/) - Detailed explanation of different wall anchor types and their load capacities
- [IKEA – Safety at Home: Secure It](https://www.ikea.com/us/en/customer-service/product-support/safe-home/) - Guidance on anchoring furniture and preventing tip‑overs in high‑use areas
- [Bob Vila – Entryway Storage Ideas](https://www.bobvila.com/articles/entryway-storage-ideas/) - Examples of functional entryway layouts and storage solutions
Key Takeaway
The most important thing to remember from this article is that this information can change how you think about DIY Projects.


