Floating shelves are one of the fastest ways to add storage and style without a full remodel. When they’re done right, they look clean, stay level, and don’t sag under everyday use. When they’re done wrong, they pull out of the wall, tilt forward, and crack your drywall. This guide walks you through a reliable, DIY-friendly way to build and install a sturdy floating shelf you’ll be proud to show off.
Plan Your Shelf for Strength, Not Just Looks
Before you buy materials, decide what the shelf needs to do in real life, not just how it will look in photos.
Think about what you’re storing. Books, dishes, and tools are heavy, so you’ll need stronger supports and direct attachment to studs. Decorative items (plants, picture frames, candles) are lighter and give you more flexibility, but you still need a solid anchor system.
Choose a realistic length. Longer shelves create more leverage on the wall. If you’re spanning a big width, plan to hit at least two studs. A good rule: aim for at least one stud every 16–24 inches of shelf length.
Pick a depth that matches your space. Shallow shelves (around 6–8 inches) work well in hallways and bathrooms. Deeper shelves (10–12 inches) fit books and dishes but need stronger brackets and better anchoring.
Decide your material and finish early. Solid wood, plywood with edge banding, or pre-made shelf boards can all work. If you’re painting, choose a paintable wood and plan to fill and sand screw holes. If you want a stained finish, pick a wood species with a grain you like and avoid soft, knotty boards that warp easily.
Finally, sketch a quick diagram with measurements: shelf length, depth, thickness, bracket positions, and where the studs are relative to your final location. This step removes guesswork once you start drilling into the wall.
Gather Tools and Materials That Make the Job Easier
Having the right tools on hand turns this from a frustrating project into a smooth one. Here’s a practical setup for a basic, strong floating shelf:
For the shelf itself, use:
- 1x8, 1x10, or 1x12 solid wood board (or a pre-made laminated shelf board)
- Optional: Edge banding if you’re covering plywood edges
- Heavy-duty floating shelf brackets or a steel rod bracket system rated for your expected load
- Wood screws sized to match your bracket manufacturer’s instructions (typically #8 or #10, 2.5–3 inches)
- If you absolutely must mount in drywall without a stud (not recommended for heavy loads), use high-quality metal toggle bolts rated for the weight
- Stud finder (with deep scan mode if possible)
- Tape measure and sharp pencil
- Level (2–4 feet long works best)
- Drill/driver with wood and masonry bits as needed
- Screwdriver bits that match your screws
- Sandpaper (120–220 grit) or a sanding block
- Paint or stain, plus a clear topcoat (polyurethane or water-based polycrylic)
- Painter’s tape and a drop cloth or old sheet for catching dust and drips
- A miter saw or circular saw if you’re cutting your own board to size
- Clamps to hold the shelf in place while you mark or test-fit
- A small square to check corners and bracket alignment
For mounting, choose:
Basic tools you’ll need:
Optional but helpful:
Lay everything out in one place before you start. It’s much easier to adjust your plan now than after you’ve already punched holes in the wall.
Step 1: Find Your Studs and Mark a Solid Layout
A floating shelf is only as strong as what it’s attached to. Start by locating solid structure in the wall.
Use your stud finder along the wall at the height you want your shelf. Move slowly and mark each stud center with a light pencil line. Double-check by scanning again a few inches above or below; real studs should line up vertically.
Confirm stud locations mechanically if you can. Drive a small test screw where your stud finder says the center is. If it bites firmly and doesn’t suddenly “give,” you’ve likely hit solid wood. Remove the screw and fill this tiny hole later if it’s not in your final bracket position.
Measure and lightly mark where the shelf will start and end. Step back and visually confirm the height and length make sense with surrounding furniture, door swings, and existing decor.
Use a level to draw a light horizontal line between your start and end points. This is your reference line for bracket placement. Don’t trust just your eye—walls and ceilings are often not perfectly straight.
Decide where your brackets will go along that line. Aim to anchor into at least two studs, spaced evenly. If your studs don’t line up perfectly with your ideal shelf length, adjust the shelf length slightly or shift the shelf position so you catch solid wood.
Mark the bracket positions on the line with small crosshairs. These are where your mounting holes will go, so take a moment to confirm everything is level and symmetrical.
Step 2: Cut, Sand, and Finish the Shelf Board
With your layout marked, move on to building the shelf itself so it can dry while you work on the wall.
Measure the distance between your start and end marks on the wall. Transfer this measurement to your board, marking the cut line with a square so your ends are clean and square.
Cut the board using a miter saw or circular saw, supporting both sides of the cut to avoid splintering. If you’re not comfortable cutting, many home centers will cut boards to length for you.
Lightly sand all faces and edges of the board with 120–150 grit sandpaper, then move to 220 grit for a smoother finish. Break the sharp edges by slightly rounding them; this helps prevent chipping and feels better to the touch.
If you’re staining, apply wood conditioner first (especially on softwood like pine) to avoid blotchy results. Then apply stain according to the manufacturer’s directions, wiping off excess evenly.
If you’re painting, use a quality primer first, then apply 1–2 coats of paint. Sand lightly between coats with very fine sandpaper (220+ grit) if you want a smoother, furniture-like finish.
Once your color coat is fully dry, add a clear topcoat for durability, especially in kitchens, bathrooms, or high-traffic areas. Allow plenty of drying time—rushing this step can cause smudges, fingerprints, and stuck-on dust that will be hard to fix later.
Step 3: Install the Brackets Into Solid Structure
Now you’ll turn your wall marks into solid support for the shelf.
Hold your first bracket up to the wall, aligning it with one of your stud center marks and your level line. Use a pencil to mark through the bracket’s mounting holes onto the wall.
Drill pilot holes where you marked, using a bit slightly smaller than your screws. Pilot holes reduce the chance of splitting wood inside the wall and make it easier to drive screws straight.
Attach the bracket with your wood screws, driving them in until snug but not over-tightened. Over-torquing can strip the screw hole in the stud. Use your level to check that the bracket is perfectly vertical and its top is aligned with your reference line.
Repeat the process for the remaining brackets, always checking level side-to-side and aligning with your reference line. A long level helps ensure all brackets sit at the same height.
If you must use anchors for any bracket holes that miss studs (for light-duty shelves only), drill the correct size hole for your toggle or specialty anchor, install it per the manufacturer’s instructions, and then mount the bracket. Keep heavy loads on stud-mounted supports.
Once all brackets are installed, double-check that the tops form a straight, level line. A slight misalignment now will show as a visibly crooked shelf later.
Step 4: Dry-Fit and Secure the Shelf Board
With your brackets firmly installed and your board finished and dry, it’s time to bring them together.
Carefully place the shelf board onto the installed brackets. Make sure it’s centered left-to-right according to your original plan. Step back and visually check that it looks balanced on the wall.
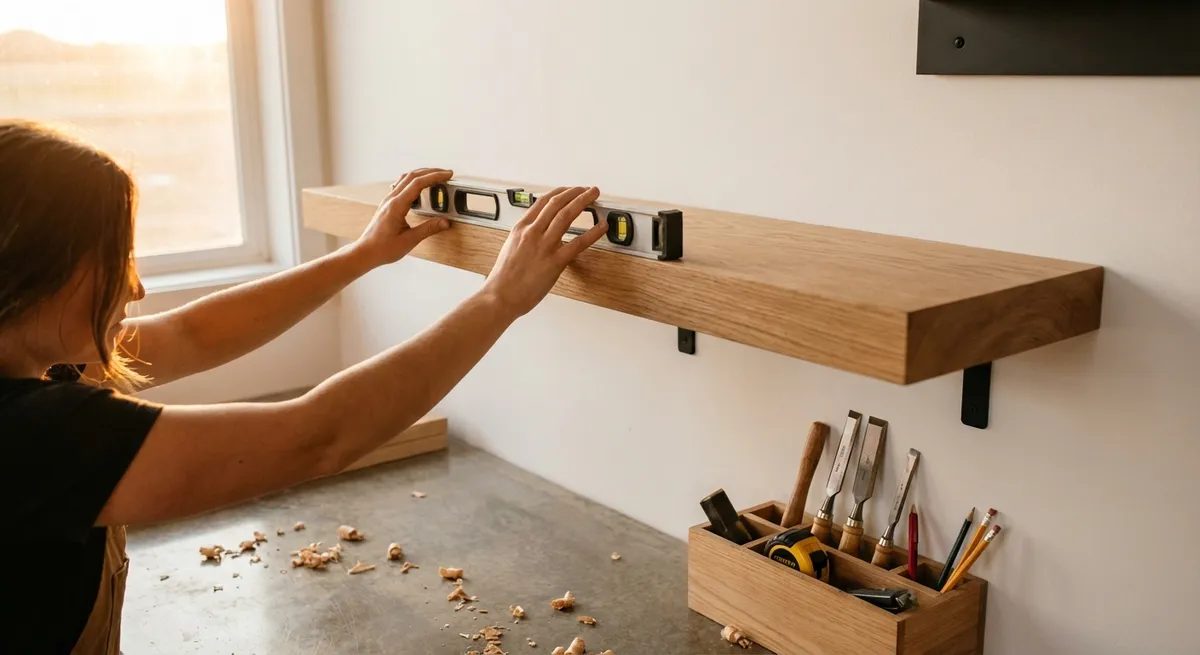
Use your level on top of the shelf to confirm it’s truly level. If you see a minor issue, check that no bracket is bent and that the board isn’t warped. Slight warping can sometimes be fixed by flipping the board or by securing it tightly to the brackets.
Most floating shelf brackets include small screw holes on the top (or underside) that allow you to fasten the shelf to the bracket. From underneath or above, mark where these holes land on the shelf.
Remove the shelf and drill shallow pilot holes into the marked spots on the underside of the board. Use a drill stop or wrap tape around your bit to avoid drilling through the top of your shelf by accident.
Place the shelf back on the brackets, align your pilot holes with the bracket holes, and drive in the recommended screws to secure the shelf to the brackets. Don’t overtighten; you want a firm hold, not a crushed wood fiber.
Give the shelf a gentle upward and downward wiggle. It should feel solid, without noticeable play. If you feel movement, re-check your mounting screws in the wall and into the shelf.
Step 5: Load the Shelf Smartly and Maintain It
A properly installed floating shelf can last years if you use it within its limits and keep an eye on it over time.
Before loading it fully, test the shelf with a moderate amount of weight, gradually increasing up to your intended use. Stay comfortably under the total weight rating of your brackets and anchors. If anything flexes or creaks, remove the load and reassess your mounting.
Place heavier items closer to the wall and above brackets, not right at the outer edge. This reduces leverage that can cause sagging or pull-out over time.
Avoid overloading long, deep shelves. If you notice even slight sagging in the middle under load, either reduce the load or add an additional bracket tied into a stud.
Keep the shelf dry and clean. Wipe up spills immediately to protect your finish. In kitchens and bathrooms, a high-quality topcoat helps resist moisture and stains.
Every few months, quickly inspect the shelf. Check for any separation from the wall, loosened screws, or cracks around the mounting points. Tighten lightly if needed and touch up any finish damage before it worsens.
If you ever decide to remove the shelf, unscrew it from the brackets, then remove the wall screws. Patch and repaint the holes to leave a clean wall behind.
Conclusion
A floating shelf looks simple, but the difference between a solid, long-lasting installation and a wobbly failure comes down to planning, stud-based mounting, and attention to detail. By taking time to map your studs, use the right brackets, and secure the shelf correctly, you’ll end up with storage that’s both clean-looking and truly functional. Once you’ve built one that actually holds up, adding more throughout your home becomes a fast, reliable weekend project.
Sources
- [Family Handyman – How to Build and Install a Floating Shelf](https://www.familyhandyman.com/project/how-to-build-and-install-a-floating-shelf/) - Step-by-step instructions and diagrams for a similar floating shelf project
- [This Old House – How to Hang Shelves](https://www.thisoldhouse.com/walls/21015012/how-to-hang-shelves) - Practical advice on anchoring shelves safely and finding studs
- [Lowe’s – How to Find Wall Studs](https://www.lowes.com/n/how-to/find-wall-studs) - Explains different methods and tools for accurately locating studs in walls
- [U.S. Consumer Product Safety Commission – Shelving and Storage Safety](https://www.cpsc.gov/Safety-Education/Safety-Education-Centers/Tipover-Information-Center) - Guidance on load safety and preventing tip-over or pull-out accidents
- [Minwax – Staining Wood: Tips & Techniques](https://www.minwax.com/how-to/wood-staining-basics/how-to-stain-wood) - Detailed advice on preparing, staining, and finishing wood for durable results
Key Takeaway
The most important thing to remember from this article is that this information can change how you think about DIY Projects.


