If you like fixing things but feel scattered every time a project pops up, a home repair starter station changes everything. Instead of hunting for tools or buying the same screws again, you’ll have a small, organized setup ready for most everyday DIY jobs. This guide walks through how to plan, build, and stock a compact repair station that actually works in real life—even in a small home or apartment.
Step 1: Choose the Right Spot for Your Station
Before you buy anything, decide where this setup will live. The right location makes your tools easier to use and much safer to store.
Look for a space that is dry, well-ventilated, and easy to access: a corner of the garage, a laundry area, a hall closet, or even the back of a bedroom door can work. Avoid damp basements without dehumidification—moisture leads to rusted tools and moldy materials. Think about noise and dust: hanging tools on a wall near a bedroom might annoy someone if you’re drilling or hammering at night.
Measure the area’s height, width, and depth so you know what kind of shelving, pegboard, or cabinet can fit. If you rent, check your lease or building rules before mounting heavy items to walls. For very small spaces, a rolling cart or a heavy-duty plastic tote can substitute for a full workstation, as long as it’s easy to move and store. The goal is simple: a spot you can get to quickly without moving half your house.
Step 2: Set Up a Simple, Safe Work Surface
Once you’ve chosen a location, create a basic surface where you can safely cut, glue, measure, and assemble.
If you have room, a small workbench or sturdy table is ideal. Check that it does not wobble—press down on each corner and side. If it rocks, shim the legs with wood shims, folded cardboard, or adjustable leg levelers. For tight spaces, consider a folding wall-mounted table or a collapsible workbench you can store vertically when not in use.
Protect the surface so you’re not worried about damaging it. A scrap piece of plywood, a cutting mat, or a sheet of hardboard can take the abuse from cutting, drilling, and gluing. If you occasionally work with solvents, finishes, or paints, keep a metal tray or thick plastic sheet handy to catch drips.
Plan for lighting right above or next to the work area. A clamp light or under-cabinet LED fixture can make small repairs much easier and safer. Always leave enough space to stand, bend, and turn without bumping into shelves or stored items; cramped work areas lead to mistakes and injuries.
Step 3: Build a Core Tool Set That Covers Most Repairs
You don’t need a full workshop to handle most common home issues. Focus on a compact, high-coverage tool set you’ll actually use.
Start with essential hand tools: a 16–20 oz hammer, a set of screwdrivers (both Phillips and flathead in several sizes), an adjustable wrench, pliers (standard and needle-nose), and a good quality utility knife with replaceable blades. Add a tape measure (at least 25 feet), a small level, and a stud finder to help with hanging and mounting tasks.
Include at least one power tool that matches your projects. For most homes, a cordless drill/driver with a basic bit set (wood, metal, and masonry bits) and a selection of driver bits (Phillips, flat, square, Torx) will cover a lot of ground. Keep a small selection of fasteners: assorted wood screws, wall anchors, picture hangers, and a multi-size pack of nails. Sort them into labeled containers so you don’t waste time guessing.
Prioritize quality for the tools you’ll use often—cheap screwdrivers and dull blades will slip, strip, and frustrate you. Keep safety basics in the same station: safety glasses, work gloves, hearing protection for louder tools, and a dust mask or respirator if you sometimes sand or cut materials that create fine dust. When everything lives together, you’re more likely to gear up properly every time.
Step 4: Organize Your Station so You Can Find Things Fast
A “tool pile” is just a future headache. A little organization makes your station feel professional and saves you real time during every project.
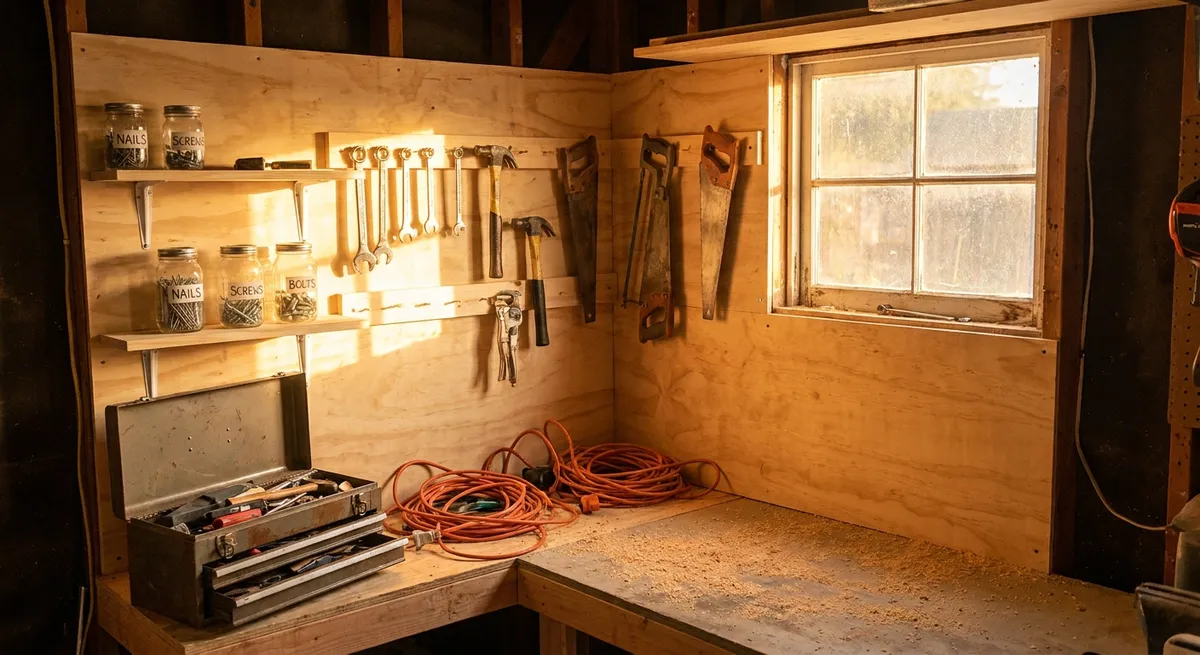
Use vertical space first. Pegboard or slatwall panels over your work surface can hold your most-used tools within arm’s reach. Outline tool shapes with a marker so you know exactly where each tool belongs; it’s a simple trick that keeps things tidy. For renters, over-the-door racks, removable adhesive hooks, or freestanding pegboard frames can work without drilling into walls.
Sort small items into clear, labeled containers. Small bins, jars, or compartment organizers are ideal for screws, anchors, nails, and picture hardware. Label by type and size in plain language (e.g., “Wall Anchors – For Drywall,” “Short Wood Screws”) so you don’t have to squint at tiny numbers each time.
Keep a “grab tray” or small tote for current or frequent projects—tape, pencil, utility knife, and measuring tools can live there. When you start a repair, you can just pull the tray onto your work surface. Store chemicals and consumables—like wood glue, caulk, spray lubricants, and touch-up paint—in a separate bin, upright and clearly labeled, away from open flames or heat sources.
Finally, create a simple habit: at the end of every project, put tools back where they belong, toss obvious trash, and make a quick note of anything you’re running low on. Five minutes of cleanup keeps your station usable instead of turning into another junk corner.
Step 5: Add a Basic Home Repair Checklist and Emergency Kit
Your station shouldn’t just help with planned projects—it should also support quick fixes and simple emergencies.
Print or write a one-page home repair checklist and keep it on a clipboard or inside a clear sleeve at the station. Include quick-reference steps for common tasks you handle often, such as patching a small wall hole, tightening a loose door handle, stopping a running toilet, or quieting a loose cabinet door. This keeps you from searching your phone with dirty hands and gives you a repeatable process.
Right next to your tools, keep a small, dedicated emergency kit focused on home issues (separate from medical first aid). Useful items include a flashlight or headlamp with extra batteries, a roll of duct tape, zip ties, a multipurpose sealant, plumber’s tape (Teflon tape) for minor leaks at threaded connections, and a small adjustable wrench specifically for shutting off water or gas if your local setup allows. Label the kit clearly so other household members can find it quickly.
If you have children in the home, store sharp or powered tools out of reach or in a lockable box or cabinet. Teach everyone where the main water shutoff and electrical panel are, and note their locations on your checklist. Your station becomes more than a tool corner—it’s the home’s central hub for dealing with the “something broke” moments calmly, instead of scrambling.
Conclusion
A home repair starter station doesn’t have to be big or expensive, but it does need to be intentional. By picking a smart location, setting up a solid work surface, building a focused tool set, organizing everything clearly, and adding a repair checklist and emergency kit, you create a small system that supports every DIY project you take on. The payoff is simple: less time hunting for tools, fewer duplicate purchases, and a lot more confidence every time something needs fixing.
Sources
- [U.S. Consumer Product Safety Commission – Power Tool Safety Tips](https://www.cpsc.gov/safety-education/safety-guides/tools-and-home-maintenance/power-tools) - Practical guidance on using and storing power tools safely at home
- [Occupational Safety and Health Administration (OSHA) – Hand and Power Tools](https://www.osha.gov/hand-power-tools) - Federal safety information on proper tool use, maintenance, and protective equipment
- [Family Handyman – Must-Have Tools for Every Homeowner](https://www.familyhandyman.com/list/must-have-tools-for-homeowners/) - Overview of essential tools and why they’re useful for common repairs
- [This Old House – Workshop Storage & Organization Ideas](https://www.thisoldhouse.com/garages/21015057/workshop-storage-organization-ideas) - Practical strategies for organizing tools and supplies in limited space
- [University of Missouri Extension – Home Maintenance and Repairs](https://extension.missouri.edu/publications/gh3460) - Educational resource on planning and managing routine home maintenance tasks
Key Takeaway
The most important thing to remember from this article is that this information can change how you think about DIY Projects.


