Your entryway is the first thing you see when you walk in—and the first place clutter explodes. Shoes pile up, mail lands everywhere, and keys somehow vanish daily. The good news: you can fix most of this with a weekend DIY project and a few smart upgrades.
This guide walks you through a practical, step-by-step entryway makeover you can tackle with basic tools. You’ll create a space that looks better, works harder, and actually helps your home feel less chaotic the second you open the door.
Plan a Functional Entryway Layout
Before you drill a single hole, figure out what your entryway needs to do. Don’t skip this part—planning is what separates a pretty entry from one that actually works.
Think about:
- Traffic flow: Where do people walk when they come in? Don’t put furniture where people naturally pass through.
- Storage needs: Do you need shoe storage, coat hanging, bag hooks, a mail drop zone, or all of the above?
- Space constraints: Measure the width of the wall, the distance from door swing to wall, and available floor depth.
- Household habits: Do kids dump backpacks on the floor? Do you kick shoes off immediately? Design for how you live, not how you wish you lived.
- Clearances: Leave at least 36 inches of walkway where possible so the area doesn’t feel cramped.
Sketch a simple layout on paper. Mark where a bench would go, where hooks might mount, and where a small shelf or console could fit. Use painter’s tape on the wall and floor to outline pieces before you buy or build—this shows you in real space whether you’re crowding the door or blocking outlets.
Step 1: Build or Install a Sturdy Entry Bench
A bench is the anchor of a functional entryway: it gives you a spot to sit while you take off shoes and can double as storage.
Materials and tools (for a simple wood bench)
- 2x lumber (e.g., 2x12 for top, 2x2 or 2x3 for legs/supports)
- Wood screws (2 ½" typical for 2x lumber)
- Wood glue
- Sandpaper (120-220 grit) or sander
- Drill/driver
- Measuring tape
- Saw (miter saw or circular saw)
- Level
- Finish (paint, stain, or clear coat)
- Safety gear: safety glasses, hearing protection, dust mask
Basic build steps
Measure and cut the bench top
Aim for a bench height of about 17–19 inches and a depth of 12–16 inches. Cut your bench top to fit your wall, leaving enough clearance from the door. For most entryways, 36–48 inches long works well.
Cut legs and supports
Cut four legs to your target height minus the thickness of your bench top. If your top is 1.5 inches thick and you want an 18-inch bench, cut legs to 16.5 inches. Add horizontal supports between legs for extra strength, especially if the bench is longer than 36 inches.
Assemble the frame
Pre-drill screw holes to prevent wood splitting. Use wood glue at each joint, then secure legs to supports with screws. Always check for square using a speed square or by measuring diagonals—if both diagonals match, the frame is square.
Attach the bench top
Center the frame under the bench top and clamp if possible. Pre-drill from underneath and screw the frame into the top. Double-check that the bench sits flat on the floor without rocking; if it rocks slightly, sand or plane down the long leg.
Sand and finish
Round off sharp edges, especially on the front edge of the bench where legs and clothes will brush. Sand progressively to a smooth finish and apply stain or paint according to manufacturer instructions. Let it dry completely before use.
Pro tip: If you don’t want to build from scratch, buy a simple, unfinished bench and customize it with paint or stain. Focus your DIY energy on organizing features instead.
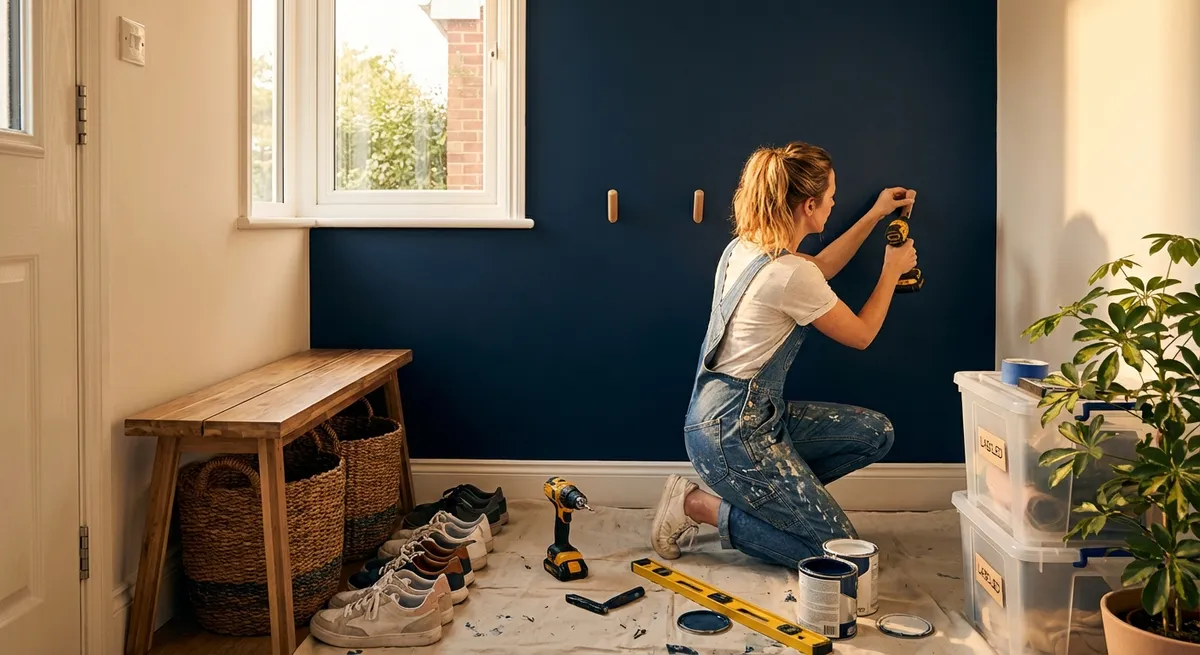
Step 2: Add Vertical Storage with Hooks and Backing
Vertical space is the most underused advantage in an entryway. Well-placed hooks and a wall panel/backing create order instead of a coat-and-bag avalanche.
Plan your hook layout
- Height guidelines:
- Adult hooks: 66–70 inches from floor
- Kid-friendly hooks: 40–48 inches from floor
- Spacing: 6–8 inches apart for coats and bags, closer for keys or hats.
- Quantity: Plan for at least two hooks per person (e.g., coat + bag).
Install a simple hook rail with backing
Choose your backing material
You can mount hooks directly to studs, but a backing board spreads the load and looks finished. Use 1x4, 1x6, or similar trim board cut to length. Prime and paint before installation for easier finishing.
Locate studs and mark level line
Use a stud finder to mark stud centers along the wall. Draw a light, level pencil line where the top of your backing board will sit. This keeps everything looking intentional, not random.
Attach the backing board
Hold the board on your level line and drive wood screws into studs every 16 inches. If you can’t hit studs for every screw, use appropriate wall anchors rated for the expected load.
Mark and install hooks
Measure and mark equally spaced points along the board. Pre-drill small pilot holes for hook screws to avoid splitting the wood. Install hooks firmly; test by pulling down gently on each one.
Add a second row if needed
For families or tight spaces, add a second lower row of hooks for kids or smaller items. Keep the lower row aligned and parallel to the first for a clean look.
Pro tip: Use double hooks (upper and lower prong) to maximize each hook’s usefulness—hat or scarf on top, bag or coat below.
Step 3: Control Shoe Chaos with Simple, Stackable Storage
Shoes are usually the worst entryway offender. You don’t need a fancy cabinet; you just need a system that can handle real-life use.
Choose the right style for your space
- Open shelves: Easy access, quick to build, but visually busier.
- Stackable wire racks: Good airflow, adjustable, affordable.
- Slim cabinets: Best for tight hallways but more complex to build.
- Crates or baskets: Flexible and simple, but can get jumbled if overfilled.
Build or set up a low-profile shoe system
Measure your clearance
Decide how much depth you can give to shoe storage without blocking the walkway. 10–13 inches works for most adult shoes. Check door swing to ensure it doesn’t hit any rack or shelf.
Select or cut shelves
For DIY wood shelves, use 1x10 or 1x12 boards cut to match your bench length or wall width. If using premade racks, assemble them according to instructions and check stability.
- Decide on floor vs. wall-mounted
Floor-standing racks are easier and more flexible. Wall-mounted shelves free up floor space visually but require more precise installation and stronger anchors.
Install or place storage
Level and secure wall-mounted shelves into studs or with proper wall anchors. For floor units, use adjustable feet or shims to prevent rocking. Keep at least one open space for boots or taller footwear.
Create simple rules for use
Limit the number of pairs per person at the door (for example, 3–4 pairs each). Seasonal shoes stay, off-season shoes go to a closet. Label baskets or sections for kids if that helps keep it under control.
Pro tip: Add a washable mat or tray under lower shelves to catch dirt and water, especially in wet or snowy climates.
Step 4: Set Up a No-Excuses Mail and Keys Station
Mail and keys are small items that cause outsized frustration. Creating a landing zone just inside the door prevents piles from migrating to the kitchen or dining table.
Design a compact command center
Pick your location
Ideally, place this station within arm’s reach of the door but out of the main traffic path. Above the bench, next to a light switch, or on a narrow wall often works well.
Add a small shelf or narrow ledge
Use a 3–6 inch deep shelf—a standard 1x4 or 1x6 board is perfect. Mount securely with brackets or floating hardware, anchored into studs or with heavy-duty wall anchors.
Use vertical sorters for mail
Mount one or two wall-mounted file holders or small baskets. Label them clearly: - “To Sort/Action” - “To Pay” - “Outgoing/Mail”
Keep the categories simple or you won’t use them consistently.
Install dedicated key hooks
Add 2–4 small hooks just below or beside the shelf. Keep them specifically for keys and small daily essentials (like a dog leash). Make it a rule: keys never go on the counter or in a bag.
Add a small catch-all tray
A shallow tray or dish on the shelf handles loose items like sunglasses, transit cards, or earbuds. Empty it once a week so it doesn’t become a permanent junk pile.
Pro tip: Keep a small notepad and pen here for quick reminders (e.g., “return library books,” “drop off package”), or mount a mini whiteboard if that suits your style.
Step 5: Finish with Lighting, Rugs, and Small Safety Checks
Once the core pieces are in place, the right finishing touches make your entryway feel intentional and safe, not just “where stuff happens to land.”
Improve lighting
Evaluate brightness
If your entry feels dim, swap out existing bulbs for brighter, warm white LEDs (around 2700–3000K). Make sure the fixture is rated for the bulb wattage equivalent you choose.
Consider layered lighting
If possible, add a table lamp on a console or a plug-in wall sconce for softer evening light. Use smart bulbs or timers so lights come on automatically around your usual arrival time.
Avoid glare and shadows
Position lights to avoid harsh shadows on the floor or direct glare in your eyes as you come in.
Add a durable, correctly sized rug
Pick the right material
Choose a low-pile, durable rug or mat that’s easy to vacuum and designed for entryways. Look for non-slip backing or add a rug pad that grips the floor.
Size it for real use
The rug should be large enough for you to step fully onto it when you open the door, and ideally for at least two pairs of feet to stand comfortably. Indoor-outdoor rugs are great for muddy or wet climates.
Do a quick safety and stability check
Secure anything that could tip
If you used a taller piece (like a narrow cabinet or shelving unit), anchor it to the wall using anti-tip hardware, especially if you have kids.
Check door clearance and swing
Open and close the door fully to ensure it doesn’t hit the bench, hooks, or shelves. Adjust placements or hardware if needed to avoid damage.
Deal with cords and trip hazards
Route lamp cords along walls and secure them with cord clips. Make sure rugs lie flat and corners don’t curl.
Pro tip: Take a photo of your finished entryway and compare it to a photo from before. That quick visual contrast helps you see what’s working—and keeps you motivated to maintain it.
Conclusion
A well-designed entryway doesn’t have to be elaborate or expensive. With a simple bench, smart vertical storage, a reliable mail and keys station, and a few finishing touches, you can turn daily chaos into a predictable routine that works for everyone in the house.
The key is to design for your real habits: where you drop things, how you move through the space, and what always seems to go missing. Build around that, and your weekend project turns into a long-term upgrade that makes life noticeably easier every time you walk through the door.
Sources
- [U.S. Department of Energy – LED Lighting](https://www.energy.gov/energysaver/led-lighting) - Overview of LED lighting benefits, efficiency, and color temperature guidance
- [Consumer Product Safety Commission – Anchor It!](https://www.anchorit.gov) - Safety information on securing furniture and preventing tip-over accidents
- [U.S. Fire Administration – Home Electrical Fire Prevention](https://www.usfa.fema.gov/prevention/outreach/electrical.html) - Guidance on safe use of electrical devices, cords, and lighting fixtures
- [Mayo Clinic – Preventing Falls at Home](https://www.mayoclinic.org/healthy-lifestyle/healthy-aging/in-depth/fall-prevention/art-20047358) - Practical tips on reducing trip hazards and improving home safety
- [Family Handyman – How to Use a Stud Finder](https://www.familyhandyman.com/project/how-to-use-a-stud-finder/) - Step-by-step instructions for locating studs safely and accurately
Key Takeaway
The most important thing to remember from this article is that this information can change how you think about DIY Projects.


