Most renovation mistakes don’t start with bad tools or bad taste—they start with bad prep. Before you tear out a wall, order cabinets, or rent a dumpster, your home needs a different kind of work: planning, protection, and smart setup. Skipping this stage is how people blow budgets, wreck timelines, and damage the parts of their house they weren’t trying to touch.
This guide walks you through five practical, step‑by‑step prep tasks that make any renovation—big or small—run smoother, safer, and closer to budget. Think of it as getting your home “build‑ready” before the real chaos begins.
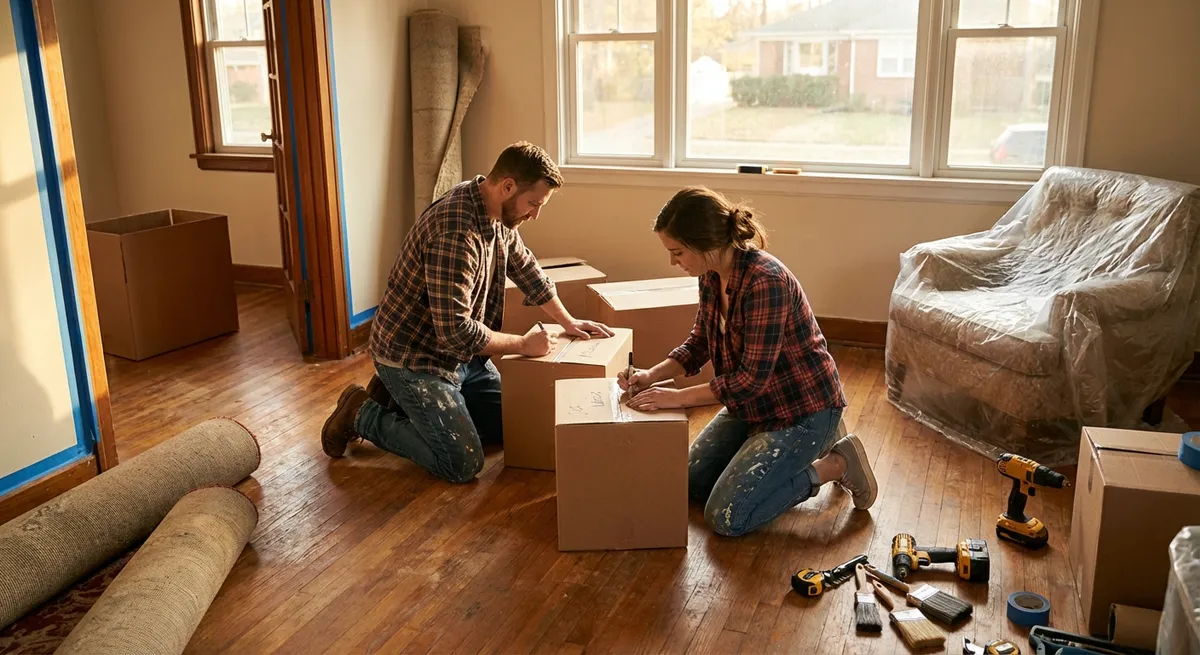
Step 1: Map the Project (So the House Still Works While You Work)
Renovation doesn’t happen in a vacuum—you still need to live there. Before any demo, figure out how the project will affect your daily life and how you’ll work around it.
- Define the exact work area.
Mark the renovation zone with painter’s tape on floors and walls. Include staging space for tools, materials, and trash. This tells you how much of your home will actually be under siege.
- Plan alternate routes and spaces.
If you’re renovating a kitchen, where will you make coffee and prep meals? If you’re doing a bathroom, where will everyone shower? Set up temporary stations (a folding table “kitchen,” a caddy for bathroom supplies, etc.) before you start.
- Decide what’s off-limits.
Pick at least one “clean zone” where no tools, dust, or materials are allowed. This becomes your sanity space when the rest of the house looks like a jobsite.
- Pin down your working hours.
Choose daily start/stop times that respect neighbors, kids’ naps, and your own energy levels. Write them down and stick them on the fridge so everyone knows when noise and dust are coming.
- Create a simple project map.
On one sheet of paper, write:
- Room(s) affected
- What’s being removed
- What’s being installed
- Tools you’ll need
- Tasks you’ll DIY vs. hire out
This becomes your reference when you’re tired and tempted to improvise.
Fix Ready tip: Snap “before” photos from all angles. They help with insurance claims, permit inspections, and just remembering where things were before you moved everything.
Step 2: Protect What You’re Not Renovating
A common renovation regret: scratching floors, damaging trim, or coating half the house in dust while working on one room. A little protection up front can save you from a second, unplanned renovation later.
- Clear the space properly, not halfway.
Remove:
- Furniture
- Rugs
- Curtains
- Wall art and mirrors
- Lamps and small decor
If something is too big to move, slide it to the center and wrap it in plastic sheeting, taped at the bottom.
- Shield floors for the full traffic path.
Protect not only the room you’re renovating, but also the path to the door or driveway:
- Use rosin paper or ram board on hardwoods
- Use drop cloths or cardboard on tile and concrete
- Tape edges with painter’s tape—not duct tape—to avoid residue
- Cover vents, returns, and built-ins.
- Turn off HVAC while you’re generating heavy dust, if possible
- Tape plastic over supply vents and return grills in the work area
- Cover built-in shelves and cabinets with plastic or old sheets
- Protect doors, trim, and windows.
- Use painter’s tape on edges of trim before prying anything nearby
- Lean, don’t stack, removed doors and trim—label and store them in a dry spot
- If windows are in range of flying debris, cover glass with cardboard
- Set up a “dirty entry” and a “clean exit.”
- Dirty entry: the door everyone uses to bring in tools and materials—floor fully covered, shoe brush or boot tray at the door
- Clean exit: route to your clean zone that avoids the messiest areas
Dust will travel anywhere air moves:
Fix Ready tip: Label every door, trim piece, and hardware set with painter’s tape as you remove it. Write the room and location (“Hall – Closet Door,” “Bedroom – Window Left”). Reinstalling goes much faster.
Step 3: Find and Mark What’s Inside the Walls
Before you cut, drill, or demo, assume there’s something important behind that surface—wire, pipe, duct, or structure. This step is about avoiding the “I just hit something” moment.
- Turn off what you might hit.
- For electrical work:
Turn off the correct breaker at the panel and verify with a non-contact voltage tester at outlets and switches.
Locate and test shutoff valves for sinks, toilets, and the main water line. Make sure you can actually turn them.
- Locate studs, wires, and pipes.
- Use a stud finder that also detects AC wires
- Make multiple passes horizontally and vertically to confirm locations
- Mark studs with light pencil or painter’s tape, not deep gouges
- Open test holes before full demo.
Instead of swinging a hammer through an entire wall:
- Identify load-bearing elements.
If you’re changing walls, doorways, or openings:
- Mark “no‑cut zones.”
Once you find wires, plumbing, or ductwork:
Fix Ready tip: Take photos of open walls with a tape measure in the frame. Later, if you need to mount something heavy or find a line, you’ll know exactly what’s behind the drywall and at what distance.
Step 4: Plan Materials and Waste Before You Order Anything
A lot of renovations bog down because materials arrive late, don’t fit, or pile up in the wrong spot, while trash takes over the driveway. A little logistics work up front keeps the project moving.
- Measure the real, finished space.
- Measure each wall in full, including any alcoves and bumps
- Measure ceiling height at multiple points in older homes
- Note door swings, window locations, and any radiators or vents
These measurements guide everything from flooring and trim to cabinets and lighting.
- Calculate material quantities with a reasonable buffer.
- Flooring: usually add 5–10% for waste (more for complex patterns)
- Tile: buy extra boxes from the same dye lot for future repairs
- Paint: check coverage rates on the can and round up, not down
- Decide where materials will live.
- Store wood products in the house, not the garage, so they acclimate to indoor humidity
- Keep heavy items (tile, tools) on lower floors if possible
- Keep adhesives, paints, and finishes away from direct heat or freezing temps
- Set up a basic waste plan.
- For small projects: heavy-duty contractor bags, separated for trash vs. donation/recycling
- For bigger demo: schedule a dumpster or bag-style container in advance
- Know your local rules for disposing of paint, electronics, and hazardous materials
- Create a simple staging checklist.
Before you start a workday, confirm:
Fix Ready tip: Keep a “returns box” for extra fittings, hardware, and unopened materials. At the end of the project, one trip back to the store gets you money back and your storage space back.
Step 5: Set Up a Safe, Efficient DIY Work Zone
Even a small renovation will feel bigger if your tools are scattered, cords are tangled, and you’re constantly hunting for that one bit or blade. A structured work zone makes you faster and keeps you safer.
- Choose one main tool station.
- Use a folding workbench, sturdy table, or pair of sawhorses with a sheet of plywood
- Keep this station in or near the project area, but not blocking doorways
- Group tools by task, not by type.
Instead of storing “all drills together,” think in kits:
- Manage power and cords deliberately.
- Use a heavy-duty extension cord rated for your tools
- Route cords along walls, not through walkways
- Avoid “daisy-chaining” power strips—use one quality surge-protected strip near your station
- Create a dust and fume strategy.
- Open windows when sanding, cutting, or using strong adhesives/finishes
- Use a fan to blow out of the room, not into the house
- Wear a respirator or at least an N95 mask when dealing with dust
- Use a shop vac with a fine dust or HEPA filter, especially when cutting indoors
- Keep a mini safety station within arm’s reach.
In a clearly marked bin or caddy, keep:
Fix Ready tip: At the end of each work session, spend 10 minutes on reset: tools back in kits, floor swept, trash out. Tomorrow’s work goes faster when you don’t start in yesterday’s mess.
Conclusion
Renovation doesn’t start with demolition—it starts with preparation. By mapping your project, protecting your home, checking what’s in the walls, planning materials and waste, and setting up a safe work zone, you turn chaos into a controlled jobsite.
None of these steps are glamorous, and you won’t see them in before-and-after photos. But they’re the difference between a project that drags, breaks things, and burns you out, and one that feels manageable from day one. Get your home build‑ready first; then, when you finally swing that hammer, you’ll know the rest of the plan is already working for you.
Sources
- [U.S. Consumer Product Safety Commission – Home Improvement Safety Tips](https://www.cpsc.gov/Safety-Education/Safety-Guides/home-improvement-and-tools) – Guidance on safe use of tools, electrical precautions, and general renovation safety.
- [U.S. Environmental Protection Agency – Renovation, Repair and Painting Program](https://www.epa.gov/lead/renovation-repair-and-painting-program) – Important information about lead-safe practices in homes built before 1978.
- [Occupational Safety and Health Administration (OSHA) – Construction Industry Safety](https://www.osha.gov/construction) – Best practices for dust control, PPE, electrical safety, and jobsite organization adapted from professional standards.
- [Family Handyman – Home Remodeling Planning Guide](https://www.familyhandyman.com/project/home-remodeling-planning-guide/) – Practical advice on planning, budgeting, and staging DIY renovation projects.
- [This Old House – How to Protect Floors During Remodeling](https://www.thisoldhouse.com/house-remodeling/21015088/how-to-protect-floors-during-remodeling) – Specific techniques and materials for protecting surfaces during renovation work.
Key Takeaway
The most important thing to remember from this article is that following these steps can lead to great results.


