Your tools don’t just need to be stored—they need to be cared for. Well‑maintained tools cut cleaner, drill straighter, and fail less often right in the middle of a project. Whether you’re building a deck or hanging shelves, a few simple routines can keep your tools accurate, safe, and ready to go when you are.
This guide walks through practical, step‑by‑step routines DIYers can use to keep their gear in top shape, from cordless drills to circular saws and measuring tools. No fancy workshop needed—just a little time, consistency, and basic supplies.
Step 1: Tune Up Your Cordless Drill So It Works Like New
Your cordless drill is probably your most-used power tool. A quick tune‑up can extend battery life, improve drilling power, and keep screws from stripping.
Inspect the chuck and bit grip
Remove the battery. Open and close the chuck fully a few times to check for smooth movement. Insert a bit and gently tug to see if it slips. If it does, clean the jaws with a dry brush or compressed air and try again.
Clean the vents and exterior
Use a soft brush or compressed air around motor vents and trigger areas. Wipe the casing with a damp cloth. Avoid soaking or spraying liquids directly onto the drill—moisture inside the housing can corrode contacts.
Check the battery contacts
Remove the battery and inspect the metal contacts on both the drill and the battery. If you see dirt or light corrosion, gently wipe with a cloth slightly dampened with isopropyl alcohol. Let everything dry completely before reattaching.
Cycle and store your batteries correctly
Fully charge the battery before storage, but avoid leaving it on the charger for days. Store batteries in a cool, dry place—never in a hot car or damp basement. If you have multiple batteries, rotate them so one doesn’t sit unused for months.
Tighten loose screws and test under load
Check any visible screws on the drill housing and handle and snug them up with a screwdriver. Reattach a battery, chuck a bit, and run the drill briefly in both directions. If you hear odd grinding or smell burning, stop—time for a pro inspection or replacement.
Practical tip: Mark your batteries with the purchase date using a permanent marker. When one starts noticeably underperforming, you’ll know its age and can replace it before it fails mid‑project.
Step 2: Sharpen and Safely Handle Utility Knives and Hand Saws
Dull cutting tools are more dangerous than sharp ones because they force you to push harder and lose control. Keeping blades sharp and handled correctly reduces slips and ragged cuts.
Replace utility knife blades instead of overusing them
Slide the blade out (following your knife’s instructions) and replace it as soon as it starts tearing instead of slicing. Most blades are cheap and double‑ended: flip it once, then replace. Never toss loose blades in the trash—wrap in cardboard or tape first.
Touch up hand saw teeth with a file (if designed to be sharpened)
Clamp the saw blade in a vise with the teeth up. Using a triangular file, lightly file each tooth at the same angle, maintaining the factory pattern. Many modern saws have hardened teeth that are “use and replace” only—check the manufacturer’s info first.
Clean resin and gunk from saw blades
For hand saws or removable circular saw blades, remove pitch and resin with a dedicated blade cleaner or mild degreaser and a nylon brush. Build‑up increases friction and makes even a sharp blade cut poorly.
Store blades and saws properly
Use blade guards or homemade cardboard sleeves. Hang hand saws on a pegboard or store flat where the teeth can’t catch and bend. Keep utility knives retracted when not in use; never toss them into a drawer with the blade out.
Use a cutting surface that protects edges
When using utility knives, cut on a self‑healing mat, scrap plywood, or thick cardboard. Cutting directly on concrete, tile, or metal quickly ruins edges and makes the knife jump unpredictably.
Practical tip: Keep a small magnetic tray or tin for used blades. When it’s full, tape it shut and label it “sharp waste” before tossing so no one gets cut handling the trash.
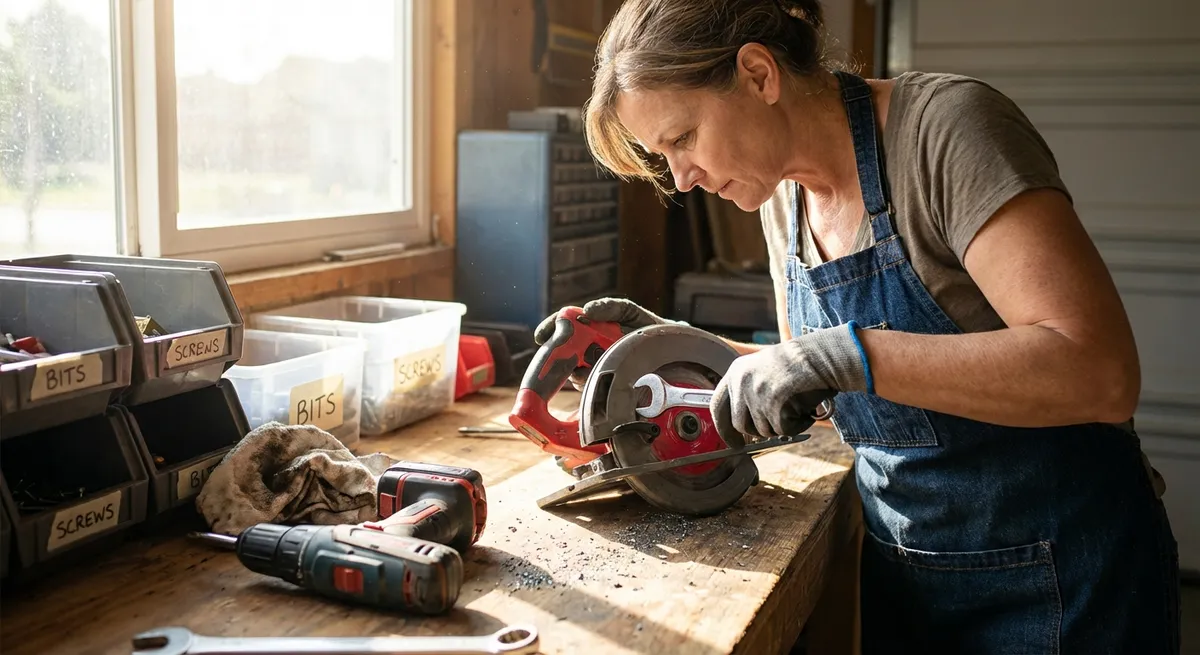
Step 3: Keep Your Circular Saw Cutting Straight and Safe
A circular saw that’s out of alignment, dirty, or using the wrong blade can burn wood, kick back, or wander off your cut line. A quick setup routine makes your cuts smoother and safer.
Unplug or remove the battery first
Before touching the blade, guards, or depth adjustment, disconnect power. Treat it like it’s live until you physically separate the power source.
Check and set cutting depth
Loosen the depth lever and adjust the base so the blade extends about 1/8–1/4 inch below the material you’re cutting. Too deep increases kickback risk and makes the motor work harder; too shallow can bind the blade.
Verify the blade is straight and tight
Lock the blade (using the built‑in spindle lock) and check that the blade is seated flat against the arbor. Tighten the arbor nut firmly, but don’t over‑torque it. Spin the blade by hand to ensure it rotates freely and doesn’t wobble.
Square the baseplate to the blade
Set the bevel angle to 0°. Use a small combination square: place it against the blade and the base. If there’s a gap, adjust the bevel stop until the blade sits exactly 90° to the base. This improves both safety and cut accuracy.
Clean and lube moving parts lightly
Brush out sawdust from the motor vents, guard mechanism, and base. Make sure the lower blade guard snaps back quickly and smoothly—sticky guards are dangerous. If needed, use a tiny amount of dry lubricant on the pivot points, not on the blade itself.
Practical tip: Dedicate blades: one for construction lumber, one for plywood/finish cuts. Label them with a marker. Swapping the right blade in saves time sanding and reduces burn marks.
Step 4: Calibrate Your Measuring and Layout Tools for Reliable Results
“Measure twice, cut once” only works if your measuring tools are actually accurate. Periodically checking and calibrating them prevents small errors from turning into big, expensive mistakes.
Check a tape measure against a known standard
Use a steel ruler or an object with verified measurements (like a certified carpenter’s square). Line up the 1" mark on your tape with 1" on the standard and compare at 12", 24", and 36". If it’s off more than 1/16", retire it from precision work.
Verify your carpenter’s square is truly square
Place the square against the factory edge of a board and draw a line along one side. Flip the square to the opposite side of the line and draw another line. If the lines diverge, the square is out of true and shouldn’t be used for critical layout.
Confirm level accuracy with a simple flip test
Put your level on a flat surface and note the bubble position. Mark the side of the level that faces left. Flip the level end‑for‑end and place it in the same spot. The bubble should read the same. If it doesn’t, it’s not accurate.
Clean and protect measuring surfaces
Wipe dirt and debris off rulers, squares, and levels. Grit can throw off alignment. Avoid dropping them—bent edges and cracked vials mean bad readings that are hard to spot in the moment.
Standardize on one primary measuring tool for each project
Within a project, pick one tape measure and stick with it for critical dimensions. Slight differences between tapes can lead to misfits when parts that “should” match don’t actually line up.
Practical tip: Label your most accurate tape “layout only” and don’t use it for rough framing or demo where it’s more likely to get bent or damaged.
Step 5: Create a Simple Maintenance Routine That Actually Sticks
Tools last longer when care is consistent, not perfect. A basic maintenance habit is better than a complicated system you never use.
Define a quick “end of project” checklist
Before you call a project done, take 10 minutes to: - Blow or brush dust off power tools - Wipe down handles and metal surfaces - Remove and store batteries separately - Return hand tools to their designated spots
Write this on a card and pin it near your main work area.
Schedule deeper maintenance sessions
Once a month (or after a big project), set aside 30–60 minutes for: - Sharpening blades/chisels - Checking cords for nicks or damage - Inspecting batteries for swelling or cracks - Tightening screws on handles and housings
Keep a small “tool first aid” kit ready
Stock a caddy with: light machine oil, dry lubricant, rags, small files, a brush, isopropyl alcohol, and a screwdriver set. Having supplies in one spot makes you far more likely to do quick fixes as you notice issues.
Track recurring problems
If the same tool keeps causing issues—like a drill that overheats or a saw that won’t stay square—note it. Decide whether it needs repair, a replacement part, or full replacement. Constant workarounds waste time and hurt results.
Set a simple rule: no dirty tools go into storage
Make it a habit that tools don’t go back into bags, cases, or drawers while covered in dust, mud, or adhesive. A 60‑second wipe‑down now can prevent rust and sticky mechanisms later.
Practical tip: Use your phone calendar to set recurring “shop check” reminders. Treat tool care like changing the oil in your car—regular and non‑negotiable.
Conclusion
Good tools are an investment, but they only pay off if they’re kept in working order. By tuning up your cordless drill, keeping blades sharp and clean, aligning your circular saw, calibrating your measuring tools, and following a simple maintenance routine, you’ll get better results and fewer mid‑project surprises.
You don’t need a professional workshop to do this—just a bit of time and attention after each project. Start with one step today, build the habit, and your tools will be ready whenever you are.
Sources
- [U.S. Consumer Product Safety Commission – Power Tool Safety Tips](https://www.cpsc.gov/safety-education/safety-guides/tools-and-home-maintenance/power-tools) - Guidance on safe handling and maintenance considerations for power tools
- [Occupational Safety and Health Administration (OSHA) – Hand and Power Tools](https://www.osha.gov/hand-power-tools) - Official recommendations on inspection, care, and safe use of hand and power tools
- [Fine Homebuilding – How to Tune Up Your Circular Saw](https://www.finehomebuilding.com/2016/08/30/tune-up-your-circular-saw) - Practical tips on aligning, cleaning, and improving circular saw performance
- [Family Handyman – How to Maintain Power Tools](https://www.familyhandyman.com/project/how-to-maintain-power-tools/) - Step‑by‑step advice on cleaning, inspecting, and extending the life of power tools
- [This Old House – Sharpening Hand Tools](https://www.thisoldhouse.com/tools/21016477/sharpening-hand-tools) - Detailed guidance on sharpening and caring for manual cutting tools
Key Takeaway
The most important thing to remember from this article is that this information can change how you think about Tools & Equipment.


