If you’re tired of wobbly cuts and burning through lumber (and money), your circular saw is probably not the problem—how you set it up and use it is. With a few smart tweaks and habits, a basic saw can deliver clean, accurate cuts that make every DIY project look more professional. This guide walks through practical steps DIYers can follow to get better results from almost any circular saw.
Know Your Saw: Parts, Types, and What They Actually Do
Before you start adjusting anything, you need to know what you’re holding. A circular saw is more than a spinning blade—every knob and lever affects how clean and safe your cuts will be.
Most homeowner saws are 7‑1/4" sidewinder models, which are lighter and spin faster. Worm-drive saws are longer, heavier, and have more torque, great for framing and tougher cuts but overkill for many casual users. Check the blade side: left-blade models are easier for right-handed users to see the cut line; right-blade models often feel more balanced on wide sheets.
Core parts to understand include the blade guard (should move freely and snap back), depth adjustment lever, bevel adjustment lever (for angled cuts), shoe or base plate (the flat part that rides on the wood), and the blade lock for changing blades. A warped shoe or sticky guard will ruin your accuracy and increase your risk. If your saw has noticeable play or your shoe is bent, fix or replace it before worrying about “technique.”
Always match the blade to the material: general-purpose framing blades are fine for rough cuts, but plywood, trim, and cabinets need a higher tooth-count blade labeled for “finish” or “plywood” to reduce tear-out. Whenever possible, let the blade do the work—forcing a dull or wrong blade through the wood is how you burn edges and lose control.
Step 1: Set Up a Safe, Stable Cutting Station
A circular saw is only as accurate as the surface it rides on. Unstable work surfaces cause binding, kickback, and lousy cuts. Build a simple, repeatable setup and use it every time.
Use a pair of sawhorses or a solid workbench, then support your workpiece with sacrificial boards (2x4s or rigid foam insulation) underneath. That way, you can cut all the way through without worrying about hitting metal or your table. Make sure the board or sheet you’re cutting is fully supported on both sides of the cut line, with the waste side allowed to fall away slightly—never let the keeper piece be the one dropping.
Clear your work area of cords and clutter. Route your extension cord behind you or over your shoulder so it can’t hang up on the edge of the material mid-cut. Wear safety glasses and hearing protection, and clamp the workpiece whenever you can, especially for narrow rips or crosscuts.
Before cutting, do a dry run with the saw unplugged or battery removed: place the shoe on the work, slide along the intended cut path, and look for anything that might snag the shoe or cord. This quick check saves you from surprises once the blade is up to speed.
Step 2: Adjust Depth and Bevel for Cleaner, Safer Cuts
Correct depth and bevel settings make your saw cut faster, straighter, and with less tear-out. Most DIYers run their saw too deep, which makes it more likely to bind and kick.
To set depth, unplug the saw or remove the battery, then loosen the depth lever. Rest the saw shoe flat on your workpiece and lower the blade until the tips of the teeth extend about 1/8" to 1/4" below the bottom surface of the board. Tighten the lever firmly. The idea is simple: just enough blade to clear the material, not an inch of exposed steel under it.
Check bevel accuracy if you ever cut miters or bevels. Set the saw to “0°” and use a reliable square against the blade (avoid the teeth; reference the blade body itself). If there’s a gap, adjust the bevel stop screw (if your saw has one) so “0°” really is square. Do the same for common angles like 45° if your projects call for it.
Understand that most built-in angle and depth scales are approximations. For finish work—like visible shelves, trim, or furniture—measure and confirm with a square or digital angle gauge. Mark your intended bevel on a scrap and test before committing to your final piece. This extra minute can save you from ruining expensive material.
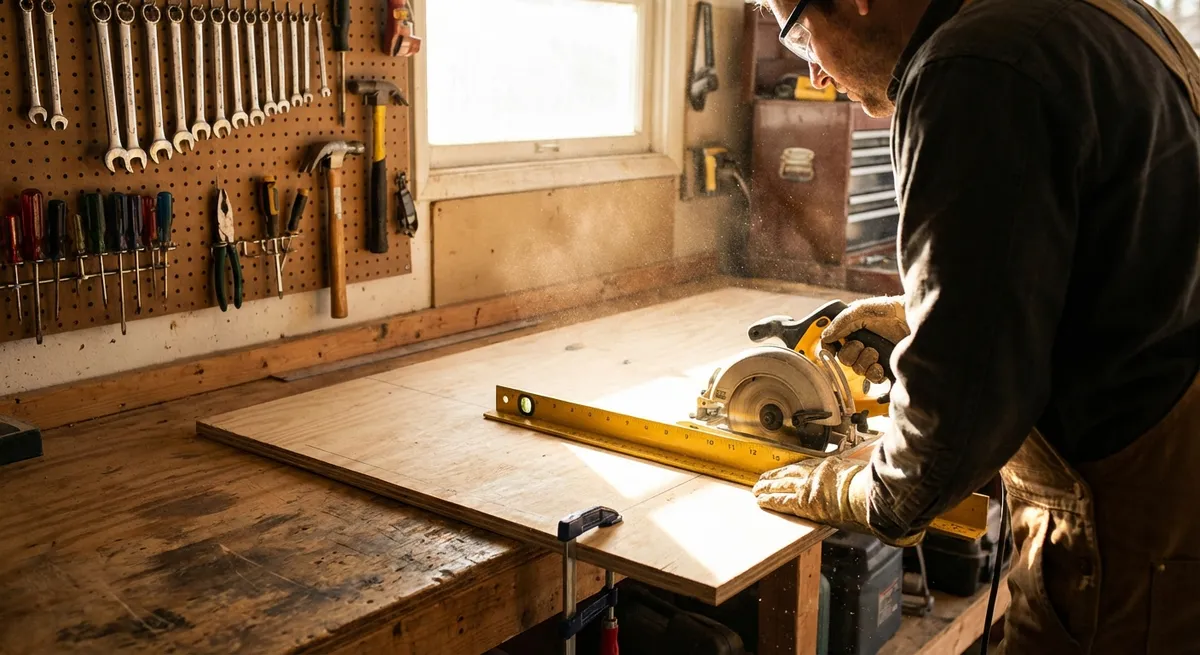
Step 3: Use Straightedges and Guides Instead of “Cutting by Eye”
If you’re cutting freehand along a pencil line, you’re working way harder than you need to—and you’ll never be as accurate as a simple guide will make you.
For basic straight cuts, use a clamped straightedge: a long level, straight 1x4, or an aluminum guide rail. Measure the distance from the saw’s blade to the edge of the shoe, then offset your straightedge that exact amount from your cut line. Clamp both ends securely so nothing shifts. Now you just keep the saw’s shoe pressed against the straightedge and slide forward; the saw can’t wander.
Build a simple “cutting jig” from plywood: a wide base piece with a narrower straight strip glued and screwed on top. Run your saw along the strip once to trim the base to your saw’s kerf. From then on, just align the trimmed edge of the jig with your cut line, clamp, and cut—the jig shows you exactly where the blade will cut, and it helps reduce tear-out too.
For repeated cuts of the same width (like ripping shelf boards), use your saw’s rip fence if included, or build a shop-made rip guide that rides along the board’s edge. Consistent, guided cuts are not only straighter; they also make assembly way easier because pieces actually match.
Always support narrow offcuts carefully: the smaller piece can vibrate and pinch the blade. Whenever possible, keep the wider “keeper” piece under the saw shoe with the guide, and let the narrower waste piece be on the opposite side.
Step 4: Mark Smarter and Follow the Line the Right Way
Good layout and how you visually track the cut matter as much as the saw itself. A clean, thin line and the right cutting side make a huge difference in fit and finish.
Use a sharp pencil or marking knife instead of a fat carpenter’s pencil when accuracy matters. Mark your cut line and also mark an “X” on the waste side of the board so you don’t forget which side to cut on. For visible surfaces like shelves or tabletops, cut with the good side facing down—most circular saws cut upward, and tear-out tends to appear on the top face.
When you cut, line up the correct kerf indicator on your saw’s shoe with the line (many saws have two: one for 0° and one for 45°). Make sure you consistently keep the blade just on the waste side of the line, not directly on it. Let the saw get to full speed before you enter the wood, and then move at a steady, moderate pace—too slow and you can burn the wood, too fast and you’ll wander.
Watch the blade position or the front notch on the shoe, not the spinning blade itself; staring at the teeth tends to make you overcorrect. Keep your grip firm but relaxed, and let your front hand guide the saw along the line or guide rail while your rear hand controls the trigger and pressure.
If you start to drift off the line, don’t twist the saw mid-cut. Ease out of the cut, let the blade stop, then restart from a bit before the mistake and follow the correct line. Twisting the saw sideways while the blade is buried is one of the fastest ways to cause binding or kickback.
Step 5: Maintain Your Saw and Blades So They Keep Cutting True
A well-maintained saw is easier to control, runs cooler, and cuts straighter. Neglect it and you’ll fight the tool on every single board.
Inspect the blade regularly. If you see chipped teeth, burn marks on wood, or the saw feels like it’s struggling, swap to a fresh or sharpened blade. Pitch (resin) buildup on the teeth also makes cuts rougher and increases heat; clean blades with a dedicated blade cleaner or a mild degreaser, following the manufacturer’s recommendations.
Check that the shoe is flat and unbent by placing it on a known flat surface. If it rocks or you can see visible gaps, accuracy will suffer. Minor issues might be fixable, but a severely bent shoe usually means it’s time to replace the saw.
Keep the lower blade guard moving freely—dust and debris can make it stick open or closed, which is both dangerous and annoying. With the saw unplugged or battery removed, manually cycle the guard and blow out or brush away dust. Never tape the guard open.
For corded saws, inspect cords for nicks or cuts and avoid sharp bends during storage. For cordless, keep batteries out of extreme heat or cold and store them partly charged if you won’t use them for a while, per manufacturer guidelines.
Finally, give the saw a quick tune-up before bigger projects: verify the bevel is square at 0°, check that depth levers lock solidly, confirm your guides and jigs still match your saw’s kerf, and test on scrap material. A five-minute checkup before you start can save hours of rework.
Conclusion
A circular saw doesn’t have to be an unpredictable, rough-cut tool. With a stable setup, correct depth, simple guides, smart marking, and basic maintenance, you can turn an everyday saw into a reliable, accurate workhorse. The payoff is straight, clean cuts that make your projects assemble easier, look better, and last longer—without upgrading to expensive specialty tools.
Sources
- [OSHA – Hand and Power Tools Safety](https://www.osha.gov/hand-power-tools) - Official U.S. government guidance on safe use of power tools, including circular saws
- [Fine Homebuilding – How to Use a Circular Saw](https://www.finehomebuilding.com/2017/06/08/use-circular-saw) - Practical tips from pros on setup, cutting techniques, and accuracy
- [Family Handyman – Circular Saw 101](https://www.familyhandyman.com/project/circular-saw-101/) - Beginner-friendly overview of circular saw parts, blades, and safe operation
- [DeWalt – Circular Saw Operating Instructions](https://www.dewalt.com/support/instruction-manual) - Official manufacturer manuals providing detailed setup and safety information (search by model)
- [This Old House – How to Make Perfect Cuts With a Circular Saw](https://www.thisoldhouse.com/tools/21015255/how-to-make-perfect-cuts-with-a-circular-saw) - Step-by-step methods for straighter, cleaner cuts with jigs and guides
Key Takeaway
The most important thing to remember from this article is that this information can change how you think about Tools & Equipment.


