A drill is the one power tool that shows up in almost every DIY project—hanging shelves, assembling furniture, building planters, or tackling light renovations. But between corded vs. cordless, hammer vs. regular, and all those drill bits, it’s easy to buy the wrong tool or ruin materials. This guide walks you through how to choose, set up, and use a drill safely and effectively, with five clear step‑by‑step mini‑guides you can follow on your next project.
Know Your Drill: Types, Power, and Features That Actually Matter
Before you start drilling into anything, it helps to understand what’s in your hand. Most homeowners do best with a cordless drill/driver: it drills holes and drives screws with one tool. Corded drills are lighter on your wallet and never run out of power, but the cord is limiting and less convenient for quick jobs around the house. Hammer drills add a “pulsing” action that’s ideal for masonry like brick and concrete, but they’re overkill if you only work with wood and drywall.
Pay attention to voltage on cordless models—12V is great for light household tasks and furniture assembly, while 18V/20V tools give more power for deck building, thick lumber, and bigger projects. Look for adjustable clutch settings (those numbered ring settings near the chuck) so you can control how hard the drill drives screws and avoid stripping them. Variable speed triggers and a two‑speed gearbox (low for driving screws, high for drilling) give you better control. A 3/8" chuck handles most homeowner needs; a 1/2" chuck fits larger bits if you plan to work with big holes or heavy materials. If you’ll be working overhead or for long periods, check weight and balance—an ergonomic grip and lighter battery can make a big difference in fatigue.
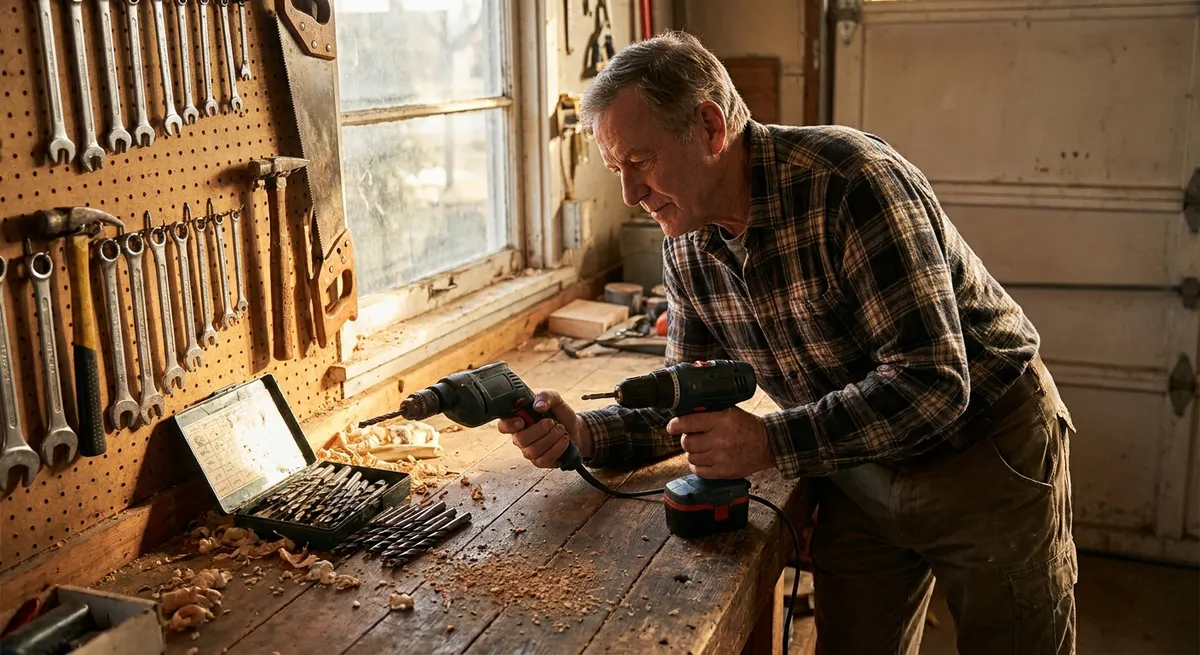
Step 1: Match Your Drill and Bits to the Material
Using the wrong bit is one of the fastest ways to burn a hole, strip a screw, or ruin your workpiece. Matching tool to material is the first smart step in any drilling job.
1. Identify what you’re drilling into.
Is it softwood (like pine), hardwood (like oak), drywall, metal, tile, brick, or concrete? If you’re not sure, check an exposed edge, behind a cover plate, or a closet where the material is visible.
2. Choose the right drill type.
For wood, drywall, and light metals, a standard drill/driver is usually enough. For concrete, brick, and some stone, use a hammer drill setting with masonry bits. If your drill doesn’t have a hammer mode, limit yourself to softer materials and light-duty anchors.
3. Pick the correct bit style.
Use brad‑point or twist bits for wood, twist bits labeled for metal for steel or aluminum, and carbide-tipped masonry bits for brick, block, and concrete. For tile and glass, use specialty glass/tile bits and go slow to avoid cracking. For driving screws, switch to driver bits (Phillips, Torx, square, etc.) that match the screw head exactly—no “close enough.”
4. Match bit size to the job.
For screws, pilot holes should usually be slightly smaller than the screw’s shank (the solid center, not counting the threads). For anchors, use the size recommended on the anchor package. For bolts and hardware, check manufacturer instructions or test on scrap first.
5. Test on scrap when possible.
If you’re unsure, drill a test hole in a scrap piece or an inconspicuous area. This lets you confirm the bit cuts cleanly, doesn’t wander, and produces an opening that fits your screw or anchor properly before you commit to the visible surface.
Step 2: Set Up Your Drill Correctly (Speed, Clutch, and Direction)
Even the right drill and bit can cause damage if you run them at the wrong speed or torque. Proper setup takes less than a minute and saves hours of patching, filling, and replacing hardware.
1. Select the correct gear (if your drill has 1/2 speeds).
Use “1” (low speed, high torque) for driving screws and larger bits. Use “2” (high speed, lower torque) for small drill bits in wood or metal. If you’re drilling hard material like masonry, stick with lower speed to reduce heat buildup.
2. Adjust the clutch for the task.
The numbered ring on the drill lets you control when the clutch “slips” to stop applying torque. For small screws in softwood or drywall, start at a low setting and test on scrap to avoid burying the screw. For larger screws in hardwood or structural lumber, increase the clutch number until the drill drives the screw fully without over‑torquing.
3. Set the direction correctly.
Look for the small forward/reverse switch near the trigger. Set it to forward (usually indicated by an arrow pointing away from the drill) to drill or drive screws in, and reverse to back screws out or remove stuck bits from holes. Get into the habit of checking direction before every task to avoid instant stripped heads.
4. Secure the bit properly in the chuck.
Fully insert the bit into the chuck, then pull it back very slightly (1–2 mm) before tightening. Hold the chuck and run the drill slowly, or tighten the key (on keyed chucks) evenly around all holes. A loose bit wobbles, enlarges holes, and can slip suddenly.
5. Do a quick function test.
Run the drill in the air at low speed to feel for wobble or vibration. Check that the bit spins straight. If there’s visible “wobble,” reseat the bit or inspect it for bending. This takes seconds and helps avoid crooked holes and rough cuts.
Step 3: Drill Clean, Straight Holes in Wood and Drywall
Whether you’re hanging wall shelves or building a simple bench, clean, straight holes make for stronger, better‑looking results. A few simple habits improve accuracy immediately.
1. Mark your hole locations clearly.
Use a pencil and a tape measure to mark center points. For high‑accuracy work, use a combination square or level to line up multiple marks. Press a nail or an awl lightly into the mark to create a small dimple—this “centers” the bit so it doesn’t wander when you start.
2. Support the material properly.
If drilling through boards, place scrap wood underneath to prevent blowout when the bit exits. For wall drilling, avoid pushing too hard; let the drill cut, not your body weight. Use a stud finder to locate framing and avoid blindly going into electrical or plumbing.
3. Start slow and straight.
Hold the drill perpendicular (90°) to the surface, both left‑to‑right and up‑and‑down. Start at low speed to get the bit cutting, then increase to moderate speed once it’s centered and biting cleanly. Resist the urge to “stab” the drill; steady pressure gives cleaner results.
4. Control depth when it matters.
For drywall anchors or shallow holes, use a depth stop if your drill has one, or wrap a piece of painter’s tape around the bit at the desired depth. Stop drilling when the tape touches the surface. This helps avoid punching through the other side of thin boards or hitting hidden pipes or wires.
5. Clear chips and finish the hole.
Every few seconds, back the bit out slightly to clear wood or drywall dust. This keeps the bit cooler and cutting efficiently. Once you reach depth, release the trigger before pulling the bit fully out; spinning a bit while exiting can enlarge the hole and chip the material.
Step 4: Drive Screws Like a Pro Without Stripping or Splitting
A drill/driver can make screw driving almost effortless, but it can also ruin fasteners and wood if used incorrectly. Treat this as a controlled process, not just “pull the trigger and hope.”
1. Pre‑drill pilot holes when needed.
For hardwoods, large screws, or close‑to‑edge fastening, drill a pilot hole to prevent splitting. Size the pilot hole slightly smaller than the screw’s shank (ignore the threads; match the solid core). For drywall into studs, small pilot holes help prevent studs from cracking and make screws easier to drive straight.
2. Use the right driver bit and keep it seated.
Match the bit type and size to the screw head—Philips, Torx, square, etc. Press the bit firmly into the screw while you start driving, and keep steady pressure as it goes in. If the bit slips or “cams out,” stop immediately and reseat; continuing will strip the head.
3. Set a low clutch first and adjust upward.
Start with a low clutch setting and drive a test screw in scrap or an inconspicuous area. If the clutch slips before the screw is flush, raise it one or two numbers and try again. Your goal is for the screw head to sit just below the surface (for wood) or just flush (for hardware) without tearing fibers or crushing drywall.
4. Control angle and speed.
Keep the drill aligned with the screw—straight in, not angled. Begin at a slower trigger pull until the screw grabs, then increase to moderate speed. Near the end, reduce speed again for more control. High speed at the end is where most stripping and over‑driving happens.
5. Finish by hand when it’s critical.
For hardware that must sit perfectly, like hinges, handles, or visible trim, stop just before your target depth and finish the last turn or two with a hand screwdriver. This prevents over‑driving and lets you “feel” when it’s snug without crushing the material.
Step 5: Stay Safe and Maintain Your Drill for the Long Haul
A well‑maintained drill is safer, more pleasant to use, and lasts much longer. These habits take a few minutes and pay off over years of DIY projects.
1. Wear basic safety gear and secure the work.
Use safety glasses any time you drill—wood, metal, masonry, or tile can all throw chips. For louder hammer drilling or extended use, add hearing protection. Clamp your workpiece whenever possible so it doesn’t spin or shift while you’re drilling.
2. Avoid hidden hazards in walls.
Before drilling into walls, especially near switches, outlets, or plumbing fixtures, use a stud finder with AC detection or a separate live‑wire detector. Stay clear of the vertical paths above and below outlets and switch boxes, where wires commonly run. If something feels “soft” or inconsistent while drilling, stop and investigate.
3. Manage heat and battery life.
If the bit or drill body gets very hot, pause and let it cool—overheating can damage motors and dull bits quickly. When working with masonry or metal, take short breaks and clear debris frequently. For cordless models, rotate between two batteries on long jobs so you’re not pushing one pack to failure.
4. Clean and store properly after use.
Wipe down the drill body with a dry or slightly damp cloth to remove dust. Blow or brush debris out of vents. Lightly brush or wipe drill bits and driver bits and store them in their case so they’re not banging around in a drawer. Keep the drill in a dry spot, away from direct moisture or temperature extremes.
5. Check and replace worn parts.
If the chuck no longer holds bits tightly, the trigger feels inconsistent, or the drill struggles with simple jobs, inspect it. Worn driver bits and drill bits are cheap to replace and often solve “weak drill” complaints. For corded drills, check the cord for nicks or exposed wires; for cordless, retire any battery that swells, leaks, or gets very hot in normal use.
Conclusion
A drill is one of the most versatile tools you can own, but it only works as well as you set it up and use it. When you match your drill and bits to the material, dial in the right settings, and follow a controlled, step‑by‑step process, you get cleaner holes, stronger joints, and fewer damaged screws or surfaces. Add basic safety habits and a little maintenance, and your drill becomes a reliable workhorse for almost every home project you’ll tackle.
Sources
- [Occupational Safety and Health Administration (OSHA) – Hand and Power Tools](https://www.osha.gov/hand-power-tools) - Official safety guidance on using powered tools, including drills
- [Family Handyman – How to Use a Drill/Driver](https://www.familyhandyman.com/project/how-to-use-a-drilldriver/) - Practical homeowner‑focused tips on drill basics and technique
- [Fine Woodworking – Drill Bits 101](https://www.finewoodworking.com/2008/10/22/drill-bits-101) - Detailed breakdown of drill bit types and when to use each
- [This Old House – How to Drill Into Concrete](https://www.thisoldhouse.com/tools/21016720/how-to-drill-into-concrete) - Step‑by‑step guide to hammer drilling masonry safely and effectively
Key Takeaway
The most important thing to remember from this article is that this information can change how you think about Tools & Equipment.


