Getting better results from DIY projects usually isn’t about buying more gear—it’s about using what you already own the right way. Poor cuts, crooked shelves, or loose hardware often trace back to one problem: tools that aren’t set up, calibrated, or maintained correctly.
This guide walks you through five practical, step‑by‑step routines to tune and care for the tools most DIYers actually use. Follow these, and you’ll get cleaner cuts, safer workflows, and more predictable results on every project.
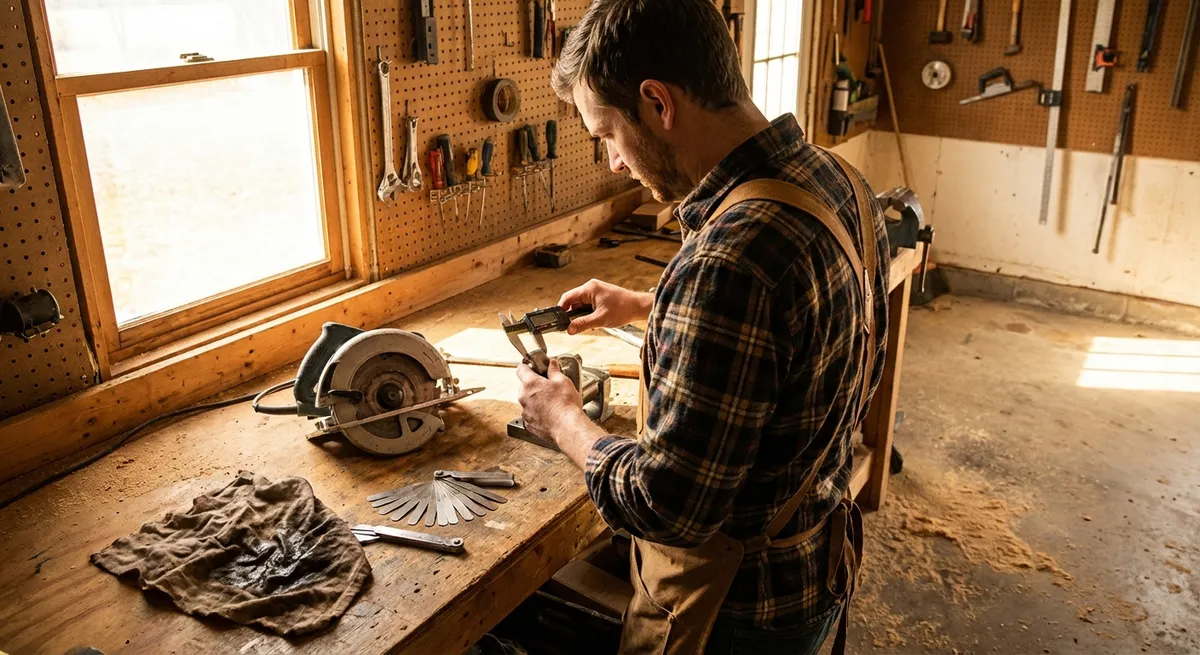
Step 1: Square and Tune Your Circular Saw for Straighter Cuts
A circular saw is one of the most useful tools in a home workshop—but only if it cuts straight and at the angle you intend.
- Unplug and inspect the saw. Unplug the cord or remove the battery. Check the blade for missing teeth, chips, rust, or pitch buildup. If the teeth are dull or damaged, replace the blade before tuning anything else.
- Check and clean the base plate (shoe). Flip the saw over and make sure the shoe is flat, not bent, and free of debris. Use a stiff brush and a rag with a bit of mineral spirits (if safe for your saw’s finish) to remove gunk that could throw off alignment.
- Set the blade to 0° and verify square. Unlock the bevel adjustment and set it to 0°. Tighten the lever. Place a reliable speed square or combination square against the blade (avoid the teeth—check against the body of the blade). If you see light between the square and the blade, you’re not truly at 90°.
- Adjust the bevel stops. Most saws have a small set screw or stop for the 0° and 45° bevel positions. Loosen the stop slightly, adjust until the blade reads square against the square at 0°, then retighten. Repeat at 45° if your saw has that stop.
- Align the saw to your cut line. Make a test cut on scrap wood. Pay attention to where the blade actually cuts in relation to the notch or mark on the front of the shoe. Mark or mentally note the true “line of cut” so you can aim accurately in real projects.
Practical tip: Label your saw with painter’s tape noting which notch aligns with the kerf for 90° and 45° cuts. That tiny reminder can save a lot of ruined boards.
Step 2: Set Up a Drill/Driver So Screws Go In Clean and Flush
Stripped screws and split boards are often caused by rushed drill setup, not bad hardware. A quick checklist before you start saves time and frustration.
- Match the bit to the screw head. Grab the screw you’ll use and test bits until one fits snugly with almost no wiggle. Using a bit that’s even one size off dramatically increases stripping. Keep a labeled bit set (PH2, PZ2, T25, etc.) so you can grab the right one fast.
- Set the clutch correctly. Turn your drill’s clutch ring to a low or mid setting (e.g., 6–10) for driving into softwoods or drywall; go higher for hardwoods or long structural screws. Start lower than you think you need—test on scrap—and increase until the screw drives flush without the clutch chattering too early.
- Choose the right speed. Use low speed (1) for driving screws and high speed (2) for drilling holes in wood or metal. Low speed gives more torque and control, which matters more than speed when you’re trying not to overdrive or strip screws.
- Pre‑drill when it matters. For hardwood, near board edges, or with long screws, drill a pilot hole using a bit slightly smaller than the screw’s shank (not the threads). This reduces splitting and makes it easier to keep screws straight.
- Hold the drill in line with the screw. As you drive, keep your wrist, bit, and screw in one straight line. If the bit tilts, you’re more likely to strip the head or drive the screw at an angle. Pause if you feel the bit camming out—back it out slightly, re‑seat it, and continue.
Practical tip: Keep a small “test board” in your workspace. Whenever you change screws or material, try one test screw there first to dial in clutch and speed before touching your actual project.
Step 3: Maintain a Tape Measure and Marking Setup You Can Trust
Accurate measuring and marking matters more than fancy tools. If you can’t trust your tape and marks, nothing else will line up.
- Check the hook for movement—not slop. The metal hook at the end of a tape is designed to move about 1/16 in (1–2 mm) to account for inside and outside measurements. It should slide slightly but not rattle. If it’s bent or loose, replace the tape; “fixing” it with pliers often makes it less accurate.
- Test your tape against a known reference. Line up your tape against a metal ruler or another high‑quality tape. Check at 12 in (or 300 mm) and again at 48 in (or 1200 mm). If it’s off by more than about 1/32 in over a foot, retire that tape from precise work.
- Choose the right pencil or marker. For rough framing, a carpenter’s pencil is fine. For more precise work (shelves, trim, hardware), use a sharp standard pencil or fine mechanical pencil. The thinner the line, the less guesswork about where to cut.
- Use consistent reference points. When measuring multiple boards, always hook the tape the same way (all outside measurements or all inside) and always mark from one end of the board. Mixing methods is how drawers end up different depths or shelves don’t align.
- Mark clearly and cut to the same side of the line. Draw a short, straight mark across the board, then add a “V” or tick to show exactly where the measurement lands. Decide before cutting whether you’ll keep the line or cut it off, and be consistent across all pieces.
Practical tip: Dedicate one tape measure as your “project tape” and avoid mixing tapes mid‑project. Tiny differences between tapes can show up as gaps and misalignment when parts come together.
Step 4: Clean, Sharpen, and Store Hand Tools for Longer Life
Hand tools don’t just “wear out” on their own—neglect does most of the damage. A simple maintenance routine keeps them cutting cleaner and safer.
- Gather and clean your most‑used tools. Start with chisels, hand planes, utility knives, and any small cutting tools. Wipe off sawdust and debris with a dry rag. For stubborn grime or adhesive, use a small amount of mineral spirits or rubbing alcohol on a cloth (check the manufacturer’s guidance first).
- Remove surface rust safely. For light rust, use fine steel wool or a synthetic abrasive pad with a little oil. Rub along the length of the blade, not across it. For heavier rust, a rust eraser or dedicated rust remover can help, but avoid aggressive grinding that changes the tool’s shape.
- Sharpen cutting edges. Use a sharpening stone, diamond plate, or guided sharpening system. Maintain the factory bevel angle (commonly 25–30° for chisels and plane irons). Work through progressively finer grits, then strop on leather or fine compound if you have it. A properly sharpened edge should slice paper cleanly without tearing.
- Apply a light protective coat. After cleaning and sharpening, wipe metal surfaces with a very thin coat of light oil, paste wax, or a corrosion inhibitor. This reduces rust, especially if your workspace is in a garage or basement with changing humidity.
- Store tools so edges are protected. Don’t toss sharp tools loosely into a toolbox. Use blade guards, roll‑up tool wraps, or a dedicated drawer/pegboard where edges don’t bang into other metal. Store chisels and plane irons with the cutting edge facing down or covered.
Practical tip: Schedule a 20–30 minute “tool care session” after every couple of projects. Maintenance is much faster if you keep up with it instead of waiting until everything is dull and rusty.
Step 5: Set Up a Safe, Stable Workspace Before You Plug Anything In
Even the best tools are risky and inaccurate in a bad setup. A stable, organized workspace lets your tools actually perform the way they were designed to.
- Stabilize your work surface. Whether you use sawhorses, a folding workbench, or a permanent bench, make sure it doesn’t rock. Shim under any wobbly leg with cardboard or scrap wood. If you’re on a deck or uneven patio, test your setup with a bit of pressure before starting any cut.
- Secure the workpiece. Use clamps, bench dogs, or even a couple of screws into a sacrificial board to keep your material from shifting. For cutting sheet goods, support the off‑cut side with scrap 2x4s so the piece doesn’t pinch the blade as it falls. Moving wood is one of the fastest ways to get bad cuts—or get hurt.
- Plan cord and hose routes. Before turning on a tool, look at where your power cords or air hoses lie. Keep them behind you and away from cutting paths or spinning bits. If possible, route cords overhead or along a wall; tripping on a cord with a running saw in hand is a preventable hazard.
- Set up basic dust and eye protection. At minimum, keep safety glasses in an easy‑to‑reach spot and wear them whenever cutting, grinding, or drilling. If you’re creating a lot of fine dust (sanding, cutting MDF or concrete), use a properly rated dust mask or respirator and connect a shop vacuum or dust extractor if your tool has a port.
- Do a “dry run” of each cut or operation. Without switching the tool on, place it where you’ll start, move through the full motion you plan to make, and check hand positions, cord locations, and stability. If anything feels awkward or cramped, reposition your work or yourself before powering up.
Practical tip: Make a short pre‑use checklist and tape it to your wall or toolbox (stable surface, clamped work, clear cords, eye protection). Running through it quickly becomes a habit—and habits prevent accidents.
Conclusion
You don’t need a shop full of premium tools to get pro‑looking results. You need tools that are:
- Calibrated (saws square, drills set up correctly)
- Trustworthy (accurate tapes and consistent marking)
- Cared for (clean, sharp, and stored properly)
- Used in a safe, stable setup
Work these five step‑by‑step routines into your regular DIY rhythm and you’ll see your cuts get cleaner, joints fit tighter, and projects go together with a lot less fighting and re‑doing. The more predictable your tools become, the more confident—and capable—you’ll feel tackling whatever’s next on your Fix Ready list.
Sources
- [OSHA – Hand and Power Tools Safety](https://www.osha.gov/hand-and-power-tools) – Official U.S. government guidance on safe selection and use of hand and power tools
- [Fine Woodworking – How to Tune Up Your Circular Saw](https://www.finewoodworking.com/2009/09/29/tune-up-your-circular-saw) – Practical tips for improving cut accuracy with circular saws
- [Family Handyman – Drill Basics You Need to Know](https://www.familyhandyman.com/project/drill-buying-guide/) – Explains drill settings, clutch use, and bit selection in DIY contexts
- [Popular Woodworking – Sharpening Chisels and Plane Irons](https://www.popularwoodworking.com/techniques/sharpening-chisels-and-plane-irons/) – Step‑by‑step guidance on sharpening and maintaining hand tools
- [MIT EHS – Woodworking Shop Safety](https://ehs.mit.edu/environmental-health-and-safety-topics/general-shop-safety/woodworking-shop-safety/) – Educational institution resource covering safe setup and operation of woodworking tools
Key Takeaway
The most important thing to remember from this article is that following these steps can lead to great results.


