Most DIY projects online either assume you have a full workshop or a full weekend. This guide skips both. You’ll learn five practical, step‑by‑step projects that solve real problems: better storage, safer lighting, quieter doors, and a cleaner, more usable space—using basic tools and materials you can find at any hardware store.
These are great “skill builder” projects: simple enough for beginners, useful enough that experienced DIYers won’t feel like they’re wasting time.
Before You Start: Simple Setup for Safer DIY
Before jumping into the projects, get a quick, repeatable setup in place. This makes everything safer and faster.
Gather basic tools you’ll use repeatedly
Keep these in one portable toolbox or bucket: - Tape measure - Pencil and marker - Drill/driver and common bits - Stud finder - Level (torpedo level is fine) - Utility knife - Hammer - Safety glasses and work gloves
Create a no‑drama work area
Clear a flat space (table, workbench, or clear floor). Lay down an old blanket or cardboard to protect surfaces. Make sure you have good lighting and an outlet nearby for power tools.
Use the “measure, mark, test” habit
Any time you install something: - Measure the space - Mark positions lightly with pencil - Test fit (hold items in place, use painter’s tape or a helper) - Only then drill, cut, or screw
Respect safety basics
- Wear eye protection when drilling, cutting, or hammering - Keep cords out of walkways - Unplug tools before changing bits or blades - Never drill blindly into walls where electrical or plumbing may run—use a stud finder with wire detection when possible
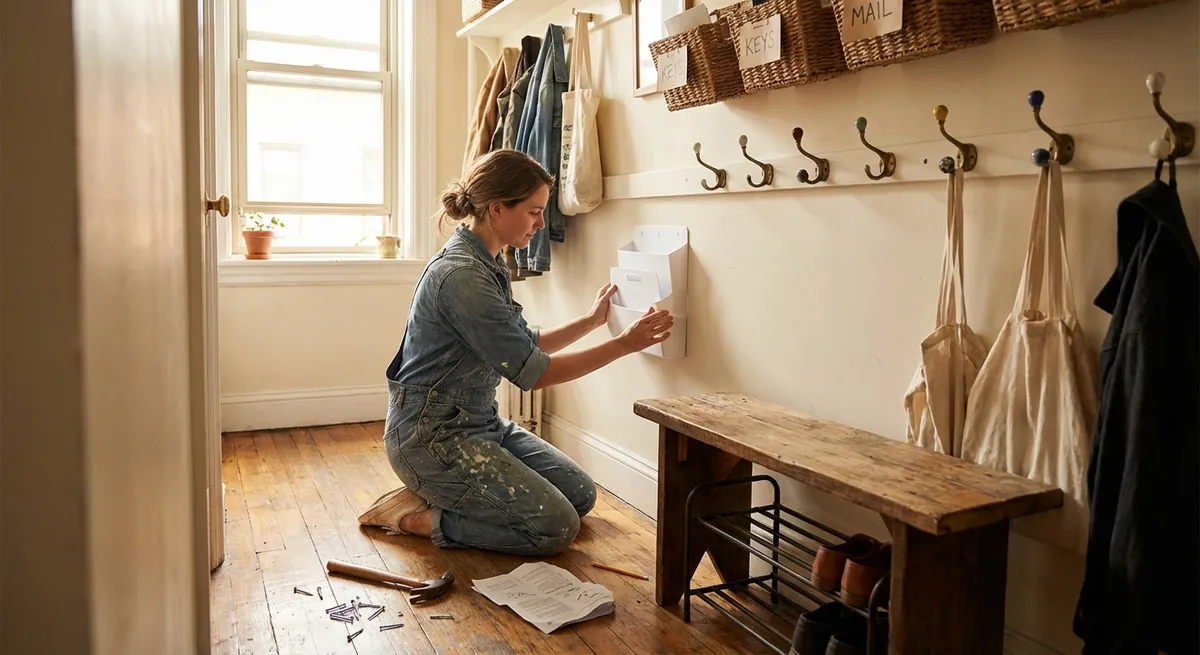
Project 1: Add Strong, Simple Wall Hooks Without Wrecking Your Drywall
Great for: entryways, bedrooms, garages, laundry rooms.
Goal: Install hooks that won’t rip out of the wall when you hang a heavy coat or bag.
Step-by-Step Instructions
Choose the right hook and anchor combo
- For light items (keys, hats): standard plastic drywall anchors work - For medium items (coats, towels, small bags): screw‑in self‑drilling drywall anchors - For heavy items (loaded backpacks, tools): screw directly into wall studs or use heavy‑duty toggle bolts
Find studs and plan your layout
- Use a stud finder to locate studs; mark centerlines lightly with pencil - Decide how many hooks you need and how far apart (6–8 inches for coats, 10–12 inches for bags) - Mark each hook location with a small cross
Pre‑drill or install anchors
- If you’re going into a stud: - Use a drill bit slightly smaller than your screw diameter - Drill a pilot hole at each mark - If you’re using drywall anchors: - For plastic anchors: drill a hole the size the package recommends, then tap in the anchor - For screw‑in anchors: press the tip into the drywall and screw in slowly until flush
Mount the hooks
- Hold the hook in place and align it with your marks - Drive screws through the hook into the pilot holes or anchors - Use a level for multi‑hook racks to keep them straight
Load test each hook
- Gently pull down and out on each hook - Hang a heavier item for a few minutes to confirm it’s solid - If anything feels loose, remove, upsize the anchor, and reinstall
Tip: If you want a cleaner, more forgiving install, mount hooks to a painted wood board first, then screw the board into studs at two points. This gives you more flexibility on hook spacing and hides minor mistakes.
Project 2: Upgrade a Dark Corner with a Plug‑In Wall Sconce (No Wiring Needed)
Great for: rentals, hallways, bedrooms, and reading corners.
Goal: Add functional lighting safely without touching electrical wiring.
Step-by-Step Instructions
Pick the right plug‑in fixture
- Look for fixtures labeled “plug‑in wall sconce” or “plug‑in lamp” - Choose LEDs: they run cooler and use less power - Get a fixture with a long cord and on‑cord or on‑base switch
Plan placement and cord path
- Decide the height: about 60–66 inches from the floor for general lighting, higher for reading corners - Visualize the cord path to the outlet—avoid doorways and walking paths - Use painter’s tape to temporarily hang the fixture and see how it feels
Mark and install the mounting hardware
- Use a level to mark the top line where the fixture will sit - Mark mounting hole locations from the fixture’s template or backplate - Drill pilot holes and use appropriate anchors (see Project 1) if there’s no stud
Secure the fixture and manage the cord
- Screw the fixture into the wall until snug (do not overtighten) - Use adhesive cord clips or cord covers to run the cable neatly to the outlet - Keep the cord flat and avoid tight bends near the plug
Test and adjust the light
- Plug in and turn on the light - Adjust shade position or angle if adjustable - If it’s too bright, switch to a lower‑lumens LED bulb or a warmer color temperature (2700–3000K)
Tip: Cord covers can be painted to match your wall, making the whole setup look almost “hard‑wired” without any electrical work.
Project 3: Quiet a Slamming Door and Fix Loose Hinges
Great for: bedrooms, bathrooms, kids’ rooms.
Goal: Make doors close smoothly and quietly, and stop hinges from squeaking or sagging.
Step-by-Step Instructions
Tighten and inspect the hinges
- Use a screwdriver to tighten all hinge screws on the door and the frame - If a screw just spins, it’s likely stripped: - Remove the screw - Insert a wooden toothpick or short piece of matchstick dipped in wood glue - Break it flush, then reinsert the screw
Lubricate squeaky hinges safely
- Place a rag or paper towel under the hinge to catch drips - Apply a small amount of silicone spray or a few drops of household oil to the hinge pin - Open and close the door several times to work it in - Wipe away excess to prevent drips on the floor
Stop the door from slamming
- Stick self‑adhesive felt pads or rubber bumpers on the frame where the door meets it - Use two near the latch side and one near the top hinge side - Test the close: add or reposition pads to soften impact
Fix misaligned latches
- If the door doesn’t latch easily, examine the strike plate (metal piece on the frame) - Loosen its screws slightly and shift it up/down or in/out, then retighten - If the latch is hitting low or high, mark where it hits, then gently file the strike plate opening wider with a metal file
Check the door sweep and weatherstripping
- Look at the bottom of the door: the sweep should lightly brush the floor or threshold - If there’s a draft or noise leaking through, replace worn sweeps and add adhesive weatherstripping around the frame - Close the door and feel for air movement to confirm the seal
Tip: Door fixes are an ideal “first mechanical project.” You’ll build confidence with measuring, adjusting hardware, and using basic hand tools.
Project 4: Build a Simple, Strong Shelf in an Awkward Nook
Great for: closets, laundry rooms, under‑stairs spaces, alcoves.
Goal: Turn unused space into storage with a basic, sturdy wall‑mounted shelf.
Step-by-Step Instructions
Measure the space and choose materials
- Measure width (left to right) and depth (front to back) of the nook - A depth of 10–14 inches works well for most shelves - Buy: - 3/4" plywood or solid pine board cut to your width and depth - Two or three L‑brackets or heavy‑duty shelf brackets - Wood screws and wall anchors (if not all brackets land on studs)
Find studs and plan bracket locations
- Use a stud finder to locate studs along the back wall - Aim for at least two brackets attached directly to studs - For wider shelves (over 36 inches), use three brackets for better support
Pre‑finish the shelf board
- Sand rough edges with medium‑grit sandpaper, then fine‑grit - Wipe off dust and apply paint, stain, or clear finish if desired - Let it dry completely before installation
Install the brackets at the right height
- Mark a level line where you want the top of the shelf to sit - Starting with a stud location, hold a bracket on the line and mark screw holes - Drill pilot holes and attach the bracket - Repeat for each bracket, checking level left to right as you go
Attach the shelf and load it sensibly
- Place the board on the brackets and check for level and even overhang - Drive short wood screws up through bracket holes into the underside of the shelf - Load heavier items near the wall and over brackets, lighter items toward the front
Tip: If your walls are uneven, leave all bracket screws slightly loose at first. Set the shelf on top, tweak bracket positions until the shelf sits flat, then tighten everything.
Project 5: Create a No-Drill Backsplash Guard Behind the Sink or Stove
Great for: rentals or hesitant DIYers.
Goal: Protect walls from splashes and stains with a removable, easy‑clean surface.
Step-by-Step Instructions
Choose your backsplash material
- Peel‑and‑stick vinyl tiles or sheets for a tile look - Clear acrylic sheet for an invisible shield - Pre‑finished wall panels for a more decorative look
Measure and cut to size
- Measure the width of the area you want to protect (e.g., behind sink or stove) - Measure from countertop to the height you want (commonly 12–18 inches) - Transfer measurements to your material and use a utility knife or fine‑tooth saw (for acrylic) to cut
Prep the wall and surface
- Clean the wall with a degreaser or mild soap and water - Let it dry fully; adhesive won’t stick to grease or moisture - Lightly mark level lines where the top and sides of the panel will go
Install with removable adhesive
- For peel‑and‑stick vinyl: - Peel a small section of backing, align at your level line, press, and peel more as you go - For acrylic or panels: - Apply removable mounting strips or double‑sided removable tape in a grid pattern on the back - Align with your marks and press firmly across the whole surface
Seal edges (optional but helpful)
- Run a thin bead of clear, removable caulk or clear tape along the bottom edge where it meets the counter - Wipe smooth with a damp finger or cloth - This helps keep water and food from creeping behind the panel
Tip: If you’re in a strict rental, test your adhesive on a hidden section of wall first to confirm it removes cleanly.
Conclusion
You don’t need a full renovation—or a garage full of tools—to make your home work better. Projects like solid wall hooks, plug‑in sconces, quieter doors, sturdy shelves, and removable backsplashes deliver visible, everyday improvements with manageable effort and cost.
Pick one project that solves a real annoyance in your home and start there. As you repeat the same basic skills—measuring, anchoring, leveling, adjusting—you’ll get faster, more confident, and ready to tackle bigger fixes when you’re ready.
Sources
- [U.S. Consumer Product Safety Commission – Power Tool Safety](https://www.cpsc.gov/Safety-Education/Safety-Education-Centers/Power-Tools) – Guidelines on safe use of common DIY tools
- [The Family Handyman – How to Use Wall Anchors](https://www.familyhandyman.com/project/how-to-use-wall-anchors/) – Detailed overview of different drywall anchors and when to use them
- [Energy.gov – Weatherstripping](https://www.energy.gov/energysaver/weatherize/air-sealing-your-home/weatherstripping) – Official guidance on improving door and window seals for comfort and efficiency
- [This Old House – Installing Wall Shelves](https://www.thisoldhouse.com/storage-organization/21015151/how-to-build-a-simple-shelf) – Practical examples of shelf design and installation methods
- [Mayo Clinic – Eye Protection](https://www.mayoclinic.org/healthy-lifestyle/adult-health/in-depth/eye-safety/art-20043922) – Why and how to protect your eyes during home projects and repairs
Key Takeaway
The most important thing to remember from this article is that this information can change how you think about DIY Projects.


