Minor wall damage makes a room look tired fast, but calling a pro for every dent, crack, or popped nail isn’t always necessary. With a few basic tools and a bit of patience, you can repair most common drywall issues yourself—and end up with a surface that’s ready for fresh paint and hard to spot later. This guide walks you through practical, step‑by‑step repairs you can tackle in a weekend, even if you’re fairly new to DIY projects.
Get Set Up: Tools, Materials, and Prep
Before you start patching anything, gathering the right tools and setting up your work area will save you a lot of frustration.
You’ll typically need: a utility knife, 4–6 inch taping knife, 8–12 inch drywall knife for feathering, sanding sponge or fine‑grit sandpaper (120–220), joint compound (pre‑mixed “all‑purpose” or “lightweight”), spackle (for tiny holes), drywall repair patches or mesh tape, a small putty knife, and primer plus touch‑up paint. For larger repairs, you may need a drywall saw and a scrap of drywall.
Prep your space by moving furniture away from the walls, laying down a drop cloth or old sheet, and taping off baseboards or trim if you’re worried about splatter. Wipe down the damaged area with a slightly damp cloth to remove dust and grease; compound sticks better to a clean surface. Good lighting is important here—use a bright work light or lamp so you can clearly see edges and low spots as you work and sand.
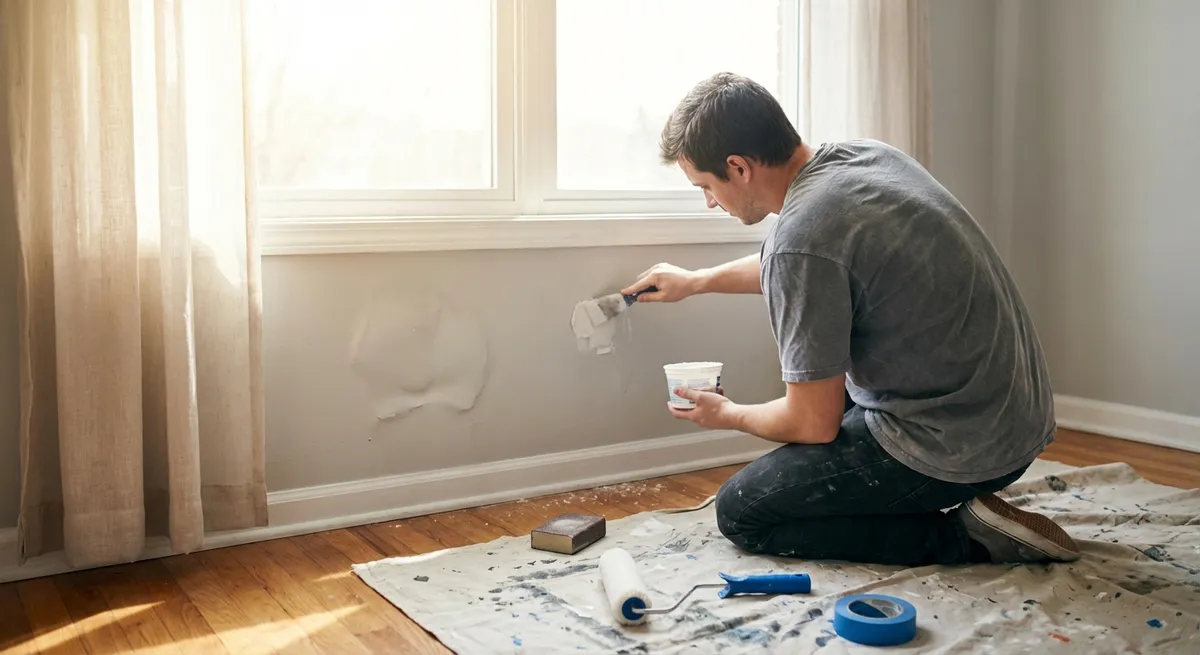
Step 1: Fix Tiny Nail Holes and Picture Hanger Marks
For small nail holes and picture hook marks, you don’t need a full drywall repair kit—simple spackle and a putty knife will do the job quickly.
Start by lightly scraping around the hole with the tip of your putty knife to remove any loose paint or raised edges. If the hole has a “lip,” shave it flush with a sharp utility knife so the repair blends better. Using your fingertip or a small putty knife, press a small amount of lightweight spackle into the hole, then scrape the excess off so it’s flush with the wall surface. Aim for as thin a layer as possible; thick blobs are harder to sand smooth.
Let the spackle dry fully (check the product label for dry time—often 30 minutes to a few hours). Once dry, lightly sand with a fine‑grit sanding sponge until it’s smooth and level with the surrounding wall. Run your fingers over it to check for ridges—your fingers will often catch flaws your eyes miss. Wipe away dust, then prime the patch before painting so the repaired spot doesn’t “flash” (show up as a different sheen) under your finish coat.
Step 2: Repair Popped Nails and Screws Without Them Coming Back
Popped nails and screws show up as small circular bumps or cracks where the fastener has pushed through the paint and drywall surface. Fixing them correctly helps prevent repeat problems.
First, locate the stud or framing where the fastener is set. If it’s a popped nail, don’t just hammer it back in; instead, drive it slightly below the surface with a hammer and nail set so it’s recessed but still anchored. For a more secure fix, drive a drywall screw into the stud 1–2 inches above or below the old nail, sinking the screw head just below the surface without tearing the paper face of the drywall. If it’s already a popped screw, back it out slightly, then drive it back in at a slightly different angle, again just below the surface.
Use a small taping knife to apply a thin layer of joint compound over the recessed fastener and surrounding area, about 3–4 inches wide. Let it dry completely, then apply a second, slightly wider coat to feather the edges and hide the repair line. After the final coat dries, sand until smooth and level. Prime and paint to finish. If you see a faint bump after painting, you likely didn’t recess the fastener enough or didn’t feather the compound wide enough—next time, widen your repair area a bit more.
Step 3: Smooth Out Hairline Cracks in Drywall or Along Seams
Hairline cracks often appear above doors, windows, or along tape seams when the house shifts slightly. If you simply paint over them, they’ll usually come back; reinforcing the crack is key.
Start by opening the crack slightly with a utility knife or the corner of your taping knife. This feels counterintuitive, but widening it just enough to remove loose material helps the new compound grip and fill properly. Brush or vacuum out dust from the crack so it’s clean. For very thin, stable cracks, you can often get away with joint compound alone; for bigger or recurring cracks, use paper or fiberglass mesh tape over the crack for reinforcement.
Apply a thin layer of joint compound over the crack using a 4–6 inch knife, pressing it into the opening. If you’re using tape, bed the tape into this fresh compound, then skim another light layer over the top, just enough to cover it. Allow it to dry thoroughly, then apply a second coat, wider than the first by an inch or two on each side to feather the transition. After the final coat dries, sand carefully, keeping your sanding sponge partly on the old wall surface and partly on the patch to avoid creating a dip. Prime the repaired area before repainting to help camouflage the repair.
Step 4: Patch Small to Medium Holes (Like Door Knob Dents)
For holes too big for simple spackle but smaller than a full panel replacement (roughly coin‑size up to about 4–5 inches), a patch repair works well and is still DIY‑friendly.
For door knob‑sized dents, first cut away any broken drywall so you have a clean, firm edge around the damage. Use a drywall repair patch (self‑adhesive metal or fiberglass mesh) sized slightly larger than the hole, and stick it centered over the damaged area. If you’re using mesh tape instead of a pre‑made patch, crisscross strips over the hole to create a stable backing.
Apply a generous but controlled layer of joint compound over the patch with a 6‑inch knife, forcing it through the mesh and covering the entire patch. Feather the edges several inches beyond the patch so you don’t get a visible “hump.” Let it dry completely—this may take longer over a patch because of the thickness. Apply a second, wider coat with an 8–12 inch knife, focusing on smoothing the transitions rather than building height in the middle. After it dries, sand the area smooth in broad strokes, not just in the center, to avoid a bumpy repair. Wipe off dust, prime, and then paint. If your walls have a texture, you may need to apply a spray or brush‑on texture product before priming to match the existing finish.
Step 5: Replace a Damaged Drywall Section for Larger Holes
When the damage is bigger than a patch (for example, a broken section from moving furniture or an old access hole), replacing a cut‑out section of drywall is more durable and still manageable with some patience.
Begin by using a drywall saw or utility knife to square up the damaged area into a neat rectangle or square, cutting back to solid, non‑crumbling material. Be careful not to cut too deep where there may be wiring or plumbing. Measure the opening and cut a new piece of drywall to the same size from a scrap sheet. If there’s no stud behind one or more edges of the opening, screw short “backer boards” (like 1x2 strips) inside the wall, spanning the hole so you have something to fasten your patch to.
Place the new drywall piece into the opening and secure it to studs or backer boards with drywall screws, sinking the screw heads slightly below the surface. Apply joint tape over all seams, then spread a layer of joint compound over the tape with a 6‑inch knife, keeping it smooth and slightly wider than the tape. Let it dry fully, then add a second, wider coat with an 8–12 inch knife to blend the patch into the existing wall. Depending on the size and visibility of the repair, you may need a third, very thin coat just to perfect the feathered edges. Sand with a fine‑grit sponge until the seams disappear to the touch and eye. Finish with primer over the entire repair area, then repaint the wall or at least from corner to corner to avoid visible touch‑up bands.
Conclusion
Learning to repair your own walls pays off every time you move a piece of furniture, change artwork, or discover a crack by a doorway. The key is to work in thin layers, let each coat dry completely, and take your time sanding and feathering so the repair blends into the rest of the wall. Once you’re comfortable with nail holes and small patches, larger repairs feel like a natural next step—and your home will look cleaner, fresher, and more “finished” without the cost of a service call. With a weekend, some basic tools, and a bit of practice, you can make most wall damage disappear.
Sources
- [USG Sheetrock – Joint Compound and Drywall Repair Guides](https://www.usg.com/content/usgcom/en/products/wallboard/joint-compound.html) - Manufacturer information on joint compounds and proper application methods
- [Family Handyman – How to Patch and Repair Drywall](https://www.familyhandyman.com/project/how-to-patch-and-repair-drywall/) - Step‑by‑step visual guides for common drywall repairs
- [Lowe’s – How to Fix Drywall](https://www.lowes.com/n/how-to/fix-drywall) - Retailer tutorial covering tools, materials, and techniques for wall repair
- [Benjamin Moore – How to Touch Up Paint](https://www.benjaminmoore.com/en-us/paint-and-stain-tips/how-to-articles/how-to-touch-up-paint) - Tips on priming and painting so repaired areas blend with existing walls
- [Home Depot – How to Repair Drywall and Fix Wall Cracks](https://www.homedepot.com/c/ah/how-to-repair-drywall/9ba683603be9fa5395fab90b3a56c79) - Practical instructions and diagrams for patching various drywall issues
Key Takeaway
The most important thing to remember from this article is that this information can change how you think about DIY Projects.


