Renovation doesn’t have to feel like jumping into chaos. With a simple, repeatable process, you can turn one room at a time into a space that actually works for your life. This guide walks you through a realistic, step‑by‑step path that DIY‑minded homeowners can follow without getting overwhelmed. No fancy jargon, no “TV makeover” timelines—just practical moves that keep your project on track.
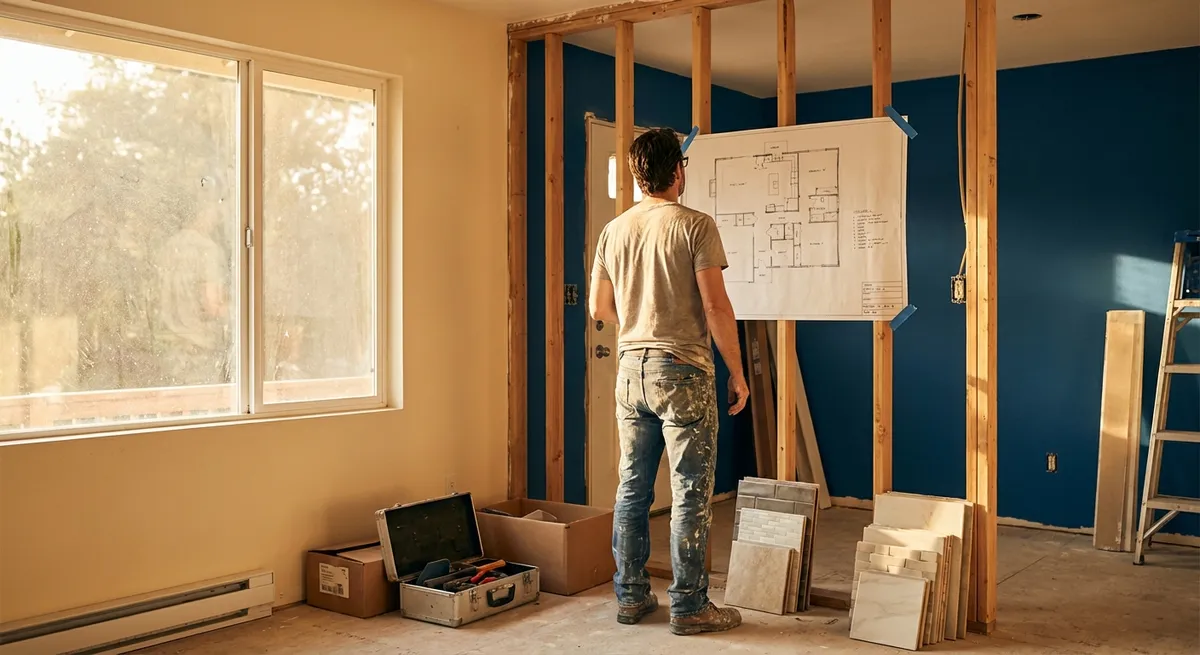
Step 1: Turn Vague Ideas into a Simple Renovation Plan
Most projects go sideways before any tools come out—usually because the plan lives only in your head.
Start by defining exactly what is changing in the room and what is staying. Write down the problems you want to fix (bad lighting, no storage, damaged floor, awkward layout) and the result you want (brighter, easier to clean, better workspace). This keeps you focused when you’re tempted to add “just one more thing.”
Collect 5–10 reference photos that match your house’s reality—similar size, ceiling height, and natural light—rather than huge inspiration homes. Note materials in those photos: painted drywall, LVP flooring, shaker cabinets, matte black hardware, etc. That list becomes a rough materials roadmap.
Next, sketch a basic floor plan with measurements. Include window and door locations, outlet positions, and any fixed items like radiators or built‑ins. You don’t need drafting skills: graph paper and a measuring tape are enough. This helps avoid buying cabinets that don’t fit or lights that end up in the wrong spot.
Finally, decide scope and sequence: are you doing cosmetic changes only (paint, fixtures, trim) or touching electrical/plumbing and possibly permits? Write a simple line‑by‑line scope in order: demo → rough work → drywall/patching → floors → paint → trim → fixtures → final clean. This list will guide your timeline and budget later.
Step 2: Build a Realistic Budget and Timeframe (Not a Fantasy One)
A solid plan is useless if your budget and schedule aren’t anchored in reality.
Start by listing every visible item in the finished room: flooring, trim, light fixtures, switches and plates, outlets, door hardware, paint, tile, cabinets, counters, shelving, and any new furniture. Then add the “invisible” items people forget: joint compound, screws, caulk, primer, sanding sponges, roller covers, drop cloths, and tool rentals.
Research local pricing for your main materials and add them to a basic spreadsheet or notes app. For anything structural, electrical, or plumbing‑related, price out at least one licensed pro quote even if you think you’ll DIY—this gives you a cost comparison and a backup plan if you hit a wall. Build in a contingency of 10–20% for surprises like damaged subfloor, outdated wiring, or hidden leaks.
For time, triple your first estimate if you’re a beginner. A “weekend paint job” often becomes two weekends once you include prep, patching, drying time, and cleanup. Break the job into blocks of work that fit into your actual life: “Friday: tape and prep; Saturday: ceilings and first coat walls; Sunday: second coat and trim.” Protect at least one rest evening to avoid burnout.
Finally, check any permit requirements on your city or county website before you start opening walls or moving plumbing. Unpermitted work can cause problems with insurance claims and future home sales. If in doubt, call your local building department—they usually answer basic questions for free and can point you to written guidelines.
Step 3: Prepare the Room Like a Jobsite, Not a Storage Unit
A clean, organized workspace is what separates smooth projects from constant frustration.
Start by completely clearing the room whenever possible. Move furniture to another space or into the center of the room and cover it with plastic sheeting. Remove wall art, shelves, curtain rods, outlet covers, and switch plates. If you’re doing dusty work like sanding or demo, tape plastic over doorways and vents to limit dust spreading through your home.
Protect surfaces you’re keeping. Use rosin paper or thick cardboard on floors you don’t plan to replace, and painter’s tape to hold it in place along edges. For countertops or built‑ins, use a combination of plastic and moving blankets. Label anything you remove with painter’s tape (e.g., “north wall outlet cover”) so it goes back in the right spot without guesswork.
Set up a simple staging area just outside the room if you can: one spot for clean materials, one for tools, and one for trash and debris. Keep a large contractor‑grade trash bag or bin in the room so scraps don’t pile up on every surface. A small folding table or even a piece of plywood across saw horses makes a good cutting and assembly station.
Before you start any work, confirm you have your basic safety gear where you’ll actually use it: safety glasses, hearing protection, a dust mask or respirator when sanding or cutting, and work gloves for demo. Keep a basic first‑aid kit nearby for minor cuts and scrapes.
This level of prep takes time, but you only do it once—and it pays off every single work day that follows.
Step 4: Tackle Demo and Repairs Without Creating New Problems
Demo is the flashy part of renovation, but it’s also where a lot of expensive mistakes happen. Slow down here.
If you’ll be opening walls, ceilings, or floors, locate and turn off power to the circuits in that area at the breaker panel and test outlets and switches to confirm they’re dead. For any plumbing work, find and test shutoff valves. Take photos before you start tearing things apart; they’re invaluable for remembering wiring routes, stud locations, and old framing.
When removing trim, cabinets, or fixtures you might reuse, work methodically with a pry bar and utility knife, cutting any caulk lines first to reduce damage to surrounding surfaces. Label each piece and set related hardware (screws, brackets) in clearly marked bags or containers. Keep fasteners with the item they came from as often as possible.
As surfaces are exposed, inspect for hidden issues: soft or discolored subfloor, signs of water leaks, cracked or overloaded electrical boxes, mold, or pest damage. Address these problems now. Patching a small plumbing leak or replacing a bad section of subfloor during renovation is far cheaper than repairing finished work later.
Make repairs before any cosmetic work. This is the time to sister damaged joists, add blocking for future wall‑mounted items (like TV brackets or heavy shelving), upgrade old outlets to GFCI where needed, and bring sketchy wiring up to current standards with a licensed electrician if you’re not qualified. Fixing the structure and systems first makes every later step more durable.
Keep demo controlled: cut drywall in manageable sections, bag debris as you go, and vacuum frequently with a shop‑vac. Fewer trips to the dumpster and less airborne dust means a safer, more workable space.
Step 5: Rebuild in Layers, From Rough Work to Finished Details
Rebuilding is where the room starts to look intentional. The key is to follow a logical order so you’re not undoing your own progress.
Start with rough‑in work: framing changes, electrical updates (adding or moving outlets, switches, or recessed lights), and plumbing shifts (new fixture locations, shutoff valves). Get inspections if they’re required in your area before closing anything up. Take photos of wiring and pipes in walls and ceilings for future reference.
Next, close and smooth surfaces. Hang new drywall or patch existing walls and ceilings. Apply joint compound in thin layers, allowing each to dry fully before sanding. Use a bright work light at an angle to spot ridges or low spots. Prime all new or heavily patched areas—primer helps topcoat paint adhere and reveals flaws you might miss on bare compound.
Once walls and ceilings are ready, move to flooring. Whether you’re installing LVP, tile, or hardwood, follow manufacturer instructions for expansion gaps, underlayment, and acclimation time. Keep cuts clean at doorways and undercut trim where needed for a tight look. After flooring, install baseboards and any new trim so they sit on top of the finished floor, not behind it.
Now tackle paint and finishes. Cut in along ceilings, trim, and corners, then roll large areas. Two coats of quality paint often cover better and last longer than three coats of bargain paint. Caulk gaps at trim and along built‑ins for a seamless look, wiping with a damp finger or sponge as you go. Replace outlets, switches, and cover plates with new ones if the old are stained or mismatched—it’s a small cost that makes the room feel finished.
Finally, install fixtures and details: light fixtures, hardware, shelving, mirrors, towel bars, and any wall‑mounted storage. Look back at your original plan and problem list: did you actually solve each one? Adjust furniture layout, add task lighting where needed, and don’t rush to overfill the room. The most successful renovations are often the ones with a little breathing room left in the design.
Conclusion
A renovation doesn’t have to be a giant, stressful mystery. When you break it into clear steps—plan, budget, prep, demo and repair, then rebuild in layers—you give yourself room to learn as you go without wrecking your home or your schedule. Start with one room, keep your scope realistic, and treat each project as practice for the next. Over time, you’ll build both a better house and real confidence in what you can tackle yourself.
Sources
- [U.S. Consumer Product Safety Commission – Home Maintenance and Safety Tips](https://www.cpsc.gov/Safety-Education/Safety-Guides/home) - Guidance on staying safe during home projects, including electrical and general safety considerations
- [U.S. Department of Energy – Energy Saver: Home Improvement & Repairs](https://www.energy.gov/energysaver/home-improvement) - Covers planning energy‑efficient upgrades and how to think about improvements over time
- [National Association of Home Builders – Remodeling Basics](https://www.nahb.org/other/consumer-resources/remodeling-your-home) - Overview of remodeling planning, budgeting, and working with contractors
- [International Association of Certified Home Inspectors – Structural Issues in Houses](https://www.nachi.org/structural-designs-older-homes.htm) - Explains common structural concerns you may uncover during demo
- [Cornell University Cooperative Extension – Lead in Homes](https://ecommons.cornell.edu/items/41876869-4e10-4d18-8d47-41e3a008df5a) - Important information about dealing with potential lead paint in older houses
Key Takeaway
The most important thing to remember from this article is that this information can change how you think about Renovation.


