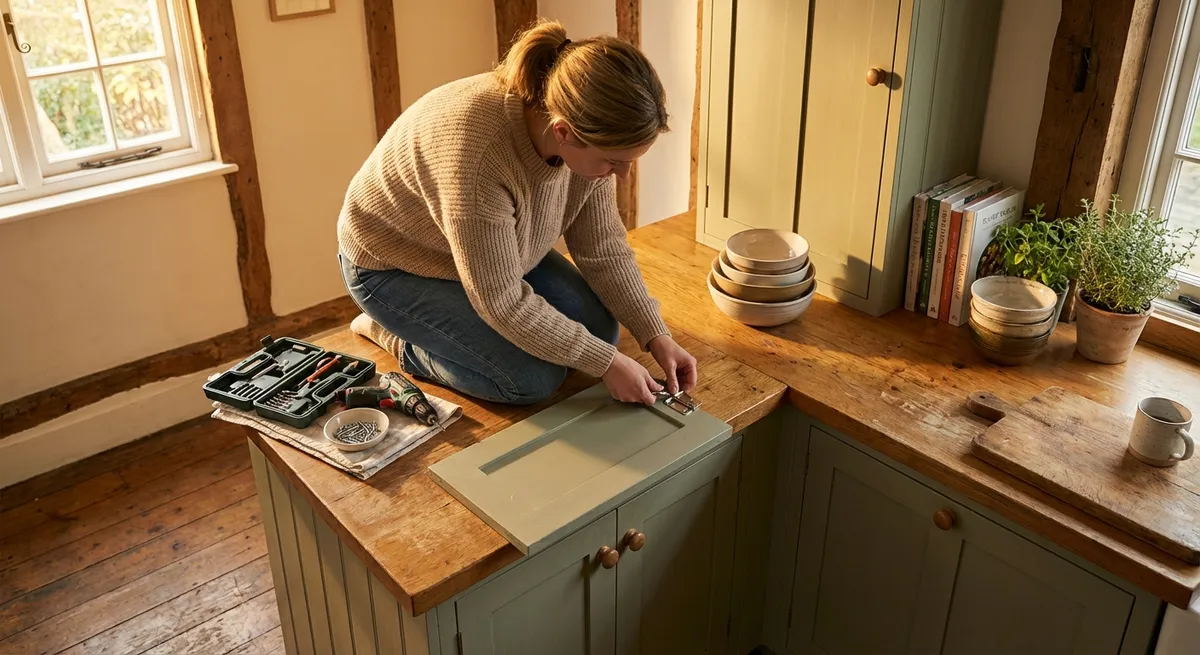
Most DIY projects get attention when they’re flashy. But the work that actually makes your home feel solid, quiet, and easy to live in is usually the boring stuff no one posts on Instagram. This guide focuses on those practical, low-drama upgrades—projects you can knock out yourself with basic tools and a clear plan.
Below are five step-by-step projects that improve comfort, safety, and long-term value without requiring a full workshop or a contractor.
1. Install a Solid, Safe Grab Bar in the Shower
Good for: Safety, aging-in-place, guests, resale value.
Tools & Materials
- Stud finder
- Drill and drill bits (masonry bit if drilling into tile)
- Level
- Tape measure
- Pencil
- Stainless steel grab bar with mounting hardware (screws rated for structural use)
- Silicone caulk (bath rated)
Step-by-Step
Decide placement with real-world testing
Stand in the shower and mimic entering, exiting, and turning. Mark where your hand naturally reaches. Common heights: 33–36 inches from the floor for horizontal bars, but prioritize your grip comfort.
Find and confirm studs
Use a stud finder to locate studs behind the shower wall. Mark both edges of the stud and then the center. Double-check by measuring: studs are usually 16 inches on center. A grab bar must be anchored into framing or approved specialty anchors—never just drywall.
Mark screw locations with a level
Hold the grab bar where you want it. Use a level to ensure it’s straight (or intentionally angled if you prefer). Mark the screw holes with a pencil. Double-check each mark lands on the stud center if possible.
Drill carefully through tile or wall surface
If drilling tile, use a glass/tile or masonry bit, start slow, and don’t use hammer mode. Apply light, steady pressure to avoid cracking. Once through tile, switch to a wood bit for the stud. Test-fit the bar to confirm alignment.
Mount, caulk, and test the bar
Secure the bar using the provided stainless screws, tightening firmly but not over-torquing. Apply a thin bead of silicone around the escutcheon plates where they meet the wall to prevent water intrusion. After 24 hours of cure time, test the bar by pulling with your body weight, not just your hand.
2. Seal Door Gaps to Stop Drafts and Noise
Good for: Energy savings, comfort, reducing dust and insects.
Tools & Materials
- Tape measure
- Utility knife or scissors
- Screwdriver or drill
- Door sweep (for the bottom gap)
- Adhesive weatherstripping (foam, rubber, or silicone)
Step-by-Step
Identify exactly where air is leaking
On a windy day or with HVAC running, close the door and run your hand around the edges to feel for drafts. At night, you can shine a flashlight from one side of the door—if you see light through gaps, air is moving there too.
Measure gap sizes before buying materials
Measure the gap at the bottom and along the sides/top. Note if the floor is level or sloped under the door; this affects which type of door sweep you choose. Bring these measurements when buying materials.
Install or replace the door sweep
Remove any old sweep. Hold the new sweep against the bottom of the door with the door closed; it should lightly touch the threshold without dragging hard. Mark screw holes, pre-drill if necessary, then fasten. Test the door several times and adjust until it closes smoothly.
Add weatherstripping to the jambs
Clean the door frame (jamb) so the adhesive will stick. Starting at the top, peel and stick the weatherstripping along the jamb so it compresses slightly when the door closes, but doesn’t force the door out of alignment. Work your way down both sides.
Test with paper and adjust
Close the door on a sheet of paper at different positions around the frame and try to pull it out. You want light resistance—if the paper slides out with zero friction, the seal is weak. If it tears or can’t be removed, the seal is too tight; reposition or use thinner weatherstripping.
3. Replace an Old Thermostat With a Programmable Model
Good for: Lower utility bills, comfort, basic smart-home upgrade.
> Note: Always follow the manufacturer’s instructions and local codes. If anything about your HVAC wiring is confusing or looks unsafe, stop and call a pro.
Tools & Materials
- New programmable or smart thermostat (compatible with your system)
- Small screwdriver set
- Tape labels or masking tape and pen
- Smartphone (for photos and setup)
Step-by-Step
Turn off power at the breaker
Don’t rely on just turning off the thermostat. Locate your HVAC breaker (or furnace/air handler breaker) and switch it off. Confirm the thermostat no longer powers on.
Remove the old thermostat cover and label wires
Gently pop off the front cover. Before loosening any wires, take a clear, close-up photo of the wiring. Then label each wire by its terminal letter (R, W, Y, G, C, etc.) using tape. This step is non-negotiable—it saves you from guesswork later.
Detach the old base and inspect the wall opening
Unscrew the base and pull it gently off the wall, feeding wires through without dropping them back inside. If needed, tape the bundle of wires to the wall above the hole to keep them accessible. Note whether there’s a “C” (common) wire if your new thermostat needs one.
Install the new mounting plate and reconnect wires
Use the new plate as a template to mark holes. Ensure it’s level, then secure it to the wall using appropriate anchors if there’s no stud. Pull wires through the opening in the plate and attach each one to the matching terminal on the new thermostat base, using your labels and the manual.
Power up, configure, and test modes
Snap the new thermostat face onto the base. Turn the breaker back on. Follow the on-screen or app-based setup for system type and schedules. Test heating, cooling, and fan modes one at a time. Confirm the system responds within a few minutes of changing the set temperature.
4. Quiet a Squeaky Floor from Above
Good for: Reducing noise, making floors feel solid, preventing long-term looseness.
> This works best on wood subfloors under carpet, laminate, or hardwood. If you have access from below (like an unfinished basement), that’s often even easier—but this method assumes you don’t.
Tools & Materials
- Stud finder (with joist detection) or joist locator method
- Tape measure
- Pencil
- Special anti-squeak floor screws (e.g., trim-head or breakaway-floor screws)
- Drill/driver
Step-by-Step
Find the joists under the squeak
Use a stud finder in joist mode or measure from a known joist (e.g., along a wall where you can find one). Floor joists are typically 16 inches on center. Walk around and note where the squeak is loudest; that’s usually where subfloor has loosened from the joist.
Mark screw lines along joists
Once you’ve found two joists, measure their spacing to map out the rest. Snap a chalk line or mark screw lines with a pencil along these joists through the squeaky area. You’re aiming to re-secure the subfloor to the joist beneath.
Use the right screws for your floor covering
For carpet: look for special anti-squeak screws with heads that snap off below the carpet surface. For hardwood or laminate: use trim-head screws and plan to fill or hide the tiny holes. Make sure screw length is enough to reach deep into the joist without punching through below.
Drive screws where the squeak is worst
Start at the loudest point and work outward. Drive screws directly through the floor into the joist below along your marked line. For carpet-specific systems, use the provided tool to break off the screw heads below the surface. For hard floors, countersink slightly to make filling easier.
Test and fine-tune
Walk the area after every few screws. If the squeak is reduced but not gone, add more screws along the joist line on either side of the problem spot. Don’t overdo it—spaced roughly every 6–8 inches in the worst areas is usually plenty.
5. Swap Out a Builder-Grade Faucet for a Better One
Good for: Daily usability, water savings, visual upgrade.
> If your shutoff valves are corroded or don’t close fully, replace those first or contact a plumber. Don’t start a faucet swap you can’t shut off.
Tools & Materials
- Adjustable wrench and/or basin wrench
- Bucket or shallow pan
- Towels
- Plumber’s putty or silicone (as directed by faucet manufacturer)
- New faucet (with supply lines if not integrated)
Step-by-Step
Clear the cabinet and shut off water
Remove everything from under the sink. Close both hot and cold shutoff valves by turning clockwise until snug. Open the faucet to confirm water stops flowing; a slow drip for a few seconds is normal as the lines empty.
Disconnect water supply lines
Place a bucket or pan under the valves. Use an adjustable wrench to loosen the nuts connecting the supply lines to the shutoff valves, then to the faucet. Allow residual water to drain into the pan.
Loosen mounting hardware and remove the old faucet
From under the sink, locate the nuts or brackets holding the faucet to the sink or countertop. A basin wrench helps in tight spaces. Remove these and gently lift the old faucet out from above. Scrape away old sealant or putty from the sink surface.
Dry-fit and seal the new faucet base
Some faucets include a gasket; others require plumber’s putty or silicone. Follow the manufacturer’s instructions—using putty when silicone is specified (or vice versa) can cause leaks or damage some materials. Set the faucet in place and loosely secure it from below so you can still adjust alignment.
Tighten, reconnect, and flush the lines
Center the faucet and tighten mounting hardware firmly but not excessively. Connect supply lines to the shutoff valves, then to the faucet (hot on left, cold on right). Slowly open the shutoff valves while checking for leaks. Remove aerator from the new faucet and run water for 30–60 seconds to flush debris, then reinstall the aerator.
Conclusion
The most satisfying DIY work isn’t always dramatic. It’s the small, solid improvements that make your home easier to use, quieter, safer, and less wasteful every single day. If you steadily tackle projects like these—with attention to planning, measuring, and safety—you’ll end up with a house that feels less like a project and more like a well-tuned tool you live in.
Pick one of these upgrades, block out an afternoon, and do it properly. The results will quietly pay you back every time you turn on a faucet, walk across a floor, or close a draft-free door.
Sources
- [U.S. Department of Energy – Weatherstripping](https://www.energy.gov/energysaver/weatherstripping) - Practical guidance on sealing air leaks around doors and windows for energy efficiency
- [U.S. Department of Energy – Thermostats](https://www.energy.gov/energysaver/thermostats) - Explains how programmable and smart thermostats can reduce energy use and how to use them effectively
- [Consumer Product Safety Commission – Preventing Falls in the Home](https://www.cpsc.gov/s3fs-public/204.pdf) - Safety recommendations, including proper use of grab bars and other fall-prevention measures
- [Mayo Clinic – Fall Prevention: Simple Tips to Prevent Falls](https://www.mayoclinic.org/healthy-lifestyle/healthy-aging/in-depth/fall-prevention/art-20047358) - Discusses home modifications like grab bars to improve safety
- [Energy Star – Air Sealing Your Home](https://www.energystar.gov/campaign/seal_insulate/air_sealing) - Covers why and how to air seal for comfort and lower utility bills
Key Takeaway
The most important thing to remember from this article is that this information can change how you think about DIY Projects.


