Renovating isn’t just about picking pretty finishes. If you don’t plan around how you actually use your home, you end up with a space that looks great in photos but feels awkward in real life. This guide walks you through a practical, step‑by‑step approach to planning a renovation that supports your daily routines, not fights them.
Whether you’re updating a single room or half your house, these five steps will help you think like a builder and a homeowner at the same time.
Step 1: Map How You Use Your Space Today
Before you swing a hammer, figure out what’s truly not working. Most renovation mistakes come from skipping this part.
Spend a week paying attention to your routines in the area you want to update. Notice where you drop bags, where clutter piles up, and where you constantly bump into furniture or family members. Walk through your typical day and write down exact pain points: “no outlet near the desk,” “tripping over dog bowls by the back door,” “nowhere to fold laundry,” “kitchen too dark at night.”
Take photos during normal use, not just when the room is tidy. These snapshots show you where storage is missing and traffic jams happen. Print them or load them into a note-taking app and mark them up with arrows and labels: “need light here,” “this corner wasted,” “door swings into path.”
Then, list what actually works well. Maybe the natural light at one end of the room is perfect in the mornings, or a particular wall is great for a TV because of glare. These “do not mess with” features help you avoid creating new problems while solving old ones.
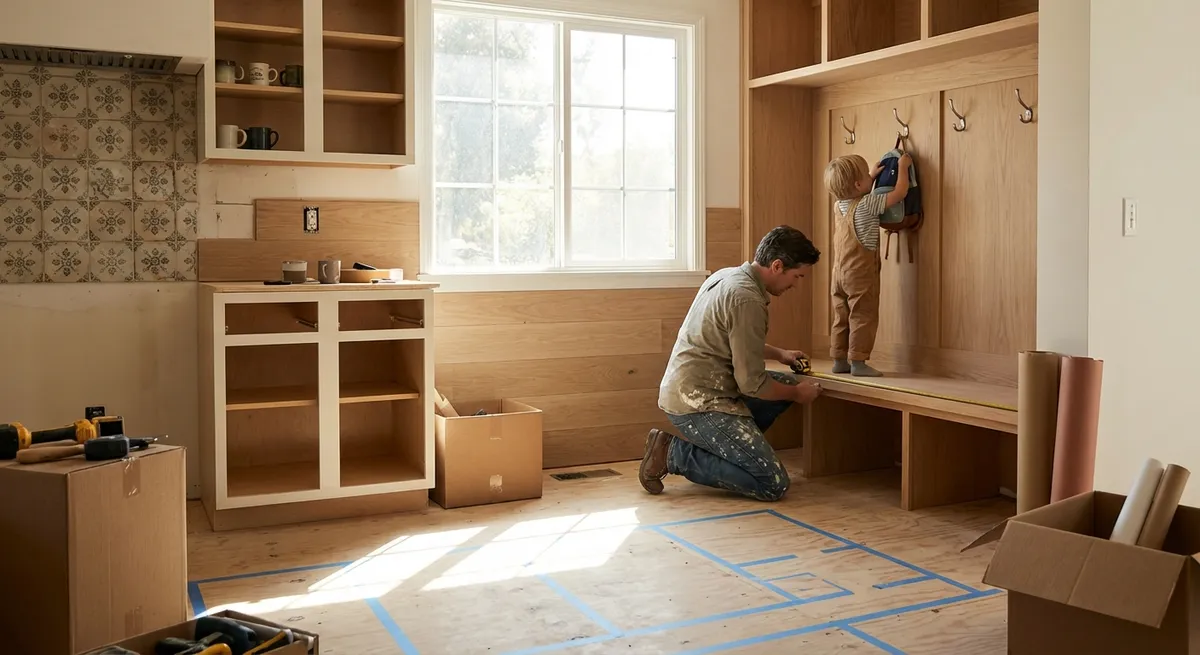
DIY tip: Use painter’s tape on the floor to outline ideas—like a wider hallway, relocated island, or bigger entry bench—to see how they’ll affect movement before you commit to any plans.
Step 2: Turn Pain Points Into a Simple Renovation Plan
Once you know what’s broken in your space, you can define what you’re really renovating for. “Make it look nice” is too vague; “better lighting for working from home and more closed storage to hide kids’ toys” is a workable goal.
Group your notes into a few categories like:
- Layout and traffic flow
- Light and electrical
- Storage and organization
- Comfort (noise, temperature, seating)
- Safety and accessibility
For each category, write a clear outcome you want. For example:
- “Clear walking path from front door to kitchen with no obstacles.”
- “Enough outlets for chargers and small appliances at counter height.”
- “Enclosed storage for everyday clutter so surfaces can stay mostly clear.”
- “Less echo and noise transfer between living room and bedroom.”
This turns random frustrations into a simple scope of work. Now you can prioritize. Mark each item as:
- Must‑have (solves a daily problem or safety issue)
- Nice‑to‑have (improves comfort or looks)
- Future‑upgrade (can be added later without tearing things apart again)
DIY tip: Keep your “must‑have” list short and specific—3–7 items. That list is your north star when the budget gets tight or decisions start to spiral.
Step 3: Sketch a Realistic Layout Before You Touch the Walls
With your goals set, sketch how the room could physically change. You don’t need design software—graph paper and a tape measure go a long way.
First, measure the room and draw it roughly to scale. Include:
- Wall lengths and ceiling height
- Window and door locations, including which way doors swing
- Existing outlets, switches, and vents
- Fixed elements like radiators, fireplaces, or structural posts
Next, think about “zones” instead of just furniture: entry zone (shoes, coats), work zone (desk, outlets), cooking zone (range, prep, cleanup), relax zone (seating, lighting). Place these zones where they make the most sense based on your pain points. For example, if the entry always clogs up, dedicate more wall space to hooks and a bench, or shift storage away from the direct door swing.
Use your earlier painter’s tape trick on the floor and walls to test ideas. Outline:
- A larger doorway to improve flow between rooms
- A built‑in bench or cabinet depth
- A different location for the dining table or island
- A new wall, half wall, or opening
As you sketch, keep some basic “real‑world” rules in mind:
- Leave at least 36" (about 90 cm) for main walkways.
- Plan 24"–30" (60–75 cm) of clear space between furniture and walls where people pass frequently.
- In kitchens, keep the “work triangle” (sink, stove, fridge) relatively compact so you’re not walking laps.
DIY tip: If you’re considering moving or removing any wall, mark its location and label it clearly: “maybe remove,” “maybe open doorway,” etc.—this will matter in the next step when you check what’s structural.
Step 4: Decide What’s DIY‑Friendly and What Needs a Pro
Not every part of a renovation should be done yourself. Sorting this early prevents expensive mistakes and keeps your project safer and more realistic.
Start by identifying any work that might affect:
- Structural elements (load‑bearing walls, beams, major supports)
- Electrical systems (new circuits, panel upgrades, work inside walls)
- Plumbing changes (moving sinks, toilets, or major drains)
- Gas lines or HVAC systems
If your plan touches any of these, pause and gather information. Look at your home’s original plans if you have them, or check any visible framing (in the basement, attic, or unfinished areas) to see which walls line up with beams or posts. Load‑bearing walls typically run perpendicular to floor joists and/or carry other walls above—but you should never assume. This is where a structural engineer or experienced contractor is worth the consult fee.
Next, check local building codes and permit requirements on your city or county website. Many areas require permits for:
- Structural changes
- New electrical circuits or major rewiring
- Moving or adding plumbing fixtures
- Window changes, especially egress windows or anything affecting the exterior
Make a simple two‑column list:
- “DIY‑possible”: Painting, trim, flooring installation, simple built‑ins, replacing light fixtures (on existing boxes and circuits), installing pre‑hung interior doors, basic tiling.
- “Pro‑required or heavily advised”: Structural changes, panel work, new circuits, major plumbing re‑routes, exterior envelope changes, anything gas‑related.
DIY tip: Even if you hire a pro for complex work, you can often save money by handling demolition, painting, simple prep, and final touch‑ups yourself—as long as you coordinate the timing so you’re not in each other’s way.
Step 5: Build a Practical Sequence and Timeline (and Actually Stick to It)
Once you know what you’re doing and who’s doing it, organize the work in a logical order. Jumping around leads to rework and frustration.
A typical interior renovation sequence looks like this:
Plan and permits
Finalize your layout sketch, fixture/appliance choices, and materials. Apply for any needed permits. Order items with long lead times (specialty lighting, custom cabinets, custom windows, or doors).
Prep and protection
Clear the room. Cover floors you’re keeping with rosin paper or drop cloths. Seal off other areas with plastic and painter’s tape to limit dust. Set up a basic “landing zone” for tools and materials.
Demolition
Remove what’s being replaced: old flooring, cabinets, non‑load‑bearing partitions, damaged drywall. Shut off power and water where needed, and test wires with a non‑contact voltage tester before touching anything. Work slowly and keep anything you might reuse (doors, trim, hardware).
Rough work (behind the walls)
This is where pros typically come in for structural, electrical, and plumbing changes. They’ll frame new walls or openings, pull wires, and run pipes. Inspections usually happen at this stage if you have permits.
Close‑up and surfaces
Install insulation (if needed), hang and finish drywall, then prime. Do major tiling and flooring next (some pros prefer flooring before cabinets, others after—follow manufacturer recommendations).
Trim, cabinets, and fixtures
Install baseboards, window/door trim, cabinets, interior doors, and built‑ins. Mount lighting, switches, outlets, and plumbing fixtures on existing approved rough‑ins.
Paint and finishing touches
Caulk gaps in trim, paint walls and trim, install hardware, hang shelves, and put outlet/switch covers back on. Move furniture back in—with your earlier “traffic flow” and zones in mind.
Build yourself a simple timeline using this sequence. Don’t try to do every task in a single weekend; instead, assign realistic blocks:
- Weeknight tasks: patching, sanding, caulking, priming small areas
- Weekend tasks: demolition, flooring, larger painting jobs, cabinet installation
DIY tip: Plan at least one “buffer weekend” in your schedule. Something will take longer than expected—drywall mud, tile mortar, inspection delays, or a back‑ordered part. A built‑in buffer keeps your project from feeling like it’s forever “almost done.”
Conclusion
A renovation that actually supports your daily life doesn’t start with paint colors; it starts with a clear look at how you move, work, cook, and relax at home. By mapping real‑world problems, turning them into focused goals, sketching practical layouts, separating DIY tasks from pro‑only work, and following a logical sequence, you avoid most of the stress that gives renovations a bad name.
You don’t need to remodel everything at once. Pick one space, run it through these five steps, and treat it as your “practice project.” Each time you do this, you’ll get faster at seeing what your home needs—and better at creating spaces that feel as good as they look.
Sources
- [U.S. Department of Housing and Urban Development – Rehab a Home Guide](https://www.hud.gov/program_offices/housing/sfh/rehab/rehabguide) - Overview of planning and executing home rehabilitation projects, with emphasis on scope and budgeting
- [U.S. Consumer Product Safety Commission – DIY Home Improvement Safety](https://www.cpsc.gov/safety-education/safety-guides/home/diy-home-improvement) - Key safety practices for homeowners doing their own renovation work
- [U.S. Department of Energy – Home Remodeling and Energy Efficiency](https://www.energy.gov/energysaver/home-remodeling) - How to incorporate energy-efficient upgrades into renovation plans
- [National Association of Home Builders – Home Remodeling FAQs](https://www.nahb.org/consumers/home-ownership/faq-remodeling-your-home) - Guidance on working with contractors, permits, and typical remodeling processes
- [University of Missouri Extension – Home Remodeling: Planning and Managing Projects](https://extension.missouri.edu/publications/gp270) - Educational resource on planning, scheduling, and managing home renovation projects
Key Takeaway
The most important thing to remember from this article is that this information can change how you think about Renovation.


