Renovation doesn’t have to mean tearing your house apart or draining your savings. With a clear plan and a realistic scope, you can make real, visible upgrades without feeling overwhelmed. This guide walks you through a practical, step‑by‑step renovation roadmap that DIY enthusiasts can actually follow—focusing on safety, sequence, and smart decisions instead of TV-style makeovers.
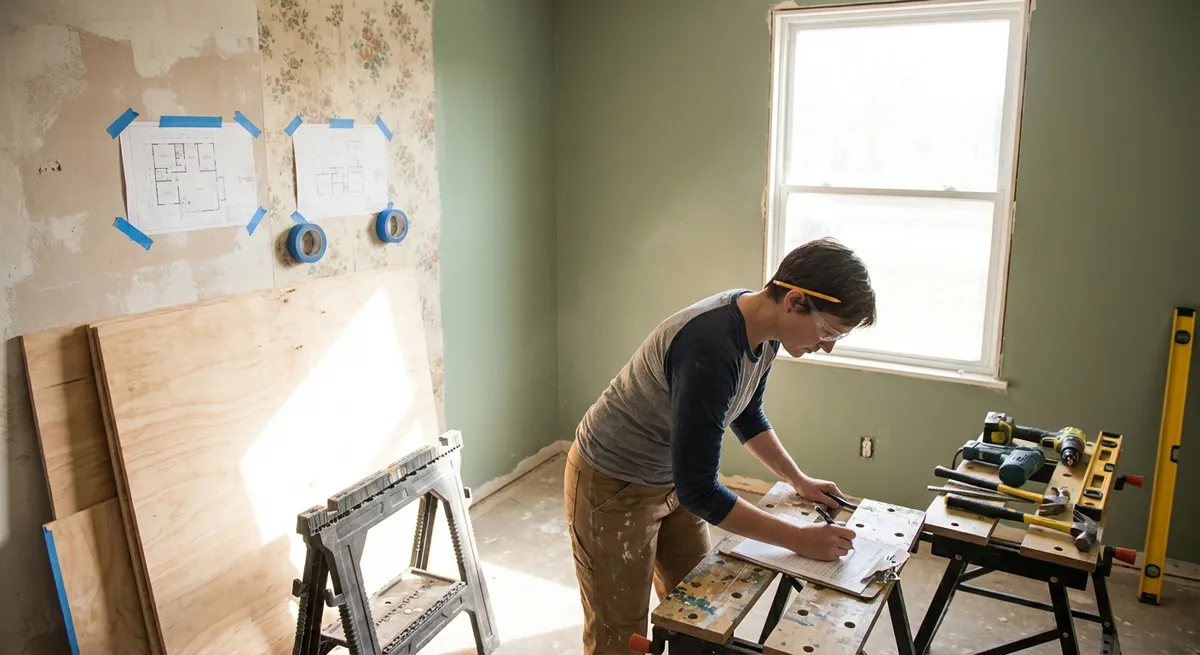
Step 1: Define the Renovation Scope Before You Touch a Tool
Jumping straight into demolition is how projects stall and budgets explode. Start by deciding exactly what you’re changing and why.
Begin with a clear problem list: what frustrates you daily (bad lighting, no storage, damaged surfaces) and what’s just “nice to have.” Rank everything by importance and impact on how you live, not how it will look in photos.
Measure each space carefully—walls, windows, doorways, ceiling height, and existing fixtures. Take photos and notes. These details matter later when you’re buying materials or checking if something will actually fit.
Set a realistic total budget, then break it into categories: materials, tools you may need to buy or rent, permits (if required), and a 10–20% buffer for surprises. If the numbers don’t work, adjust scope now rather than halfway through the project.
Finally, decide what you truly can do yourself and what should be outsourced (electrical panel upgrades, major structural work, complex plumbing). Being honest at this stage will keep your project safer, faster, and cheaper in the long run.
Step 2: Build a Sequence That Makes Sense (and Stops Rework)
Renovation has a logic to it. Doing tasks in the wrong order leads to wasted time and materials. A simple project sequence helps everything go smoother.
Start with anything hidden behind walls or under floors: electrical, plumbing, and insulation. These are messy and often require inspections, so they must happen before you close anything up.
Next, handle structural changes: moving walls, adding or enlarging doorways, reinforcing floors, or framing new openings. Once structure and utilities are done, you can move on to surfaces.
Tackle drywall repair or installation, then priming and painting. It’s much easier to paint before installing trim, cabinets, or flooring. Protect any installed items with plastic sheeting and painter’s tape if you need to come back later for touch-ups.
Install flooring after messy overhead work is complete to avoid damage and dust. Then finish with baseboards, trim, doors, cabinets, and fixtures. Treat caulking, touch‑up paint, and hardware installation as your final “polish” step to avoid redoing them multiple times.
Plan your work from the furthest room in the house toward the main entry whenever possible. This reduces traffic through freshly finished areas and helps keep dust and debris contained.
Step 3: Prep the Space Like a Pro (This Is Where DIY Projects Are Won or Lost)
Most DIY frustration comes from skipping prep. Taking time to prepare your space and materials makes every step faster and safer.
Start by clearing the room as completely as possible—furniture, rugs, wall hangings, outlet covers, and vent grilles. What can’t be removed should be tightly covered with plastic sheeting and painter’s tape, not just draped loosely.
Protect your floors with thick builder’s paper, cardboard, or reusable floor protection, especially if you’re not replacing them. Secure edges with tape to avoid trip hazards. If you’re sanding, cutting, or doing dusty work, seal doorways with plastic and zipper openings or overlapping flaps to keep dust contained.
Locate studs, pipes, and wires behind walls using a stud finder and mark them with painter’s tape. This helps prevent costly mistakes when you drill, cut, or mount anything heavy.
Set up a dedicated cutting or work area, preferably outside or in a garage, with proper lighting and a stable work surface. This keeps dust and debris out of your main living space and lets you work more efficiently.
Lastly, prepare materials ahead of time: acclimate flooring or wood products per the manufacturer’s instructions, inspect boards or tiles for defects, and pre‑prime or pre‑paint trim where possible. Doing this before install day saves time and reduces errors.
Step 4: Execute the Core Work Safely and Systematically
Once the plan and prep are locked in, you can start the visible work. A systematic approach helps keep your project on track and your home livable.
Begin with safety every single day: wear eye protection, hearing protection when using loud tools, and a dust mask or respirator for sanding, cutting, or working with chemicals. Keep a basic first‑aid kit and fire extinguisher nearby. If you’re working in an older home, be aware of potential lead paint or asbestos and follow local guidelines before disturbing old materials.
When you’re doing multiple tasks (patching, painting, installing fixtures), batch similar work together. For example, patch all walls first, let them dry, then sand all at once instead of room by room. This kind of grouping prevents constant tool changes and cleanup.
Follow manufacturer instructions closely for adhesives, mortars, paints, and finishes—especially drying and curing times. Trying to rush drying (for example, walking on floors too soon or installing hardware on tacky paint) is a common way DIY projects end up looking sloppy.
Work from top to bottom: ceilings first, then walls, then trim, then floors. Gravity is not your friend; let drips and dust fall onto areas you haven’t finished yet instead of ruining work you just completed.
Take frequent measurements and test fits. For example, dry‑fit tile layouts, place cabinets in position before fastening, and double‑check door clearances over new flooring. Slowing down to confirm fit saves you from ripping out expensive materials.
Step 5: Finish, Inspect, and Maintain Your Work for the Long Haul
Once the big tasks are complete, the “finish and check” stage is what makes your renovation feel professional rather than “almost done.”
Walk the space in good daylight and again at night with lights on. Look from different angles for paint misses, uneven caulk lines, gaps in trim, or visible screw heads. Use a sticky note or painter’s tape to mark all the spots that need touch‑up so you can fix them in one pass.
Seal gaps where air, moisture, or pests could enter: around windows, doors, baseboards on exterior walls, and plumbing penetrations. Use the right caulk or sealant for each area (paintable latex for trim, appropriate exterior or kitchen/bath sealants where needed).
Label breakers, shutoff valves, and any new controls you’ve added. Take photos of walls before you close them up if you’ve run new wiring or plumbing; store them digitally with notes. These “before it’s closed” photos make future repairs or upgrades far easier.
Create a simple maintenance checklist based on your new finishes. For example, note how often floors should be resealed, what cleaners are safe for your countertops, and when to check caulk or grout lines. Put calendar reminders in your phone so the space stays in good shape instead of slowly degrading.
Finally, document your project: costs, materials, paint colors, and model numbers of fixtures and appliances. This helps with future matching, warranty claims, and can even support resale value if buyers ask for renovation details.
Conclusion
Renovation doesn’t have to be chaotic or reserved for professionals. By defining a clear scope, following a logical sequence, preparing thoroughly, working safely, and finishing with careful inspection, you can transform your space in a controlled, predictable way. Focus on planning as much as doing, respect the limits of what should be DIY vs. hired out, and treat each step as part of a system—not a random to‑do list. That’s how you move your home from dated to done without burning out halfway through.
Sources
- [U.S. Department of Energy – Home Weatherization & Energy Upgrades](https://www.energy.gov/energysaver/energy-saver) – Guidance on improving home efficiency, useful when planning insulation, window, and sealing upgrades during renovation
- [U.S. Consumer Product Safety Commission – Home Electrical Safety Checklist](https://www.cpsc.gov/safety-education/safety-guides/electrical-safety/home-electrical-safety-checklist) – Important safety considerations for any renovation involving electrical work
- [Occupational Safety and Health Administration (OSHA) – Construction Safety & Health Topics](https://www.osha.gov/construction) – Best practices for safe tool use, protective equipment, and worksite safety during DIY renovations
- [U.S. Environmental Protection Agency – Lead Renovation, Repair and Painting (RRP) Program](https://www.epa.gov/lead/renovation-repair-and-painting-program) – Critical information for anyone renovating homes built before 1978
- [This Old House – Home Improvement & Remodeling Projects](https://www.thisoldhouse.com/home-improvement) – Practical, project-based examples and tutorials that align with many of the steps outlined above
Key Takeaway
The most important thing to remember from this article is that this information can change how you think about Renovation.


