Renovation doesn’t have to mean tearing your house apart or draining your savings. The real payoff comes from planning clearly, choosing upgrades that matter, and executing in a way you can realistically finish. This guide walks you through a practical, step‑by‑step process to move from “someday” ideas to real, visible improvements in your home.
Step 1: Map Your House’s Trouble Spots Like a Pro
Before you spend a dollar, get clear on what actually needs attention.
Walk through your home with a notebook or notes app and look at every room as if you’re a buyer seeing it for the first time. Check walls, floors, ceilings, windows, doors, outlets, and fixtures. Note anything that feels worn, unsafe, inefficient, or just annoys you daily. Group issues into categories like “safety,” “function,” and “appearance” so you can see patterns. Take photos of each problem area; they’ll help when you’re researching fixes, buying materials, or asking for advice. At the end, you should have a simple list of what’s wrong, where it is, and how much it bothers you. This list becomes the backbone of your renovation plan.
Practical tip: Give each item a quick score from 1–3 for urgency (1 = low, 3 = high). You’ll use this in the next step.
Step 2: Turn a Long Wish List Into a Realistic Project Plan
A renovation only moves forward when you decide what happens first, what waits, and what you’re skipping (for now).
Start by circling anything in your list that affects safety or basic function: leaks, electrical issues, loose railings, soft spots in floors, or signs of moisture. These come before paint colors and pretty finishes. Next, look at energy and comfort: drafty windows, poor lighting, or a lack of storage in spaces you use daily. Then consider purely cosmetic changes like dated trim or mismatched hardware. Combine your urgency score with impact: ask, “If I fix this, will I notice the improvement every day?” Use that to rank your top 5–10 projects. For each top project, quickly note the likely scope (minor repair, cosmetic update, or major work) so you’re not surprised later.
Practical tip: Commit to tackling projects that fit your current skills plus one small stretch. Leave major structural, gas, or main electrical panel work to licensed pros.
Step 3: Build a Simple Budget and Timeline That Won’t Collapse
A renovation without numbers usually ends in half‑finished rooms and frustration.
Start with your monthly budget: how much can you realistically set aside for home improvements without touching your emergency fund? Next, assign a rough cost range to each of your top projects. Check big‑box store websites for current prices on materials like lumber, flooring, paint, and fixtures. Add 15–20% on top as a buffer for mistakes, extra supplies, or price changes. With that total in mind, choose what you can actually afford to do in the next 3–6 months. Then assign each project a realistic time window: evenings, weekends, or a specific month. Be honest about your schedule; it’s better to finish a small project fully than stall halfway through a big one.
Practical tip: If a single project would eat your entire budget, break it into phases—demo and rough repairs first, then finishes later when cash allows.
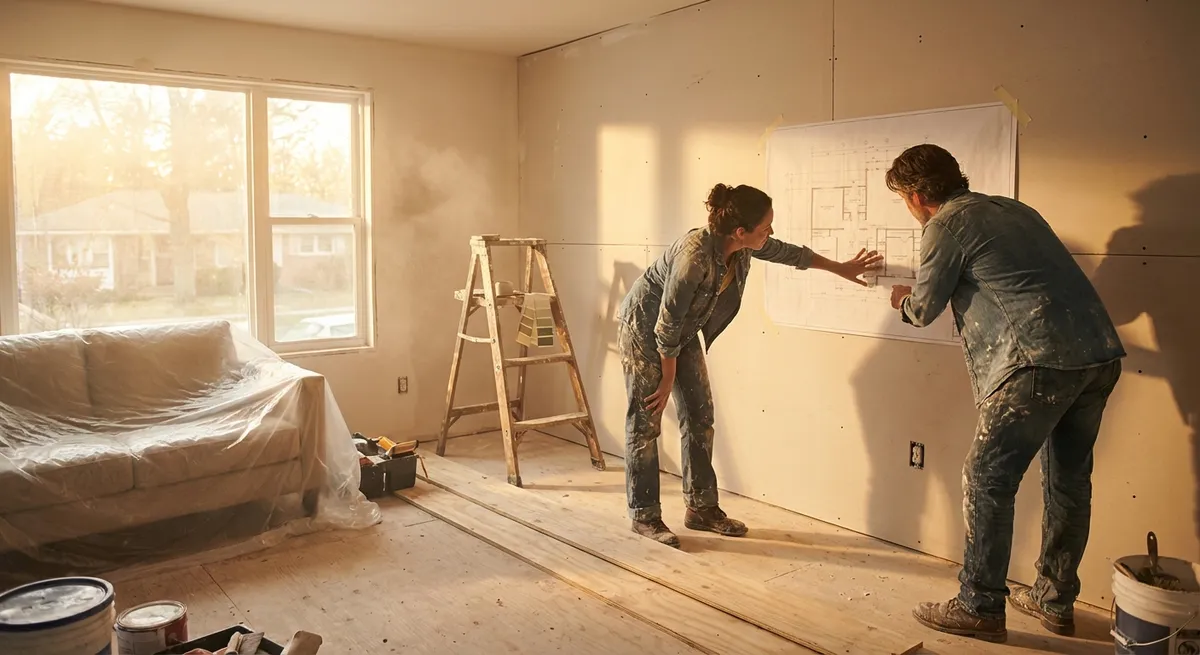
Step 4: Design the Details Before You Buy a Single Board
Decisions made in the aisle usually lead to mismatched finishes and returns.
For each chosen project, sketch a simple “before and after” plan. This doesn’t need to be artistic—boxes, lines, and labels are enough. Measure the space carefully and write the dimensions directly on your sketch. Decide on materials with durability in mind: for example, moisture‑resistant paint in bathrooms and kitchens, or scratch‑resistant flooring in entryways. Create a mini “spec sheet” for each room: wall color, trim color, flooring type, hardware finish, and lighting style. Keep it consistent: mixing three metal finishes in one small space often looks messy. Save product links and photos in one folder or note so you can compare prices and verify that everything coordinates before you checkout.
Practical tip: Order samples when possible—swatches of paint, flooring, or tile. Check them in your actual lighting (day and night) to avoid surprises.
Step 5: Prepare Your Workspace and Tools for Smooth DIY Execution
Most DIY frustration comes from poor setup, not lack of skill.
Before starting any project, clear the room or at least create a clean, protected work zone. Move furniture away from walls, cover floors with drop cloths or rosin paper, and tape off areas you don’t want damaged or painted. Lay out all your tools and materials before you start: tape measure, level, drill/driver, stud finder, safety glasses, dust mask, and appropriate bits or blades for the material you’re working with. Read the instructions on every product—adhesives, finishes, and paints all have specific cure times and conditions. Plan your work around those times so you’re not forced to rush or recoat. Finally, set a simple daily goal (e.g., “patch all holes” or “cut and install baseboards on two walls”) instead of trying to finish the entire room in one shot.
Practical tip: Keep a small “fix kit” handy during any renovation: painter’s tape, utility knife, spackle, sandpaper, wood filler, and touch‑up paint. It’s faster to correct mistakes as you go than to fix them all at the end.
Conclusion
A successful renovation isn’t about doing everything at once; it’s about choosing the right projects, planning them carefully, and executing at a pace you can sustain. When you systematically map your home’s issues, rank them by impact, budget realistically, design on paper first, and set up your workspace well, you’ll avoid most of the common DIY headaches. The result is a home that works better, looks better, and feels finished—one clear, manageable step at a time.
Sources
- [U.S. Department of Energy – Energy Saver: Home Improvement & Repairs](https://www.energy.gov/energysaver/home-improvement-and-repairs) - Guidance on upgrades that improve comfort and energy efficiency, useful for prioritizing projects
- [Consumer Financial Protection Bureau – Budgeting Resources](https://www.consumerfinance.gov/consumer-tools/budgeting/) - Practical advice for setting and managing a renovation budget
- [This Old House – Home Renovation Planning Guide](https://www.thisoldhouse.com/home-finances/21015108/7-steps-to-saving-money-on-a-home-renovation) - Expert tips on planning and sequencing renovation work
- [Lowe’s – Project Planning and Buying Guides](https://www.lowes.com/l/projects/how-to) - Material selection and how‑to guidance for common DIY renovation tasks
- [The Spruce – Home Remodeling Basics](https://www.thespruce.com/home-remodeling-4127680) - Overviews of remodeling steps, timelines, and planning considerations
Key Takeaway
The most important thing to remember from this article is that this information can change how you think about Renovation.


