Turning trash into something beautiful isn’t just for artists anymore. With reclaimed materials going mainstream—thanks to creators like self‑taught American sculptor Brian Mock, who welds old car parts, screws, and scrap metal into gallery‑worthy art—homeowners are starting to look at leftover building supplies in a new way. Instead of sending old wood, metal, and fixtures to the landfill, more people are using them to remodel, refresh, and personalize their homes.
This shift lines up with a bigger trend: renovation costs are still high, supply chains are unpredictable, and interest in sustainable design is climbing. Reuse and upcycling are no longer niche—they’re a practical, budget‑friendly way to update your space right now. If you’ve ever looked at a pile of “junk” in your garage and thought, “There has to be a better use for this,” you’re exactly who this guide is for.
Below is a step‑by‑step walkthrough to help you turn reclaimed materials into durable, safe, and genuinely good‑looking upgrades at home.
1. Start With Smart Sourcing (Without Hoarding Junk)
Before you start pulling nails out of every board you see, be selective. Brian Mock’s sculptures work because he chooses pieces with character that still have structural integrity; you should do the same in your house projects.
First, walk your own property. Check the garage, shed, attic, and basement for leftover renovation supplies: old doors, solid wood shelving, hardwood flooring offcuts, metal brackets, and unused tile. Next, expand your search to local sources: Habitat for Humanity ReStores, architectural salvage yards, municipal recycling centers, and neighborhood “buy nothing” groups. Ask contractors doing demo in your area if you can take good-condition materials they’d otherwise toss—many are happy to avoid disposal fees. As you collect, follow one rule: if it’s rotten, warped beyond flattening, deeply rusted (to the point of flaking), or moldy, skip it. Take clear photos and measurements of anything you do grab so you can plan realistic projects around what you actually have, not what you wish you had.
2. Clean, Deconstruct, and Make Materials “Renovation Ready”
Reclaimed doesn’t mean dirty, unstable, or unsafe. The difference between “junk pile” and “design feature” is the prep work you do before anything hits your walls.
Start with a thorough clean. For wood, use a stiff brush to remove dirt and cobwebs, then wash with a mild detergent solution; let it dry completely to avoid trapping moisture. For metal parts, scrub with a wire brush to remove loose rust and grime, then wipe with mineral spirits if they’re greasy. Deconstruct carefully: pull nails with a cat’s paw or nail puller instead of hammering them through, which can split boards. If you suspect old paint (especially on trim or doors) predates 1978, test for lead before sanding. If it’s positive, either encapsulate with a bonding primer and leave it intact, or hire a pro to remove it safely—don’t dry‑sand it yourself. Finally, stabilize what you plan to reuse: straighten slightly warped boards with clamping and gentle heat (or cut around the worst sections), seal metal with a rust‑inhibiting primer or clear coat, and store everything flat and dry until you’re ready to build.
3. Design Projects Around the Material, Not the Other Way Around
Artists like Mock don’t force scrap to behave like brand‑new stock—they lean into its shape and history. Renovation projects go smoother when you do the same. Instead of designing a perfect Pinterest‑worthy piece and then hunting for reclaimed materials to match, flip the process: look at what you’ve got and let it guide your plan.
Lay your boards, metal pieces, or leftover tiles out on the floor. Measure each piece and note thickness, straightness, and any damage. Then match materials to roles they can actually handle: straight, solid boards are good for shelving, wall caps, or stair treads; shorter pieces are perfect for accent walls, headboards, or cabinet door insets; visually interesting but irregular metal scraps can become brackets, handles, or wall art. Sketch simple layouts using the exact dimensions you have—graph paper or free design apps help here. Aim for designs that minimize tricky cuts and rely on repetition: staggered plank patterns, grid layouts, or framed panels. Before you commit, dry‑fit everything on the floor, just as tile installers do, so you can see the composition and adjust without making a single cut.
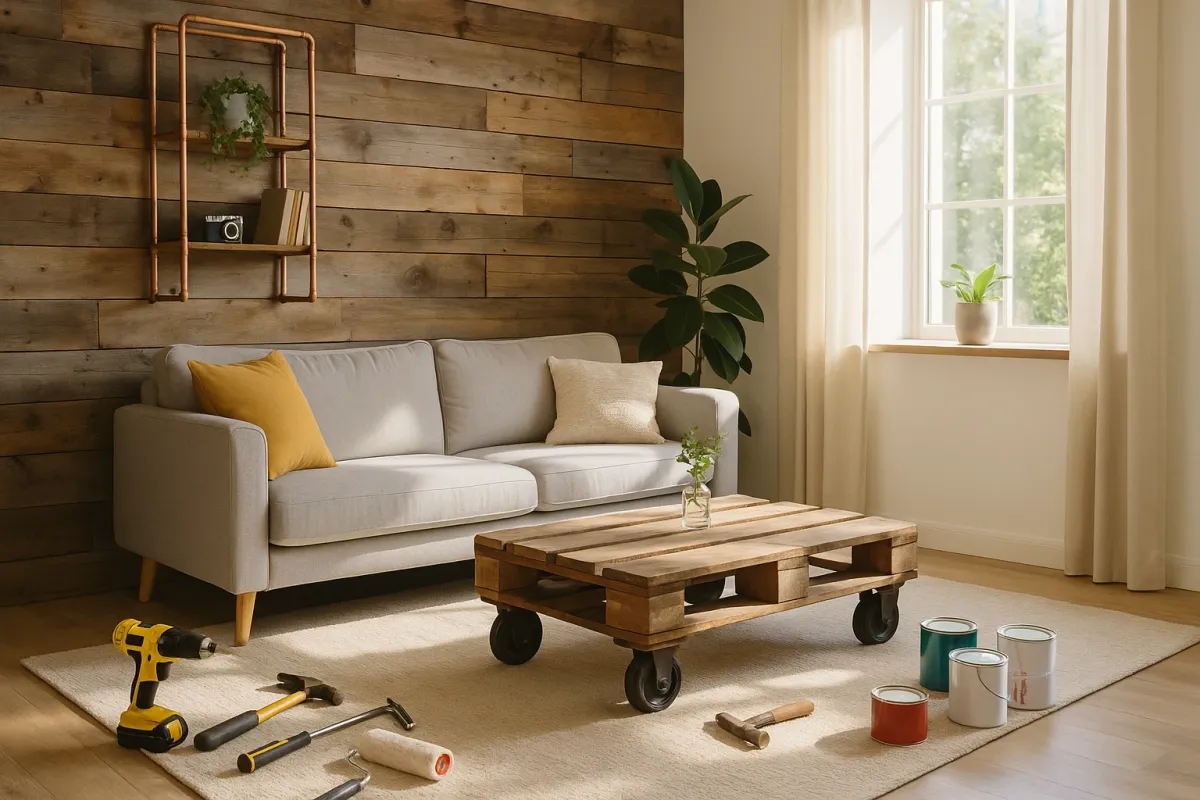
4. Build a Reclaimed Feature Wall That Actually Looks Finished
One of the most impactful (and beginner‑friendly) ways to use reclaimed materials is a feature wall—especially in a living room, entryway, or behind a bed. It’s a direct, practical way to echo the “sculpture from scraps” trend at home without welding tools or a gallery budget.
First, choose the right wall: ideally one that’s visible but not packed with doors and windows, and not the most humid area of your house (skip bathrooms without good ventilation). Locate and mark your studs with a stud finder. Next, mill your boards to similar thickness and width where possible; variation can look great, but big changes in thickness make installation and furniture placement harder. Lightly sand splinters and sharp edges, then decide on a finish: clear coat to preserve patina, stain to unify mixed woods, or paint wash for a softer, modern look. Start installing from a straight reference line—either the ceiling or a level horizontal line snapped across the wall. Use construction adhesive plus brad nails or screws into studs for secure attachment. Stagger joints like brickwork for strength and visual rhythm. Trim the edges with simple 1x boards or metal edge trim to give it a deliberate, built‑in appearance. When you’re done, seal everything with a durable clear finish appropriate to your wood type, so the wall is easy to dust and clean.
5. Turn Metal Scraps and Offcuts Into Functional Hardware and Storage
Metal scraps are where most DIYers hesitate, but you don’t need to be a sculptor or a welder to get value out of leftover steel, aluminum, or iron. With basic tools and smart design, you can turn them into brackets, hooks, and storage that feel custom and high‑end.
Start by sorting your metal: flat bar, angle iron, pipe, and small hardware all have different uses. Flat bar and angle pieces are perfect for open shelving brackets; pipes can become closet rods, towel bars, or supports for wall‑mounted desks. Deburr any sharp edges with a file or flap disc. If you don’t weld, rely on mechanical fasteners: drill holes with a metal‑rated bit, then use bolts, nuts, and washers for joints, or attach directly to studs with structural screws. Before installation, treat surface rust and finish the metal: either paint with a metal primer and enamel, or seal with a clear coat to preserve an industrial look. Build in adjustability: slotted holes or multiple mounting holes give you wiggle room on uneven walls. Verify load capacities—especially for shelves—by using appropriate anchors and tying into studs whenever possible. The goal is simple: pieces that feel like they came from a high‑end design shop, but are built from the same kind of “junk” artists are turning into sculpture.
Conclusion
As more creators turn reclaimed materials into serious art—and as renovation costs and sustainability concerns stay in the spotlight—it makes sense to treat what you already have as a resource, not waste. You don’t need a welding studio or gallery to participate in that movement; you just need a clear process: source selectively, prepare thoroughly, design around the materials, and build with safety and structure in mind.
Whether you’re cladding one wall in old boards, building shelves from scrap metal and offcuts, or just saving a solid wood door from the landfill, each project cuts costs and adds character that store‑bought pieces can’t match. Start small, learn how your reclaimed materials behave, and let each finished upgrade inspire the next one.
Key Takeaway
The most important thing to remember from this article is that this information can change how you think about Renovation.


