A cluttered garage or workspace kills motivation fast. You walk in ready to fix something, then spend 20 minutes hunting for a tape measure or that one bit you always lose. The good news: you don’t need a fancy workshop or thousands in gear to work efficiently. You need a clear setup, the right basics, and a system that keeps everything ready to use.
This guide walks you through a practical, real-world approach to tools and equipment that fits an average home, not a pro shop. Follow the steps and you’ll spend less time searching and more time actually building, repairing, and improving your space.
Build a Core Tool Kit That Actually Matches Your Home
You don’t need every tool you see online. You need the right ones for the kind of home you live in and the projects you actually do.
Think in “core categories” instead of one-off tools:
- Measuring & marking: tape measure, speed square, pencil, level
- Fastening: screwdrivers, drill/driver, basic bit set, adjustable wrench
- Cutting: utility knife, hand saw, hacksaw
- Holding & safety: clamps, work gloves, safety glasses, hearing protection
- Electrical & plumbing basics (if applicable): voltage tester, pliers, pipe wrench or channel locks
Step 1: Match tools to your home and projects
- Walk through your home and list the materials you’re most likely to work with: drywall, wood trim, basic electrical fixtures, faucets, shelving, furniture, etc.
- Circle the top 5–10 tasks you’ve already done or know you’ll tackle soon (e.g., hanging shelves, assembling furniture, fixing loose hinges, patching walls).
Map tasks to tools:
- Hanging shelves → stud finder, drill/driver, level, tape measure, bits - Fixing hinges → screwdriver set, small level - Assembling furniture → hex key set, screwdriver, rubber mallet (optional) 4. Identify missing tools from your current stash and prioritize buying what unlocks the most tasks, not what looks cool. A good cordless drill, for example, enables far more jobs than a specialty sander you’ll rarely use. 5. Set a budget range (for example, “$150–$250 to build my core kit over 2–3 months”) and buy in phases instead of all at once.
Practical tip: Always pay a little more for tools you’ll use constantly (tape measure, drill, screwdrivers) and save on tools you’ll only need occasionally.
Choose Power Tools That Pull Their Weight
Power tools are where people overspend or buy the wrong thing first. A smart starter lineup focuses on three workhorses: a cordless drill/driver, an orbital sander, and a circular saw or jigsaw, depending on your projects.
Step 2: Pick the right power tool platform
- Select one battery system (brand) and commit to it for your cordless tools. Mixing brands means more chargers, more batteries, and more clutter.
Start with a drill/driver kit in your chosen brand that includes:
- 2 batteries - A charger - A basic bit set or case (optional but helpful)
Choose your first cutting tool based on what you build most:
- More sheet goods (plywood, shelving) → circular saw - More curved or detailed cuts (cutouts, furniture mods) → jigsaw 4. Add a random orbital sander if you plan to paint, refinish, or build small furniture. It massively improves finish quality with minimal learning curve. 5. Compare features, not just price: look for brushless motors (longer life, better runtime) and common battery voltage in the 18–20V range for a good balance of power and weight.
Practical tip: Ignore huge combo kits at first. They’re tempting, but often include tools you’ll barely touch. Better to buy a solid drill kit and one or two add-ons that you’ll use frequently.
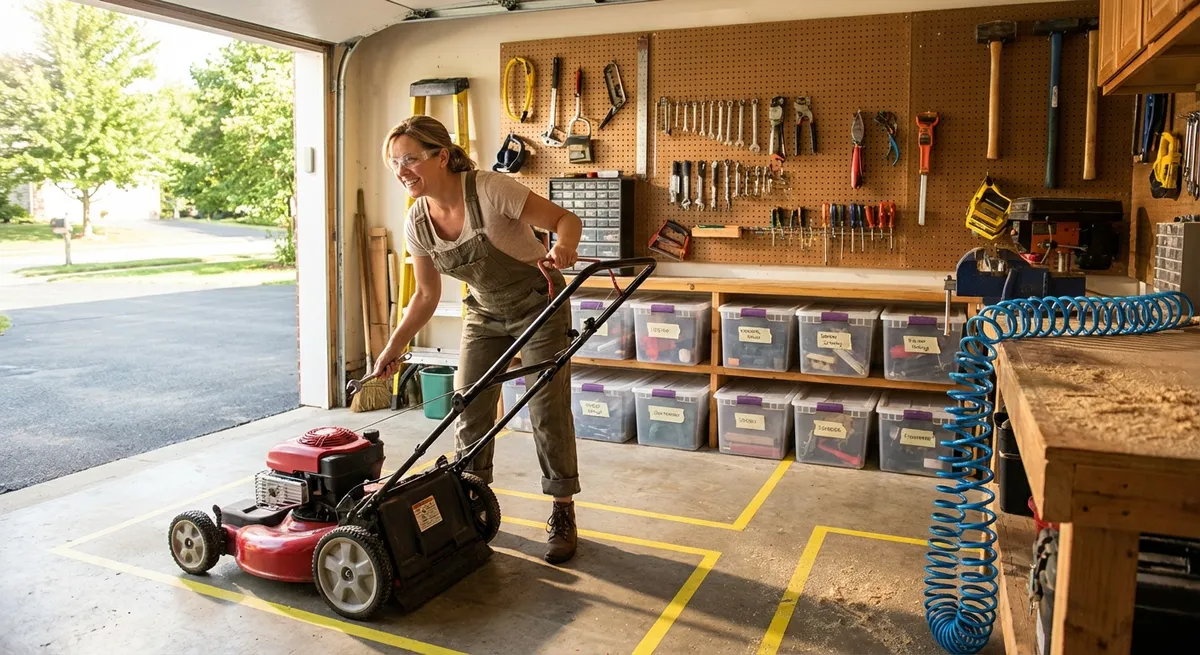
Set Up a Work Area That Keeps You Moving
A good workspace doesn’t have to be big; it has to be safe, stable, and predictable. A folding workbench in a corner beats a full garage filled with random piles.
Step 3: Build a flexible, small-footprint work zone
Pick one primary work surface:
- A sturdy folding workbench, or - A heavy-duty utility table, or - A simple 2×4 and plywood bench (if you’re ready to build one) 2. Establish a “no clutter” rule for that surface. Store boxes, junk, and unrelated stuff somewhere else. This area is for tools and active projects only.
Set up a basic tool triangle around the bench:
- Wall storage (pegboard or shelves) for hand tools and small organizers - A small rolling cart or toolbox below/nearby for frequently used tools - A clear floor zone for movement and for supporting long boards or materials
Add basic lighting directly over the work area:
- LED shop light - Clamp-on light or strong task lamp if you’re in a dim space 5. Lock in safety as part of the setup: keep safety glasses, hearing protection, dust masks, and a small first-aid kit within arm’s reach of your bench—visible, not buried.
Practical tip: If you’re working in a shared space like a driveway or multi-use room, use a folding bench and a rolling toolbox so you can set up and break down quickly.
Store and Organize So Tools Stay Easy to Reach
Good storage is about finding the right tool in under 10 seconds, not about looking like a magazine spread. Your system should be simple enough that tired-you will still put things back.
Step 4: Create a “find it fast” storage system
Divide your tools into three groups:
- Everyday tools (screwdrivers, tape measure, drill, level, utility knife) - Task-specific tools (plumbing, electrical, painting) - Rarely used or seasonal (roofing gear, extra anchors, specialty bits)
Give everyday tools a dedicated, visible home:
- Pegboard with hooks and outlines, or - A top drawer in your main toolbox, or - A wall-mounted rail or magnetic strip for your most-used items
Use small, labeled containers for hardware and consumables:
- Clear bins or drawer organizers for screws, nails, anchors, and blades - Label by size and type: “Wood Screws 1 ¼ in,” “Drywall Anchors,” “Razor Blades” 4. Build one “grab-and-go” kit: a small tool bag or box with your true basics (tape measure, screwdriver set, utility knife, pliers, small level, stud finder). This is your house-call kit for quick fixes anywhere at home.
Do a 5-minute reset at the end of each project:
- Put tools back in their home - Toss obvious trash and worn-out blades - Restock consumables you ran low on (screws, sandpaper, batteries)
Practical tip: If you keep losing one specific item (like tape measures), buy an extra and park it in two fixed spots—one in your grab-and-go kit, one at your main bench.
Maintain and Upgrade Tools So They Last
Even budget-friendly tools can last for years with basic maintenance. A dull blade or dead battery wastes time, burns wood, and can be unsafe. Treat maintenance like part of the job, not an afterthought.
Step 5: Build a simple maintenance and upgrade routine
Create a small maintenance kit with:
- Dry lubricant or light machine oil (for hinges, pliers, etc.) - Cleaning rags - A stiff brush or old toothbrush - Extra blades (utility knife, saw if applicable) - A sharpening stone or file for hand tools 2. After dusty jobs (sanding, cutting, drilling), brush off tools and blow out vents on power tools with a dry cloth or compressed air (if available). Dust build-up shortens motor life.
Check cutting edges regularly:
- Replace utility blades as soon as they start tearing instead of cutting - Swap or sharpen dull circular saw and jigsaw blades - Touch up chisels and hand tools with a sharpening stone
Monitor batteries intelligently:
- Store them in a dry, moderate-temperature spot - Avoid fully draining them whenever possible - Mark the date you bought them on the battery with a marker so you know their age
Upgrade one weak link at a time instead of replacing everything:
- That flimsy tape measure that always retracts badly - The cheap screwdriver that strips fasteners - The bargain drill that struggles through basic tasks
Practical tip: If a tool annoys you every single time you use it, it’s usually worth upgrading. You’ll feel the difference on every project.
Conclusion
A productive DIY setup isn’t about owning every tool—it’s about having the right tools, in the right place, ready to use. When your drill is charged, your blades are sharp, and your basics are easy to grab, you’ll start (and finish) more projects with less frustration.
Start small: build a core kit that matches your home, choose one cordless platform, carve out a dependable work area, and commit to a simple storage and maintenance routine. Once your tools and equipment are truly “fix ready,” your home projects stop feeling like a battle and start feeling like progress.
Sources
- [Occupational Safety and Health Administration (OSHA) – Hand and Power Tools](https://www.osha.gov/hand-power-tools) - Official safety guidance on selecting, using, and maintaining tools
- [Consumer Product Safety Commission – Power Tool Safety](https://www.cpsc.gov/safety-education/safety-guides/tools-and-home-maintenance/power-tool-safety) - Federal safety tips and best practices for home users of power tools
- [Family Handyman – Essential Tools for the Homeowner](https://www.familyhandyman.com/list/tools-every-homeowner-should-have/) - Practical overview of core tools useful in most homes
- [Lowe’s – How to Build a Workbench](https://www.lowes.com/n/how-to/build-a-workbench) - Step-by-step instructions for a simple, sturdy workbench setup
- [Home Depot – Choosing the Right Power Drill](https://www.homedepot.com/c/ab/buying-a-power-drill/9ba683603be9fa5395fab900c3d0a2c) - Detailed guidance on picking a drill/driver and understanding features
Key Takeaway
The most important thing to remember from this article is that this information can change how you think about Tools & Equipment.


