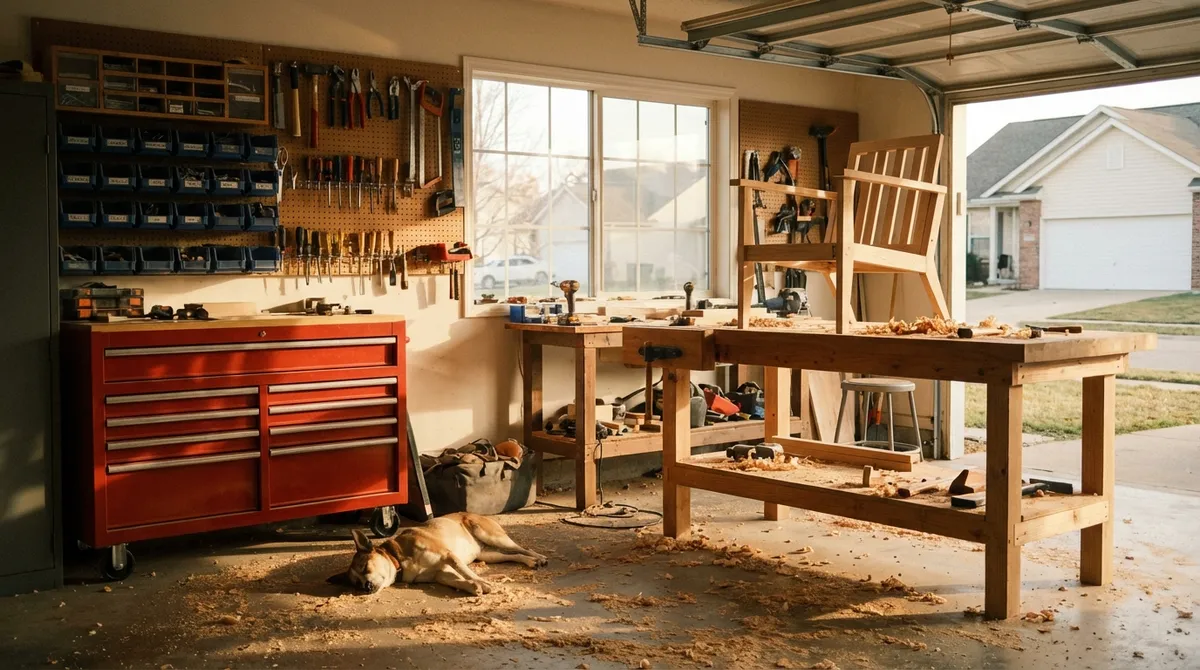
A cluttered tool corner can turn a simple 20‑minute project into an hour of hunting for the right bit, blade, or wrench. The good news: you don’t need a massive shop or expensive cabinets to get control of your tools. With a few smart setups and habits, your garage or workspace can start working for you instead of against you.
This guide walks through five clear, step‑by‑step setups focused on tools and equipment that make home projects faster, safer, and a lot less frustrating.
Step 1: Map Your Workspace Before You Move a Single Tool
Before you hang a pegboard or buy storage bins, you need a simple layout plan. This avoids constant redoing and gives every tool a logical “home.”
- Identify your main work zone.
Stand where you usually work (workbench, sawhorses, or a clear section of floor). This is your primary zone—high‑use tools should live within one or two steps of this spot.
- Mark three basic areas: cut, assemble, store.
- Cutting zone: where you use saws, utility knives, and cutting tools.
- Assembly zone: where you drill, clamp, glue, and fasten.
- Storage zone: where most tools and materials live when not in use.
These can overlap, but naming them helps you decide where tools belong.
- Note electrical outlets and lighting.
Mark on paper where outlets and lights are. Power‑hungry tools (miter saw, table saw, shop vac, charger station) should be placed near outlets to avoid permanent extension‑cord spaghetti.
- Measure your clear wall space.
Measure length and height of walls you can use for storage. This tells you how much pegboard, shelving, or French cleat track you can realistically add.
- Sketch a quick layout.
On paper or your phone, draw your space and roughly place:
- Workbench
- Saw station (if you have one)
- Storage wall
- Rolling tools (shop vac, tool cart)
Don’t aim for perfect—aim for “good enough to start.” You can adjust later.
Practical tip: Keep anything you grab almost every project (tape measure, utility knife, pencil, adjustable wrench, drill/driver) within arm’s reach of your main work zone. Treat these like “desk supplies” instead of “garage tools.”
Step 2: Build a Simple, High-Visibility Hand Tool Wall
Instead of stuffing screwdrivers, pliers, and wrenches into a drawer, move your most-used hand tools onto a visible wall. This makes it obvious when something’s missing and faster to grab mid‑project.
- Choose your system: pegboard or French cleats.
- Pegboard: cheaper, easy to install, flexible hooks; great for lighter tools.
- French cleats: stronger, modular wooden strip system; better for heavier tools and custom holders.
- Mount a backing board if your wall is uneven.
If you have bare studs or rough concrete, screw a sheet of 1/2" or 3/4" plywood to the studs. Then mount pegboard or cleat rails on top. This creates a solid base and gives hooks more holding power.
- Group tools by task, not by type.
Instead of lining up every screwdriver together, group them around how you actually work. Example clusters:
- Measurement + layout: tape measure, square, level, pencils, marking knife.
- Fastening: screwdrivers, nut drivers, small ratchet set, impact bits.
- Cutting + shaping: chisels, utility knives, handsaws, rasps, files.
This way, when you grab one, the related tools are right there.
- Outline or label key tools.
For tools you can’t afford to misplace (favorite screwdriver, specific pliers, specialty wrench), add:
- A marker outline on pegboard, or
- Small labels under hooks
This makes missing tools obvious and speeds up end‑of‑day cleanup.
- Leave 20–30% of the wall empty.
Don’t fill every hook immediately. Reserve space for tools you’ll add later or for seasonal gear. A wall that’s 70–80% full is easier to keep organized than one that’s jammed tight.
Practical tip: Put tools you use monthly or less on the outer edges or higher up. Daily or weekly tools should be between shoulder and waist height, near the center of the board.
Step 3: Create a Corded & Battery Tool Station That Stays Ready
Power tools are only useful if you can find them, the batteries are charged, and cords aren’t tangled in a bin. A compact charging and storage station can live on a single shelf or small wall section.
- Pick a dedicated power tool corner.
It needs:
- At least one free outlet (two is better)
- A small work surface or shelf
- Enough vertical space for chargers and tools
- Mount a power strip with surge protection.
- Battery chargers
- Small bench tools (if applicable)
- A task light if the area is dim
- Build or buy a simple battery rack.
Screw a quality, surge‑protected strip to the wall or side of a cabinet. Plug in:
Use a scrap 2×4 or plywood strip and drill shallow holes or cut slots that match your battery base. Mount it under a shelf or on the wall. This keeps batteries visible, off the bench, and not rolling around in drawers.
- Assign a “home” for each powered tool.
For drill/driver, impact driver, sander, jigsaw, etc.:
- Store them either handle‑out on a shelf or in simple slots under a shelf.
- Keep the main bits or accessories (drill bits, driver bits, sanding discs) in a small labeled box or organizer directly beside them.
- Set a basic charging rule.
- Put all batteries back on the rack.
- Put any low batteries on a charger.
- Unplug chargers when batteries are full (or use chargers with automatic shutoff).
At the end of any project day:
This habit keeps tools ready without leaving chargers running nonstop.
Practical tip: If you use multiple brands, label batteries and chargers with painter’s tape and a marker (e.g., “RYO,” “DEW,” “MAK”). It sounds obvious, but it saves time when you’re mid‑project and grabbing the wrong one for the third time.
Step 4: Set Up a Safe Cutting & Dust Control Zone
Sanding, cutting, and grinding create dust that ends up everywhere—especially in small garages that share space with cars, storage, or laundry. A simple cutting and dust setup improves safety and cleanup.
- Choose a “dirty” side of the garage.
Place saws, sanding tools, and your shop vac in one area, ideally near the garage door for ventilation. If possible, orient the cutting direction so dust moves toward the open door, not deeper into the house.
- Dedicate a rolling base or folding stand.
If you use a miter saw, small table saw, or benchtop tool:
- Put it on a mobile base or folding stand so you can roll it out for big cuts.
- Mark on the floor where it normally parks so it doesn’t slowly creep into your parking or walkway space over time.
- Connect dust control wherever possible.
- If you have a shop vac, buy inexpensive adapters to connect it to saws and sanders.
- Keep a short hose and a dedicated “tool” nozzle just for power tool dust, separate from the big floor nozzle.
- Add a basic PPE (safety) hook or bin.
- Safety glasses
- Hearing protection
- Dust masks or respirator
- Work gloves
Right next to your cutting zone, hang or store:
Keeping them at arm’s reach makes you far more likely to actually use them.
- Create a fast cleanup routine.
After cutting or sanding:
- Vacuum the tool first (blade area, table, fence).
- Vacuum the floor in a 3–4 foot radius.
- Wipe surfaces with a slightly damp rag to pick up fine dust.
Done every time, this keeps the rest of the garage much cleaner and protects your tools from grit.
Practical tip: If you don’t have a dust extractor, a decent shop vac with a fine dust or HEPA filter is a big upgrade over a basic filter bag. It captures more fine particles and keeps the motor from clogging.
Step 5: Build a “Grab-and-Go” Project Kit You Can Move Anywhere
Walking back and forth to the garage for missing tools is one of the fastest ways to stretch a simple job into an all‑day event. A mobile kit solves that, whether it’s a toolbox, tote, or small rolling cart.
- Choose your carrier based on how you work.
- Open tote: best if you like to see everything at once and usually work nearby.
- Closed toolbox: better if tools travel in your car or truck.
- Rolling cart: ideal if you do multiple tasks around the house in one day.
- Decide what “must‑haves” belong in every project.
Pack one of each of these categories:
- Add project‑specific mini kits in small boxes.
Use small plastic cases or zip bags labeled clearly—examples:
Keep these in or beside the main kit so you can grab the ones you need.
- Keep duplicates of your “lost constantly” items.
Add extras of what disappears most:
- Two tape measures
- Extra pencils and markers
- Extra #2 Phillips and flathead bits
This reduces hunting for the one that lives on the bench or in the garage.
- Make restocking part of your cleanup.
After a project:
- Empty your pockets into the kit (bits, small hardware, pencil).
- Toss trash and worn blades.
- Note anything running low (screws, anchors, tape) and add it to a shopping list.
A “ready” kit turns surprise repairs into simple 10‑minute jobs instead of long scavenger hunts.
Practical tip: If you often help friends or family with small jobs, this portable kit is what you grab first. It will handle 80–90% of basic home fixes by itself.
Conclusion
Efficient tool setups aren’t about owning every tool—it’s about being able to find and use what you already have without wasting time and energy. When your workspace is mapped, hand tools are visible, power tools stay charged, dust is under control, and you have a grab‑and‑go kit ready, every home project feels simpler.
Start with one step—often the tool wall or the portable kit—and build from there. Each improvement compounds, making your next repair or weekend upgrade faster, safer, and a lot less frustrating.
Sources
- [OSHA: Hand and Power Tools – General Safety Guidelines](https://www.osha.gov/hand-power-tools) - Covers official safety practices for using and maintaining tools in a home or jobsite environment
- [The Family Handyman – Garage Workshop Ideas](https://www.familyhandyman.com/list/garage-workshop-ideas/) - Practical examples of garage layouts, tool storage, and workbench setups
- [Fine Woodworking – Shop Layout and Design](https://www.finewoodworking.com/category/workshop/shop-layout) - In‑depth guidance on arranging tools, work zones, and storage for efficient workflow
- [Popular Mechanics – How to Build the Ultimate Home Workshop](https://www.popularmechanics.com/home/how-to-plans/how-to/g1289/10-tips-for-your-home-workshop-3/) - Tips on organizing tools, wiring, and basic shop upgrades for DIYers
- [U.S. Consumer Product Safety Commission – Workshop and Tool Safety](https://www.cpsc.gov/Safety-Education/Safety-Guides/Home) - Official recommendations for safe tool use and hazard reduction in and around the home
Key Takeaway
The most important thing to remember from this article is that this information can change how you think about Tools & Equipment.


