A cordless drill is the workhorse of most DIY projects. From hanging shelves to building furniture, it’s usually the first tool you grab—and the one that can slow you down if it’s underpowered, poorly maintained, or just wrong for the job. This guide walks you through how to pick the right cordless drill and keep it running smoothly, with clear, practical steps DIYers can follow at home.
Know What You Really Need From a Cordless Drill
Before you buy (or upgrade) a drill, it helps to be honest about what you actually do—occasional weekend projects, regular builds, or near‑daily use. That answer shapes the size, power, battery system, and budget that make sense.
A light, compact 12V drill is usually enough for basic tasks like assembling furniture, drilling pilot holes, and driving screws into drywall or softwood. If you’re building decks, working with hardwoods, or using larger bits, an 18V/20V (often labeled “20V MAX” in the U.S.) model will handle heavy loads and thicker materials better. Also look at the battery platform: sticking with one brand can save money long‑term, because batteries and chargers are interchangeable across many of their tools. Comfort matters too—if a drill feels off-balance or heavy in the store, it’ll feel worse after 30 minutes over your head.
Step 1: Match Drill Power and Size to Your Projects
Start by aligning the tool with your most common jobs, not the “someday” project you might tackle once.
- Identify your main tasks. List 3–5 things you regularly do or realistically plan to do in the next year: mounting TVs, basic carpentry, deck work, light metal drilling, or DIY furniture builds.
- Choose a voltage range.
- 12V drills: compact, lighter, great for indoor, light-duty work.
- 18V/20V MAX: more torque and speed for framing, deck screws, lag bolts, and larger bits.
- Check torque and speed specs. Higher torque helps with thicker materials and stubborn fasteners. Two-speed gearboxes (low speed/high torque vs high speed/low torque) give you more control.
- Look for a clutch with enough settings. The clutch helps stop overdriving screws and stripping heads. More settings give finer control when working with different materials (like pine vs hardwood vs drywall anchors).
- Test the grip and balance. If possible, hold the drill with a battery installed. It should feel secure but not bulky, and balance well when you extend your arm—especially important for overhead or ladder work.
By intentionally matching the drill to your actual needs, you avoid overspending on a tool that’s more than you’ll use—or underbuying something that struggles with every project.
Step 2: Choose the Right Battery Setup (and Treat Batteries Properly)
A cordless drill is only as useful as its batteries. Understanding your options and caring for them correctly can double their usable life.
- Aim for at least two batteries. One on the drill and one on the charger keeps your projects moving. Single-battery kits are cheaper but often lead to long, frustrating breaks.
- Check battery capacity (Ah rating). Amp-hours (Ah) indicate how long a battery can run. For DIYers, 2.0–5.0Ah is a good range. Higher Ah means longer runtime but more weight.
- Stay within one battery ecosystem. Pick a brand with other tools you’re likely to buy (impact driver, sander, circular saw). Using the same batteries across tools saves cost and storage space.
- Store lithium-ion batteries correctly. Keep them in a cool, dry place—avoid extreme heat (car trunks, attics) and freezing conditions. Don’t store them fully discharged; around 40–60% charge is ideal for long-term storage.
- Avoid complete drain whenever possible. Running the battery to zero repeatedly can shorten its lifespan. When performance drops noticeably, swap batteries instead of forcing it to the last drop.
Good battery habits not only extend battery life but also make your drill more reliable whenever you pull it off the shelf.
Step 3: Adjust the Drill Settings for Cleaner, Safer Results
Many DIY problems—stripped screws, burned wood, broken bits—come from incorrect drill settings rather than “bad tools.” Learning to dial in your drill prevents a lot of frustration.
- Set the direction correctly.
- Forward (usually the arrow pointing ahead) for drilling and driving screws in.
- Reverse for removing screws and backing a bit out of a tight hole.
- Pick the right gear.
- Low speed (1): for driving screws and drilling larger holes where control and torque matter.
- High speed (2): for drilling small holes in wood, plastic, or metal where speed is helpful.
- Use the clutch for screw driving. Start at a lower clutch setting and test on scrap material. Increase until it sinks the screw just below the surface without stripping or burying it too deep.
- Match bit type to the job.
- Wood drill bits (spade or brad-point) for lumber and plywood.
- Masonry bits for brick, concrete, and stone.
- High-speed steel (HSS) or cobalt bits for metal.
- Driver bits (Phillips, Torx, square) that match your screws.
- Keep the drill aligned with the fastener. Hold the drill straight in line with the screw or bit to reduce cam-out (the bit slipping out of the screw head) and wobbling that enlarges holes.
Once you get comfortable with these adjustments, your work looks cleaner, your bits last longer, and you’ll feel more in control of every hole and screw.
Step 4: Maintain Your Drill So It Lasts for Years
Cordless drills usually fail from neglect, not from being “worn out.” A few simple habits keep yours running smoothly and more safely.
- Clean it after heavy use. Wipe down the housing with a slightly damp cloth to remove dust and debris. Use a dry brush or compressed air around vents and the chuck to prevent buildup.
- Inspect the chuck regularly. Open and close it to ensure it moves smoothly and grips the bit evenly. If bits slip often, clean the jaws and check for damage—replace the chuck if it’s worn or cracked.
- Check vents and cooling paths. Blocked vents cause overheating, which shortens motor life. Clear any packed dust from air vents with a soft brush.
- Tighten loose screws on the housing. Over time, vibration can loosen the screws that hold the drill body together. Gently snug them up, but don’t overtighten and strip the plastic.
- Retire cracked or damaged batteries. If you ever drop a battery from a height, inspect it closely; swelling, cracks, or leaking are signs to stop using it and dispose of it according to local recycling rules, not in the trash.
Regular, light maintenance takes only a few minutes and can easily add years to your drill’s useful life.
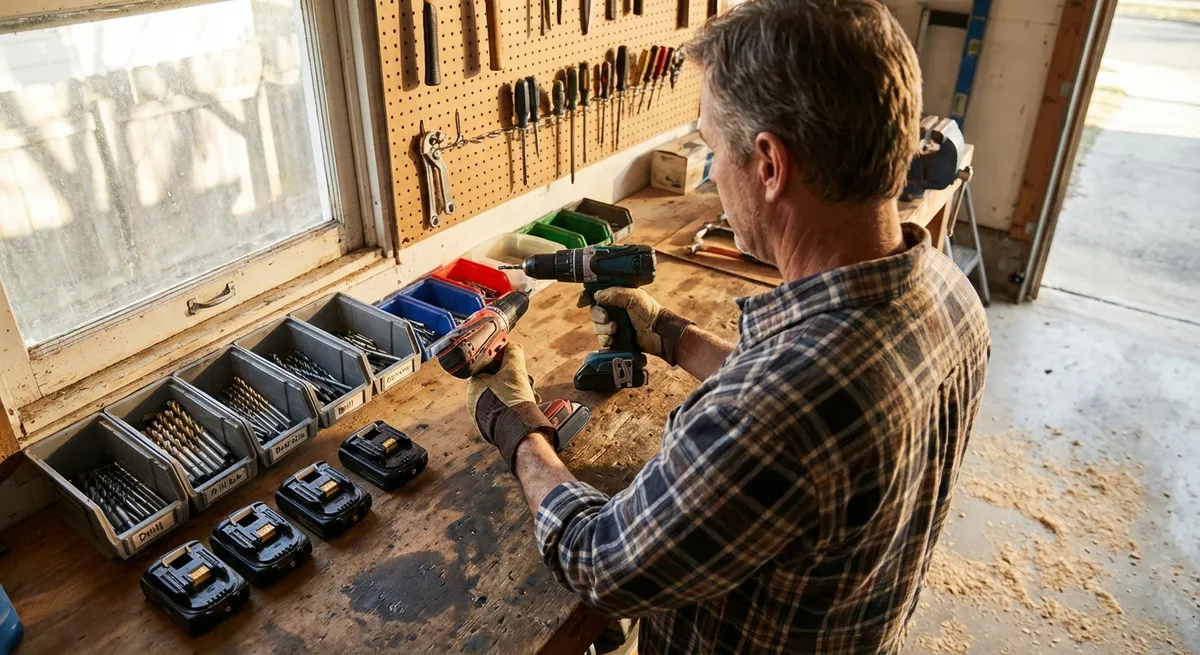
Step 5: Organize and Store Your Drill for Fast, Stress-Free Use
A powerful, well-maintained drill isn’t very helpful if you can’t find it—or its bits—when you need them. Good storage turns your drill into a ready-to-go system instead of a random tool in a pile.
- Create a “drill station.” Dedicate a small section of a shelf, cabinet, or wall to your drill, batteries, charger, and most-used bits. Keeping everything together saves hunt time.
- Mount the charger where you’ll actually use it. If possible, screw the charger to a wall or side of a cabinet near an outlet. Label it so you and anyone else in your home knows exactly what it’s for.
- Use a bit organizer. A simple labeled case, magnetic strip, or small parts box can keep drill bits and driver bits sorted by type and size. Arrange them in the order you reach for them most.
- Store the drill with a battery attached—but not your only one. That makes it grab-and-go, while your spare battery can stay on the charger (if the manufacturer says that’s safe) or on the shelf.
- Keep it out of extreme environments. Avoid leaving the drill in damp basements, uninsulated sheds, or car trunks where moisture, rust, and temperature swings will shorten its life.
A small, organized drill setup not only speeds up individual tasks but also encourages you to tackle more projects because getting started feels easier.
Conclusion
The “right” cordless drill is less about brand hype and more about a good fit: enough power for your typical projects, batteries that keep up, settings you understand, and a little basic care. By choosing wisely, dialing in the controls, maintaining the tool, and storing it thoughtfully, you turn a simple drill into one of the most dependable pieces of equipment in your home. When your drill is ready, you’re more likely to be ready for the next fix or upgrade around the house.
Sources
- [U.S. Department of Energy – Energy Saver: Cordless Tool Batteries](https://www.energy.gov/energysaver/articles/choosing-and-using-batteries-cordless-tools) - Overview of cordless tool battery types and best practices
- [OSHA – Hand and Power Tools Safety](https://www.osha.gov/hand-power-tools) - Guidelines on safe use of powered hand tools, including drills
- [Consumer Reports – Cordless Drill Buying Guide](https://www.consumerreports.org/tools-home-improvement/drills-buying-guide-a3497822735/) - Detailed breakdown of cordless drill features and what to look for when buying
- [Family Handyman – Power Drill Maintenance Tips](https://www.familyhandyman.com/project/how-to-care-for-your-power-tools/) - Practical guidance on cleaning and maintaining power tools
- [Home Depot – Types of Drill Bits](https://www.homedepot.com/c/ab/types-of-drill-bits/9ba683603be9fa5395fab90f87c7a1e) - Explanation of different drill bit styles and recommended uses
Key Takeaway
The most important thing to remember from this article is that following these steps can lead to great results.


