There's nothing more frustrating than tripping over scattered shoes in your entryway or spending precious minutes searching for a matching pair in a cluttered closet. If you're a DIY enthusiast seeking a practical and stylish solution, this is the guide for you. We'll walk you through creating your very own shoe rack that's not only functional but also adds a touch of elegance to your home decor.
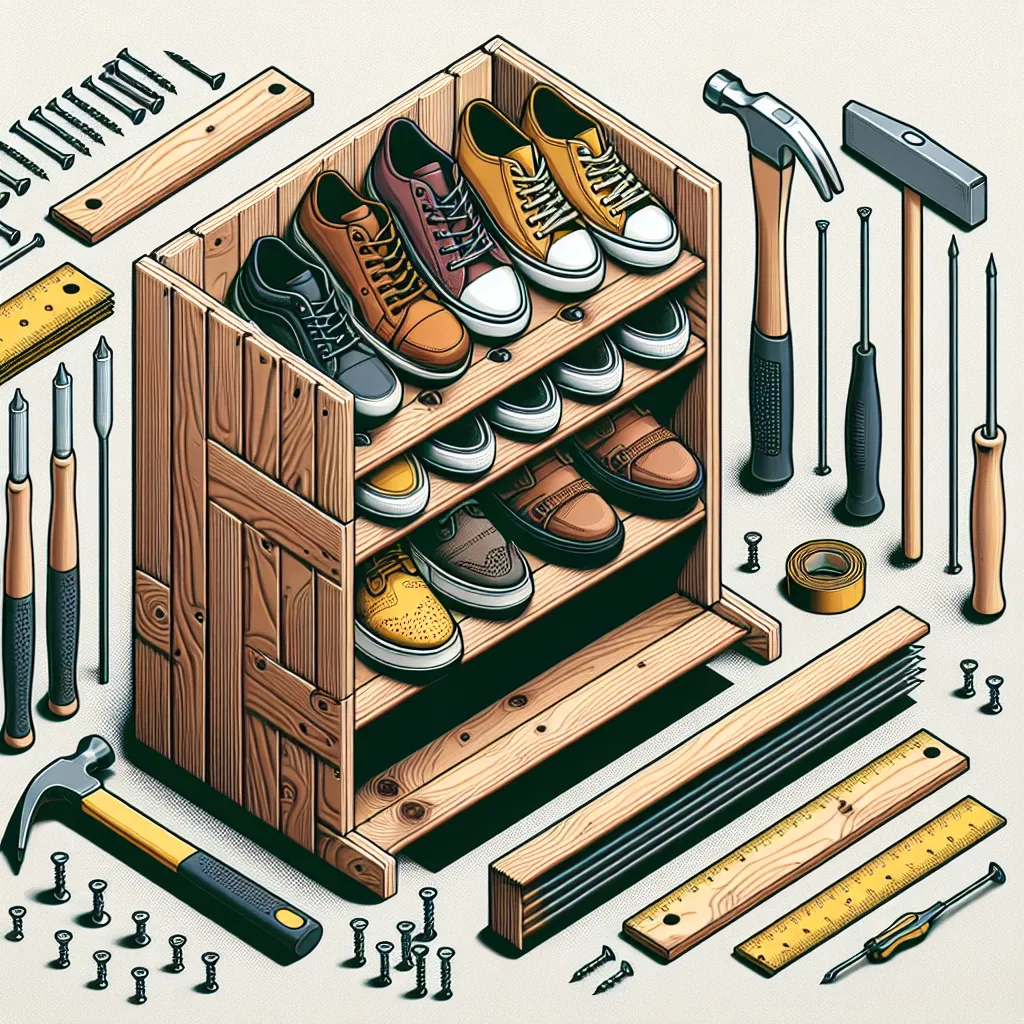
Step 1: Gathering the Necessary Tools and Materials
Before you begin, make sure you have all the necessary tools and materials. You'll need a saw, a drill, screws, sandpaper, wood glue, and wood. Depending on your preference, you can use plywood, pine, or reclaimed wood. The amount of wood you'll need will depend on the size of the shoe rack you want to build. Don't forget to grab a tape measure and a level to ensure accuracy and precision in your project.
Step 2: Designing Your Shoe Rack
Next, sketch out a design for your shoe rack. Consider the number of shoes you want to accommodate and the space available in your home. A simple design could consist of a few horizontal shelves, but you could also add compartments or cubbies for more organization. Keep in mind the width and height of your shoes to ensure they'll fit comfortably.
Step 3: Cutting and Sanding the Wood
Once you have your design and measurements, it's time to cut the wood. Use your saw to cut the wood according to the dimensions you've specified in your design. After all the pieces are cut, use sandpaper to smooth out any rough edges. This will give your shoe rack a polished look and prevent any potential splinters.
Step 4: Assembling Your Shoe Rack
Now that your pieces are ready, start assembling your shoe rack. Apply wood glue to the ends of your pieces and screw them together. Use your level to ensure everything is straight. Remember, the bottom shelf should be a bit taller to accommodate boots or larger shoes. Leave your assembled rack to dry overnight to ensure the wood glue has completely hardened.
Step 5: Finishing Touches
Once your shoe rack is dry and sturdy, you can add finishing touches. You might want to paint or stain the wood to match your home decor. Alternatively, you could seal the wood with a clear varnish to enhance its natural beauty. You might also want to add felt pads to the bottom of your rack to prevent it from scratching your floors.
Conclusion
Building your own DIY shoe rack is a great way to add functional storage and style to your home. By following these steps, you'll end up with a custom piece that fits your space and your shoe collection perfectly. Plus, you'll enjoy the satisfaction that comes with completing a DIY home improvement project. Roll up your sleeves and start building!