An accent wall is one of the highest-impact, lowest-risk DIY projects you can tackle. It changes the feel of a room without full-scale remodeling, and you don’t need advanced tools to pull it off. This guide walks you through planning, prepping, installing, and finishing a DIY accent wall that looks clean and intentional—not like an afterthought.
Step 1: Choose the Right Wall and Style
Before you buy anything, decide what you want the accent wall to do for the room.
Look for a wall that naturally draws the eye—behind a bed, sofa, TV, or dining table usually works best. Avoid walls broken up by many doors, windows, or vents; they make patterns look busy and harder to align.
Pick a style that matches your skill level and time:
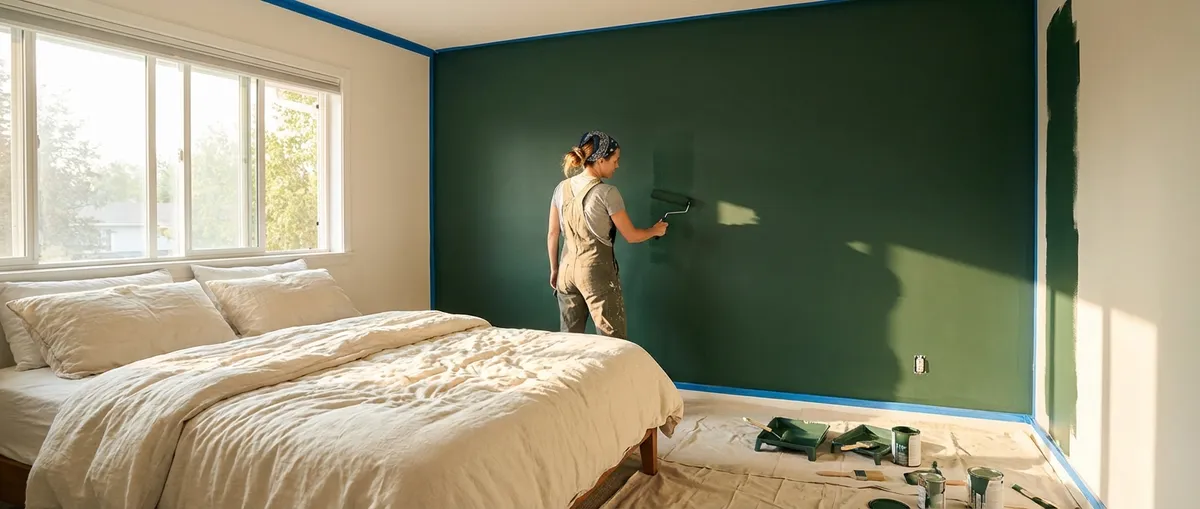
- Easiest: Solid paint in a bold or contrasting color
- Moderate: Simple geometric pattern using painter’s tape
- Moderate: Vertical or horizontal wood slats/battens for a modern look
- More advanced: Board-and-batten grids or picture-frame molding
Think about the room’s light. Dark colors can make small or dim rooms feel tighter, while mid-tone or lighter accent colors usually feel safer and still add depth. Snap a few photos of the room and sketch rough ideas on top (even just using your phone’s markup tools) to see how each style might look.
Once you know the style, measure the wall (width and height) and write down the numbers. You’ll use these to calculate paint quantity or the number and length of boards you need.
Step 2: Gather Tools and Materials
A clean, professional result comes from having the right materials ready before you start. Here’s a practical list that will cover the majority of accent wall projects:
Basic tools:
- Tape measure and pencil
- Level (2–4 ft; or a laser level if you have one)
- Stud finder (for wood or molding projects)
- Utility knife
- Sanding sponge or 120–220 grit sandpaper
- Caulk gun
- Putty knife
- Drop cloths and painter’s tape
Paint-focused accent wall:
- Wall paint (typically 1 gallon covers most standard walls)
- Primer (especially over dark colors or patched walls)
- Paint roller and tray
- Angled brush for edges and trim
Wood or molding accent wall:
- Trim boards or lattice strips (commonly 1x2, 1x3, or similar)
- Construction adhesive (optional but helpful)
- Wood filler or spackle
- Paintable caulk
- Miter saw or hand saw with miter box
- Brad nailer and nails (or finish nails and hammer if that’s what you have)
Buy a bit of extra material (about 10–15%) to cover mistakes, miscuts, or bowed pieces. Check wood boards for straightness in the store—sight down the length to avoid warped or twisted pieces.
Step 3: Prep the Wall for a Clean Finish
Prep is where DIY projects either start to look professional or obviously rushed. Spend time here; it makes painting and installation much easier.
Start by clearing the wall: move furniture away, take down any art or TV mounts, and remove outlet covers and switch plates. Lay down drop cloths and tape off baseboards, adjacent walls, and ceiling lines where needed.
Inspect the wall closely under good light:
- Fill nail holes and small dents with spackle or joint compound.
- Let patches dry fully, then sand smooth so they sit flush with the wall.
- For glossy walls, scuff-sand lightly to help new paint adhere.
If you’re doing a wood or molding design, use a stud finder and mark stud locations lightly in pencil from top to bottom—you’ll want to nail into these wherever possible for a sturdier installation.
If the existing wall color is very dark or you’ve done a lot of patching, apply a coat of primer. Primer evens out absorption so your finish paint color looks consistent and covers better.
Finally, wipe the wall with a dry cloth or slightly damp rag to remove dust. Dust left on the surface can cause paint or adhesive to fail or look gritty.
Step 4: Lay Out and Install Your Design
This step changes slightly depending on whether you’re doing a painted-only design or adding wood trim, but the planning process is similar: measure, mark, and double-check before you commit.
For a Painted-Only Accent Wall
If you’re simply changing the wall color, cut in along the edges with an angled brush, then roll the main areas in overlapping “W” or “M” patterns. Keep a wet edge as you work to avoid lap marks.
For a geometric or striped design:
- Measure the wall and lightly mark your pattern with a pencil. Use a level so lines are truly straight.
- Apply painter’s tape carefully along your lines, pressing down firmly, especially on edges where paint can seep.
- For extra-crisp lines, you can “seal” the tape by painting a thin line of the base wall color along the tape edge, let it dry, then add the accent color.
For a Wood or Molding Accent Wall
Plan your layout on paper first. For modern vertical slats, for example, decide:
- How wide the boards will be
- The spacing between them
- Whether they’ll run only partway up the wall or all the way to the ceiling
Use your wall measurements to divide evenly so you don’t end up with a tiny sliver at one end. Adjust spacing slightly to make the layout look balanced.
Then:
- Cut your boards to length using a miter saw or hand saw and miter box. Dry-fit them on the wall before fastening.
- Start with the outermost boards (edges or top and bottom pieces), using a level to keep them true.
- Apply a small amount of construction adhesive to the back (optional) and press into place.
- Secure with brad nails into studs where possible; if nailing into drywall only, use more nails to help hold.
- Work inward, using a spacer (a scrap of wood or plastic shim) to keep consistent gaps between boards.
Step back every few boards to visually check alignment. Minor adjustments now will save you from a crooked look later.
Step 5: Fill, Caulk, Paint, and Reassemble
This is where the project comes together and looks finished instead of “DIY in progress.”
For wood or molding accent walls:
- Fill nail holes and any seams between board pieces with wood filler or spackle. Let dry fully.
- Sand filled areas smooth so you can’t feel or see ridges.
- Run a thin bead of paintable caulk along where the boards meet the wall and at inside corners. Smooth it with a damp finger or caulk tool. Caulk hides gaps and shadows and makes everything look intentional.
Once everything is dry and smooth, prime any bare wood or patched areas. Then:
- Apply your first coat of paint, cutting in along edges and working systematically across the wall.
- Let it dry for the time listed on the can before adding a second coat. Don’t rush this; sticky paint is easy to damage.
- Inspect after the second coat under both natural and artificial light. Touch up any thin spots or visible brush marks.
Carefully remove painter’s tape while the paint is slightly tacky rather than fully hardened—this helps prevent peeling. Reinstall outlet covers, switch plates, and any wall-mounted fixtures or art.
Push furniture back into place and live with the wall for a few days. If something feels off (too dark, too busy, or not enough contrast), note what you’d change for your next project. The beauty of an accent wall is that it’s relatively easy to adjust later.
Conclusion
An accent wall is a manageable DIY project that delivers a big visual upgrade with modest tools, money, and time. By choosing the right wall, planning your design, prepping carefully, and taking your time with layout and finish work, you can create a feature that looks custom instead of cobbled together. Once you complete one accent wall, you’ll have the skills and confidence to tackle more involved projects around your home with the same step-by-step approach.
Sources
- [Benjamin Moore – How to Paint an Accent Wall](https://www.benjaminmoore.com/en-us/interior-exterior-paints-stains/how-to-advice/interior-painting-how-to/how-to-paint-an-accent-wall) - Practical guidance from a major paint manufacturer on choosing colors and painting accent walls
- [Sherwin-Williams – Interior Wall Preparation](https://www.sherwin-williams.com/en-us/homeowners/how-to/painting-how-to-articles/interior-wall-preparation) - Details on proper wall prep, patching, sanding, and priming before painting
- [U.S. Department of Energy – Painting and Wall Coverings](https://www.energy.gov/energysaver/painting-and-wall-coverings) - Explains how surfaces and coatings affect durability and performance, helpful when planning wall projects
- [Lowe’s – How to Install Board and Batten Wall Paneling](https://www.lowes.com/n/how-to/install-board-and-batten-wall-paneling) - Step-by-step reference for wood and molding style accent walls
- [Family Handyman – How to Use a Stud Finder](https://www.familyhandyman.com/project/how-to-use-a-stud-finder/) - Clear explanation of locating studs safely and accurately for fastening boards
Key Takeaway
The most important thing to remember from this article is that this information can change how you think about DIY Projects.


