If your bikes are always in the way, a wall-mounted bike rack is one of the most useful DIY upgrades you can tackle in an afternoon. It clears floor space, protects your bike, and makes your garage or entry feel more organized without a full remodel. This guide walks you through choosing the right rack, finding solid wall structure, and installing it safely—using tools most DIYers already own.
Step 1: Choose the Right Bike Rack for Your Space
Before you buy anything, match the rack style to your space and your bikes.
Horizontal racks hold the bike parallel to the wall. They’re great for keeping the bike fairly low and easy to grab, and they work well in wider rooms or garages. Vertical racks support the bike by a wheel, nose-up against the wall. These save more space front-to-back and are better in narrow areas like hallways, small garages, or tight storage rooms.
Check the manufacturer’s weight rating and compare it to your bike. Heavier e-bikes and cargo bikes usually need racks specifically rated for that extra weight and should always be mounted into studs or masonry (never drywall alone). If you have multiple bikes, look for a modular system you can expand later instead of buying mismatched single hooks.
Think about clearance: measure your bike’s length and handlebar width, then measure your wall. Make sure doors, vehicles, and walkways won’t be blocked. Finally, check that the mounting hardware included with the rack matches your wall type (wood studs, concrete, or brick). If it doesn’t, plan to buy appropriate anchors or masonry screws separately.
Step 2: Locate Studs or Solid Wall Structure
The most important part of a safe rack installation is what it’s actually attached to. For drywall over wood framing, you want to mount into studs—solid vertical framing members behind the wall.
Use a stud finder to locate studs along the wall where you plan to hang your bike. Run the stud finder slowly and mark each detected stud lightly with painter’s tape or a pencil. Verify by measuring: most studs are spaced 16 inches on center in modern construction, though 24 inches is also common. If two or three readings line up at standard spacing, you’ve likely found real studs, not random noise.
To double-check, use a small finish nail in an inconspicuous area: tap it through the drywall where you think the stud is. If it hits solid resistance about 1/2 inch in, that’s wood; if it suddenly gives way, you’re between studs. Patch any small test holes later with spackle.
For concrete, brick, or block walls, you won’t find studs. Instead, you’ll drill directly into the masonry and use appropriate anchors or concrete screws. Confirm your wall type before you buy hardware: lightweight plastic drywall anchors are not safe for supporting a bike, especially over time.
Step 3: Mark the Mounting Height and Layout
A little planning here makes your rack easy and safe to use long-term. Start by measuring your bike’s total height at the handlebars and saddle. If you’re installing a horizontal rack, you want the bike high enough so the wheels clear the floor but low enough that you can lift it comfortably.
For most adults, setting the rack so the bike’s top tube will sit roughly at chest height works well. Use your tape measure to mark this height on the wall with a light pencil mark at a stud location. If the rack has two mounting brackets, use a level to draw a very light horizontal line so both brackets will be perfectly level with each other.
For vertical racks, decide where the rear wheel will rest on the floor. Measure the distance from the rear wheel to the front wheel hook on your bike, then transfer that measurement straight up the wall from the floor mark. This is where your hook should go. Make sure there’s enough ceiling clearance so the front tire doesn’t bump the ceiling when you lift the bike into position.
If you’re installing multiple racks, map them all out before drilling. Stagger heights slightly so handlebars don’t crash into each other. Use painter’s tape to create temporary visual guides across the wall; step back, imagine moving through the space, and adjust your layout before committing to holes.
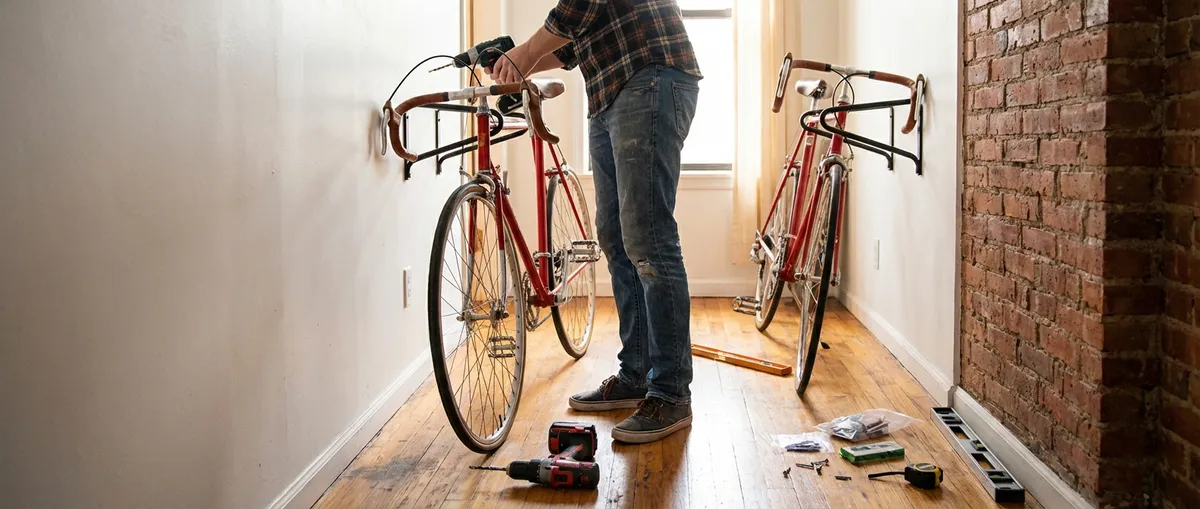
Step 4: Pre-Drill and Install the Rack Hardware
Once your layout is marked, you’re ready to drill. Always wear safety glasses—especially when working near eye level or above.
For wood studs, choose a drill bit slightly smaller than the screw’s shank (the solid core of the screw, not counting the threads). Drill a straight pilot hole into the stud at each mounting point, going deep enough for the full screw length. This reduces the chance of splitting the stud and makes it easier to drive the screws straight.
For masonry, switch to a hammer drill with a masonry bit sized to match your anchors or concrete screws. Drill slowly and let the tool do the work. Clear dust from the hole with a vacuum or a quick puff of air before inserting anchors. Make sure anchors are flush with the wall and snug before attaching the rack.
Hold the rack or bracket in place over your pilot holes, then drive the screws through the rack’s mounting holes into the wall. Use a hand screwdriver or a drill/driver with a clutch to avoid overtightening and stripping the hole. Check the level again once the screws are snug; if anything is noticeably off, loosen slightly and adjust before fully tightening.
If your rack includes additional safety hardware like secondary brackets, safety straps, or wheel cradles, install those now according to the manufacturer’s instructions. Don’t skip “optional” stabilizing parts if you have a heavier bike—they significantly reduce stress on the main fasteners.
Step 5: Test the Rack Safely and Make Final Adjustments
Before trusting the rack with your bike, test it. Start by applying downward pressure on the rack with your hands and lean some of your body weight into it. Watch for any movement, flexing, or cracking sounds from the wall. The rack should feel solid, not springy.
If it passes the basic push test, lift the bike and hang it per the rack’s design. Keep one hand on the bike briefly while you check that the rack supports the load without sagging or pulling away from the wall. If anything looks questionable, take the bike down immediately and re-check your fasteners, anchors, and stud alignment.
Next, check clearances. Open nearby doors, move your car into the garage, and walk your typical paths through the area. Ensure handlebars and pedals aren’t at head or shin height where you normally walk. Adjust the bike angle or rack height if you find collision points.
Finally, add a few simple accessories to finish the job: a small hook or shelf nearby for your helmet, a wall-mounted basket for locks and lights, or basic floor protection (like a scrap of vinyl or a cheap mat) where tires may rest against the wall. Take a quick photo of your clean new setup—it’s perfect for sharing your project and progress, and it gives you a visual reference if you ever move or reinstall the rack later.
Conclusion
A wall-mounted bike rack is a straightforward DIY project that can dramatically clean up your garage, entry, or storage room. By choosing the right rack, securing it to solid structure, and testing it carefully, you end up with a safer, more usable space and gear that’s easier to grab and go. Once this rack is up, you’ll likely spot other simple, high-impact projects around your home that can give you the same “instant upgrade” feeling without a major renovation.
Sources
- [U.S. Consumer Product Safety Commission – Bicycle Safety](https://www.cpsc.gov/safety-education/safety-guides/bicycles) - General guidance on bicycle safety and handling that’s useful when planning storage and lifting.
- [Family Handyman – How to Use a Stud Finder](https://www.familyhandyman.com/project/how-to-use-a-stud-finder/) - Practical explanation of finding studs accurately in typical residential walls.
- [This Old House – All About Masonry Drill Bits](https://www.thisoldhouse.com/tools/21015224/all-about-drill-bits) - Covers choosing and using the right bits for drilling into masonry surfaces.
- [Simpson Strong-Tie – Fastening to Concrete, Brick and Block](https://www.strongtie.com/resources/solutions/fastening-to-concrete-brick-and-block) - Technical but clear overview of anchors and fasteners for masonry walls.
- [REI Co-op – How to Store Your Bike](https://www.rei.com/learn/expert-advice/bicycle-storage.html) - Discusses different bike storage options and considerations for protecting your bike and saving space.
Key Takeaway
The most important thing to remember from this article is that this information can change how you think about DIY Projects.


