Everywhere you look online right now, people are laughing about the things they swore they’d fix in 2025 and… didn’t. Bored Panda’s trending piece “It’s Almost 2026, So Here Are 23 Ways To Finally Hide The Ugly Stuff You Swore You’d Fix This Year” sums it up perfectly: cords, scuffed walls, sad radiators, mystery piles on the stairs — we all have them.
Instead of hiding the “ugly stuff” for one more year, this guide shows you how to actually fix it. These are simple, low-cost projects that most DIY‑ers can tackle in an afternoon, using basic tools. Perfect for turning those internet‑relatable eyesores into real before‑and‑after wins you’ll want to share.
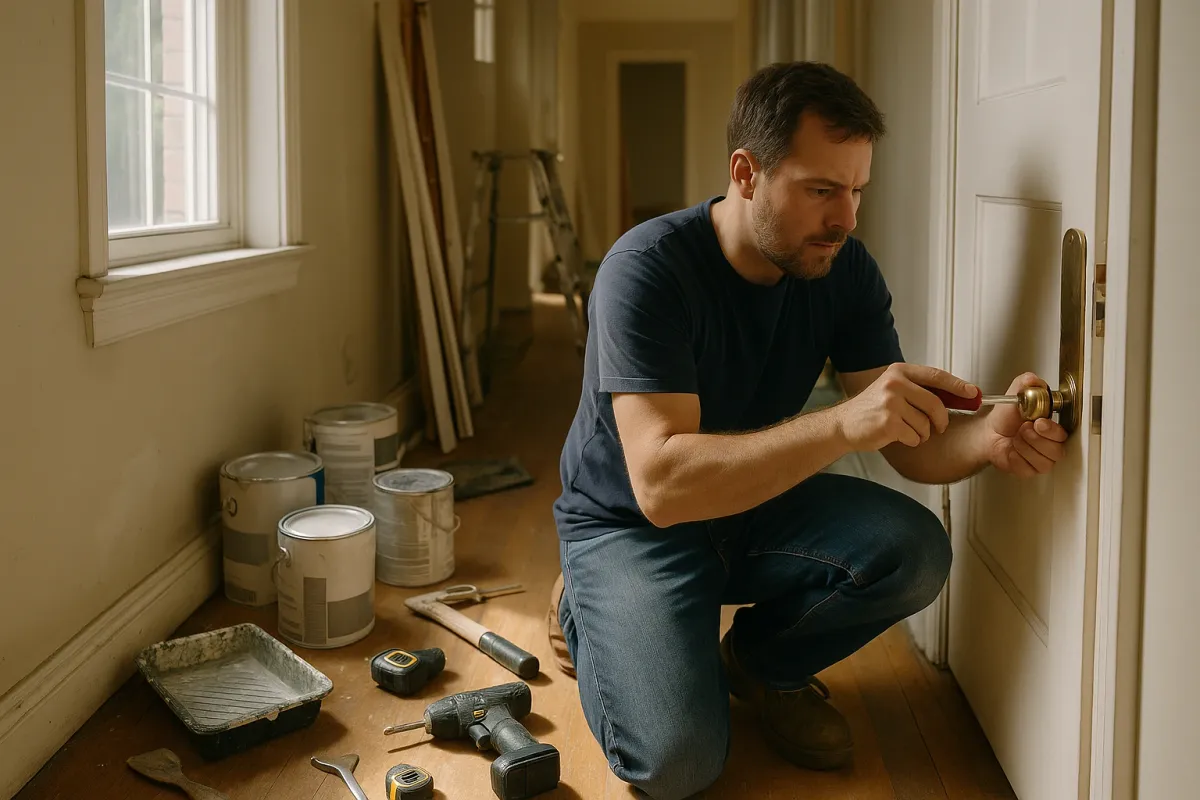
1. Tame the “Cable Monster” Without Opening a Wall
That tangle of wires behind your TV or desk is probably your most visible “I’ll deal with it later” zone. Here’s how to clean it up properly — without getting an electrician involved.
Step 1: Map the mess before you touch anything
Unplug one device at a time and label each cable with painter’s tape and a marker (e.g., “TV HDMI 1,” “Router power”). Take a quick photo of the current setup so you can reconnect confidently later. This avoids the classic “Which black cable was the modem again?” panic.
Step 2: Separate power from signal
Lay all power cords (outlet cables, power bricks) on one side and low‑voltage cables (HDMI, speaker wires, Ethernet) on the other. Keeping them separate helps reduce interference and makes future changes easier. If any cords are nicked or crushed, replace them now — they’re a fire and performance risk.
Step 3: Shorten and bundle the smart way
Use Velcro straps or reusable zip ties to coil extra length behind each device rather than at the outlet. Make loose bundles, not tight knots, so cables can dissipate heat. Group by function: one bundle for streaming gear, one for gaming, one for networking. Leave a little slack near each device to avoid stress on ports.
Step 4: Add surface raceways instead of drilling
For cords running down the wall, install adhesive cable raceways (paintable plastic channels). Clean the wall with rubbing alcohol, measure and cut the raceway with a hacksaw, then stick it level from the TV down to the outlet. Snap the cover closed. Later, you can paint it to match the wall and virtually make it disappear.
Step 5: Build a simple “cable wall” behind furniture
If the space behind your TV stand or desk is chaos, screw a piece of ¼" plywood or hardboard to the back of the furniture, leaving clearance for outlets. Use adhesive cable clips along this board to route everything. From the room side, you’ll see one neat column of cords going down — not a full spider nest.
2. Turn Scuffed, Patchy Walls Into a Clean, “New Paint” Look
Scuffed baseboards, random nail holes, and touch‑up spots that don’t match are another end‑of‑year regret. You don’t always need a full repaint to fix it — but you do need to prep correctly.
Step 1: Find every flaw in one pass
Turn off overhead lights and use a bright flashlight held at a low angle across the wall. This “raking light” reveals dents, nail pops, and roller marks. Put a small piece of painter’s tape next to each spot so you don’t lose track when you start repairing.
Step 2: Fix holes and dents the right way
For small nail holes, press a lightweight spackle into the hole with a flexible putty knife, then scrape it flush. For deeper dents or anchor holes, fill in two thin layers, letting each one dry fully. Lightly sand with 220‑grit paper until smooth and dust with a microfiber cloth. If you can feel an edge, it will show when painted.
Step 3: Prime patches so they don’t “flash”
One of the biggest reasons touch‑ups look terrible: people skip primer. Any exposed drywall or spackle should get a quick coat of stain‑blocking or all‑purpose primer. Use a mini roller if you can — it helps match the wall’s texture and prevents shiny or dull “ghost spots” later.
Step 4: Blend touch‑up paint instead of dabbing
Use the original leftover paint if you have it; if not, bring a chip to the paint store for color match. Load a small roller lightly, then roll over the patch and feather 6–12" beyond the edge in all directions. Avoid tiny brush dabs — they almost always show. For flat paint, you can often get away with this; for eggshell or higher sheen, consider repainting the whole wall for a truly seamless look.
Step 5: Refresh baseboards and trim last
Vacuum baseboards, then wipe with a degreaser or mild soap. Lightly sand any glossy or peeling spots. Tape along the floor with painter’s tape, then use a high‑quality angled brush and semi‑gloss or satin trim paint. Even just repainting trim can make an entire room feel newly renovated, especially in entryways and hallways.
3. Upgrade That “Sad Radiator” or Old Heater Without Replacing It
A lot of the viral “hide the ugly stuff” posts focus on radiators and wall heaters. You don’t necessarily need a new system to improve the look — just a smarter cover or surround.
Step 1: Confirm clearance and safety first
Look up the manufacturer’s clearance requirements for your radiator or heater (usually available online). You need to know how much open space is required for safe airflow and heat dissipation. If it’s gas or has open flames, you may need a pro; electric baseboard and hot‑water radiators are usually DIY‑friendly for cosmetic upgrades.
Step 2: Build (or buy) a ventilated cover
If you’re handy, build a simple box from MDF or plywood that sits over the radiator with at least 2–3" of space on all sides. The front should be mostly open lattice, slats, or perforated metal for airflow. No time to build? Look for ready‑made radiator covers or metal screen cabinets sized for your unit.
Step 3: Anchor, don’t just lean
Even if the cover is heavy, screw it to the wall with brackets (especially in homes with kids or pets). Pre‑drill into studs or use drywall anchors. A loose box is a tipping hazard, and you don’t want it shifting into direct contact with hot surfaces.
Step 4: Use heat‑tolerant finishes
Prime raw wood with a good bonding primer, then paint with a high‑quality interior paint. For units that get very warm, choose paints rated for higher temperatures (your local paint desk can guide you). Avoid vinyl decals and cheap contact paper on surfaces that get hot — they can off‑gas and peel.
Step 5: Turn the top into useful space
Add a solid top panel with a small overhang to create a secure shelf for plants, books, or decor, making sure nothing blocks vents. Use felt pads under decor so pieces don’t vibrate or mark the surface. The key is function: your “ugly” heater becomes a console‑like feature instead of a corner you try to crop out of photos.
4. Replace That Perpetual “Junk Pile” With Real Storage
The internet loves calling out the “doom pile” — the corner that collects mail, bags, tools, laundry, and random things that never get put away. Instead of hiding it in photos, build it a proper home.
Step 1: Watch the space for a week
Don’t buy storage yet. For 5–7 days, pay attention to what lands in that pile: mail, shoes, backpacks, tools, dog gear, returns, etc. List the top categories and note how much vertical and horizontal space they actually need. Designing around real clutter is how you avoid buying the wrong organizer.
Step 2: Choose a storage “type” for each category
Think like this: mail = wall slots, shoes = low shelf, backpacks = hooks, tools = closed bin. Open storage works better for everyday items; closed storage is good for “sometimes” items you don’t want to see. Visualize where each category will live within arm’s reach of where it naturally lands.
Step 3: Install a simple wall system, not random hooks
Use a French cleat, track rail, or slat‑wall strip across the clutter zone at stud height. This creates a strong, level mounting surface. From there, you can hang hooks, baskets, shelves, and bins in a modular way — and reconfigure them as your stuff changes over time.
Step 4: Add a “landing surface” at the right height
Whether it’s a shallow console table, wall‑mounted shelf, or built‑in bench, you need one flat surface for keys, bags, and packages. Standard console height is 30–34", bench height around 18". Bolt it securely to the wall so it can handle real daily use, not just decor.
Step 5: Finish with strict “capacity limits”
Give each family member a bin, hook, or cubby with their name or icon. Set realistic limits: one hook per person, one bin for loose items. When it’s full, something has to be put away or removed. This turns your project from a one‑time clean‑up into a sustainable system.
5. Hide (and Protect) Ugly Outdoor Eyesores Without Upsetting the Neighbors
AC condensers, trash cans, hose reels, and utility meters are some of the most‑posted “ugly stuff” in viral renovation threads. You can shield them from view while still keeping everything serviceable and code‑friendly.
Step 1: Check access and local rules
Before you build anything, check with your utility providers and HOA or city rules. Meters usually must remain visible and accessible, and many areas have distance rules around gas and electric equipment. Measure clearances and note service paths (where a technician would stand and move).
Step 2: Build a three‑sided screen, not a full cage
For most outdoor equipment, you want a U‑shaped screen with an open back (toward the house) or a removable panel. Use rot‑resistant materials like cedar, composite, or pressure‑treated lumber. Slatted designs allow airflow and look clean from the street.
Step 3: Set posts correctly for long‑term stability
Mark your layout, then dig post holes at least 18–24" deep (deeper in cold climates) and set 4x4 posts in concrete. Make sure posts are plumb and aligned with a string line. Give the concrete adequate cure time before attaching panels, so your screen doesn’t shift or warp.
Step 4: Size panels for easy service access
Make each side panel light enough for one person to lift or swing open. For AC units, leave at least 12–24" of clearance on all sides, per manufacturer guidelines. Attach panels with exterior‑grade screws or gate hinges so a tech can temporarily remove them without destroying your work.
Step 5: Blend in with landscaping
Stain or paint the screen to match your trim or fence, then add a simple planting bed in front: gravel, a few hardy shrubs, or low perennials. This turns a purely functional screen into a deliberate landscape feature — and your “ugly corner” becomes a natural part of your yard design.
Conclusion
The year is winding down, and social feeds are filled with jokes about “I’ll fix it later” projects — from cable monsters to trash can alleys. Instead of hiding those spots for another year, you can actually transform them with a few targeted, weekend‑scale upgrades.
Start with the area that annoys you most every day: the wall you stare at on video calls, the entryway pile, the heater you always crop out of photos. Tackle one project using the steps above, document your before‑and‑after, and share it. By the time the next viral “things you swore you’d fix” list drops, your home will be the example of what actually got done.
Key Takeaway
The most important thing to remember from this article is that this information can change how you think about Renovation.


