If your projects never seem to line up quite right, your measuring tools—not your skills—might be to blame. A crooked shelf, a door that won’t close cleanly, or trim that doesn’t meet perfectly often comes down to inaccurate measuring and marking. The good news: you don’t need fancy gear, just a solid setup and a few habits you repeat every time.
This guide walks you through setting up and using the most important measuring tools for home projects—with five clear step-by-step instructions DIYers can follow today to get cleaner, more professional results.
Start With the Right Core Measuring Tools
Before you worry about “pro” tricks, make sure you actually have the tools that make accurate work possible. You don’t need a shop full of gadgets—just a reliable core set.
A basic measuring kit for home projects should include a 25-foot tape measure, a 6–12 inch combination square, a decent 2- or 4-foot level, a chalk line, and a metal ruler or straightedge. These cover most interior projects: shelving, trim, cabinets, flooring layout, picture hanging, and basic framing. Look for tape measures with clear, easy-to-read markings and a sturdy, non-wobbly hook. Choose a level with at least three vials (horizontal, vertical, and 45°), and make sure the body is rigid, not flexy.
Add a small digital or dial caliper if you do more precise work like furniture building or hardware installation. Keep a sharp pencil and a fine-tip marker with your measuring tools so your lines are clean and visible. Store everything in one place—a toolbox, wall rack, or drawer—so you’re not guessing where things are each time you start a project.
Step 1: Check and Calibrate Your Tape Measure
A tape measure is the most-used tool in your kit, and small inaccuracies add up fast. Spend a few minutes verifying it’s actually telling you the truth.
- Compare against a known reference. Use a metal ruler or a carpenter’s framing square with etched markings. Lay your tape measure alongside and check at 1 ft, 2 ft, and 5 ft. The markings should line up exactly or be within a hair; if it’s clearly off, it’s time for a new tape.
- Inspect the end hook. The hook on the tape is designed to move slightly—this accounts for the thickness of the metal when you push against a surface vs. hook onto an edge. Gently pull and push it. It should move just a bit (about the thickness of the hook itself) but not wobble loosely. If it’s bent or wobbly, your measurements will be wrong.
- Test “inside” versus “outside” measurements. Hook the tape over the edge of a board and note a measurement. Then push the hook against the same board and measure again. If there’s a noticeable difference, the hook is out of alignment.
- Check the case measurement. Most tape measures have the case length printed on the back (e.g., “+ 3 in”). That’s for inside measurements (like in a window frame). Measure inside a door frame using: (a) hook method, and (b) case method (butting the case into the corner and adding the printed length). The two measurements should match.
- Mark and retire bad tapes. If a tape measure is off or the hook is damaged and you can’t easily fix it, label it “rough use only” with a marker, or toss it. Don’t use it where accuracy matters—like cutting lumber or laying out cabinets.
Pro tip: Own two decent tape measures. Keep one clean, indoors, and reserved for accurate work; use the other for rough layout, outdoor work, or demolition.
Step 2: Use a Combination Square for Straight, Square, and Repeatable Marks
A combination square is one of the most overlooked tools, but it dramatically improves accuracy and speed once you know how to use it properly.
- Check if it’s truly square. Place the body of the square firmly against a straight board edge and draw a line with the rule. Flip the square over to the other side of the same edge and draw another line following the first. If the lines line up, your square is accurate. If the lines form a “V,” your square is off and shouldn’t be used for precision work.
- Set and lock dimensions. Slide the rule to your desired measurement (for example, 1 ½ in for a standard board thickness) and tighten it. Now you can mark that exact offset again and again without re-measuring every time.
- Mark crosscuts and cut lines. Hold the square’s body firmly against the edge of the board. Use the rule as a straightedge to draw a perfect 90° line across the face. This is especially helpful for marking where to cut shelving, studs, or trim.
- Use it as a depth gauge. Set the rule to the depth you need (for example, the depth of a mortise, a drilled hole, or a hinge recess) and lock it. Use the end of the rule to check your depth as you cut or drill, instead of guessing.
- Find and mark 45° angles. Most combination squares have a 45° face. Place the body against your workpiece and use the angled face to draw perfect miters for trim corners or simple framing projects.
Pro tip: Keep the rule clean and lightly oiled. Rust or dirt will throw off your measurements and make sliding it difficult.
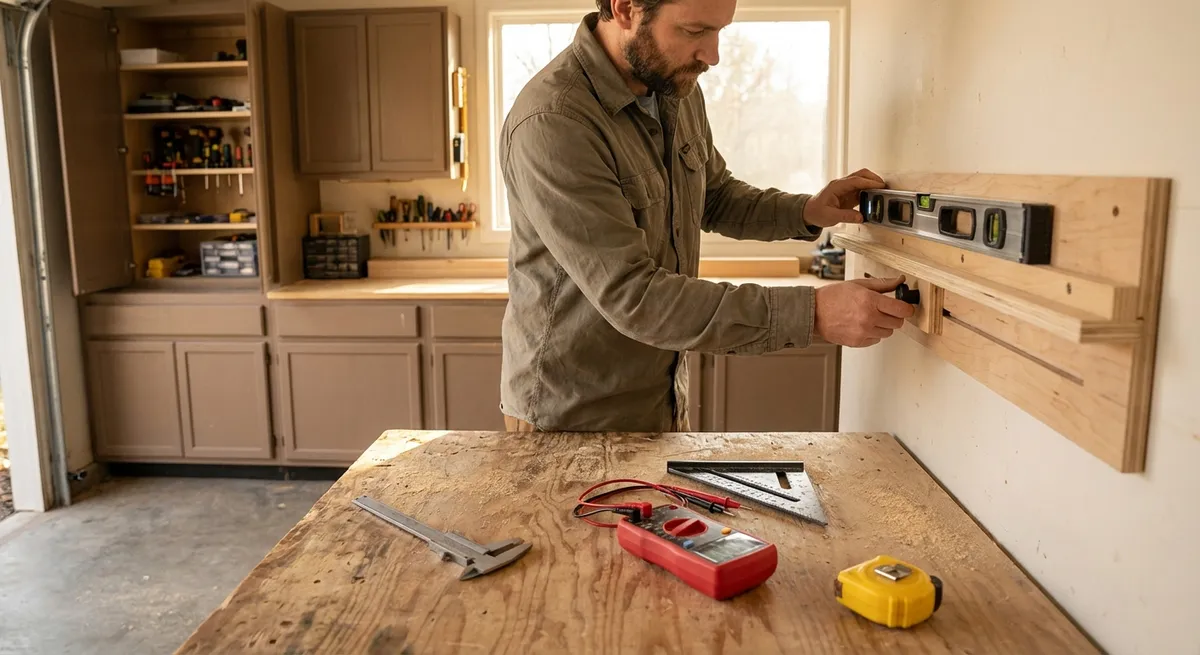
Step 3: Level and Plumb Like a Pro With a Bubble Level
If you’ve hung shelves that “look right” but still slide items off one end, you know how sensitive the eye is to crooked lines. Learning to read a level correctly solves this.
- Verify the level’s accuracy. Place the level on a relatively flat surface and note where the bubble sits. Rotate the level 180° in the same spot. The bubble should sit in the exact same place. If not, the level may be out of calibration and shouldn’t be trusted.
- Check level (horizontal). To set something level, place the level on top of it and look directly at the bubble vial, not from an angle. Adjust your object (shelf, countertop, picture frame) until the bubble is perfectly centered between the lines.
- Check plumb (vertical). Put the level against the vertical surface—such as a stud, side of a cabinet, or door jamb. Adjust the object until the bubble in the vertical vial is centered. This prevents doors from swinging open or closed on their own and keeps projects from looking visually “off.”
- Use shims for fine adjustments. If your shelf or cabinet isn’t level because the wall is bowed or the floor is uneven, slide shims under the low side until the bubble centers. Mark the shim locations so you can secure them permanently (with screws or construction adhesive).
- Mark reference lines. Level isn’t just for objects—use it to draw perfectly level or plumb lines across walls for tile layout, backsplash height, chair rail, or gallery walls. Lightly pencil the line, then work off that reference instead of trying to “eyeball” everything.
Pro tip: For longer runs (like kitchen cabinets or long shelves), a 4-foot level is more reliable than a small torpedo level. The longer the level, the more it averages out small bumps and dips.
Step 4: Lay Out Straight Lines on Walls and Floors With a Chalk Line
When you need a straight line longer than your level—such as for flooring, framing, or big wall projects—a chalk line is the tool that keeps everything aligned.
- Pick the right chalk color. Use blue chalk for general indoor use (it’s easier to clean or paint over). Red is more permanent and better for exterior work, but it can bleed through paint or be tough to remove.
- Secure one end. Hook the chalk line onto a nail, screw, or edge at one end of your layout. Make sure this starting point is correct; every error will be repeated down the line.
- Stretch the line tight. Pull the chalk line out to the other endpoint. Keep it under tension and as close to the surface as possible. A slack line will sag and give a curved or wavy mark instead of a straight one.
- Check the alignment. Before snapping, double-check the height or offset at both ends with a tape measure or level. Adjust if needed; it’s much easier to fix now than to redo a whole row of tiles or boards.
- Snap a clean line. Lift the chalk line straight up from the middle (not from one end) and let it snap back against the surface. This leaves a crisp, straight chalk mark to follow for nailing, cutting, or aligning materials.
Pro tip: For extremely precise work, lightly spray over the chalk line with hairspray or clear sealer to lock it in place, especially on floors where dust and foot traffic can erase your mark.
Step 5: Make Repeatable Cuts With Consistent Measuring Habits
Even with perfect tools, inconsistent habits lead to sloppy results. A simple, repeatable measuring routine will make your projects look cleaner with less effort.
- Measure from the same reference edge. Pick one edge or end of your board or wall as your “zero” and measure everything from that point. This reduces cumulative error versus measuring from random points each time.
- Use the same tape measure throughout a project. Different tape measures can vary slightly. Switching between them mid-project can cause noticeable gaps in trim, flooring, or cabinetry.
- Mark clearly and consistently. Instead of making a vague dot, draw a short line at your measurement, then put a small “X” on the waste side of the cut. This prevents you from cutting on the wrong side or losing track of your line.
- Account for the saw blade (kerf). The blade removes material as it cuts. Decide whether you’re cutting “on the line,” “to the waste side,” or leaving the line intact. For more accuracy, line up the blade so it just kisses the pencil mark on the waste side, preserving your exact measurement.
- Double-check before cutting (“measure twice, cut once”). After marking, quickly re-measure your final marked distance with the tape measure. Confirm: the measurement, the orientation (top vs. bottom, left vs. right), and which side of the line is waste. This 10-second habit saves a lot of ruined material.
Pro tip: For multiple identical pieces, cut a single “perfect” piece first and use it as a physical template for marking the rest, rather than measuring each one from scratch.
Conclusion
Accurate measuring isn’t about having a shop full of specialized tools—it’s about using a handful of basic tools the right way, every time. By checking your tape measure, trusting a verified square, reading your level correctly, snapping straight reference lines, and building solid measuring habits, your projects will start coming together cleaner and faster.
The payoff shows up in the details: doors that hang right, shelves that don’t slope, trim that meets neatly, and projects that look intentionally built—not “good enough.” Start by dialing in the tools you already own, and let accurate measuring become the quiet skill that makes every DIY upgrade look more professional.
Sources
- [OSHA – Hand and Power Tools: Basic Tool Safety](https://www.osha.gov/hand-power-tools) – General guidance on proper selection and safe use of common tools
- [Fine Homebuilding – How to Use a Tape Measure](https://www.finehomebuilding.com/2015/10/14/how-to-use-a-tape-measure) – Practical tips on reading and using tape measures accurately
- [Family Handyman – How to Use a Level](https://www.familyhandyman.com/project/how-to-use-a-level/) – Step-by-step instructions and illustrations for proper level use
- [This Old House – Chalk Line Basics](https://www.thisoldhouse.com/tools/21016301/chalk-line) – Overview of chalk line setup, colors, and best practices
- [MIT – Introduction to Hand Tools](https://mit.edu/2.55/tools/handtools.html) – Educational resource covering fundamental hand tools and correct usage
Key Takeaway
The most important thing to remember from this article is that this information can change how you think about Tools & Equipment.


