A dark, dated kitchen can make your whole home feel smaller and more cramped than it really is. You don’t need a full gut renovation or luxury budget to change that. With some planning, a few strategic upgrades, and basic tools, you can dramatically brighten and visually “open up” your kitchen in a long weekend or two. This guide walks you through practical, DIY-friendly steps that focus on light, layout perception, and smart finishes—without moving walls or major plumbing.
Start with a Realistic Plan and Safety Check
Before buying paint or swinging a hammer, you need a clear, realistic plan for what you can safely do yourself.
First, take photos of your kitchen from multiple angles in daylight and at night. This helps you see dark corners, shadow lines, and clutter that you might overlook in person. Ask yourself: What feels most cramped—ceiling height, wall color, cabinet bulk, or poor lighting?
Next, identify which elements are cosmetic and which are structural or tied to utilities. Painting walls and cabinets, changing hardware, swapping light fixtures, and adding open shelving are reasonable DIY projects. Moving gas lines, relocating major electrical runs, or removing structural walls usually requires a pro.
Locate your electrical panel and understand which breakers control your kitchen circuits. If you’re not comfortable turning off breakers and using a non-contact voltage tester, plan to hire an electrician for any wiring changes. Also find your home’s main water shutoff in case you’re working near the sink or dishwasher.
Set a budget and prioritize high-impact changes: lighting, surfaces, and visual clutter. List your projects in order of dependency—for example, do ceiling repairs before painting, and painting before installing new fixtures or shelving. Build in extra time for drying, curing, and inevitable small setbacks so you’re not rushing and making mistakes.
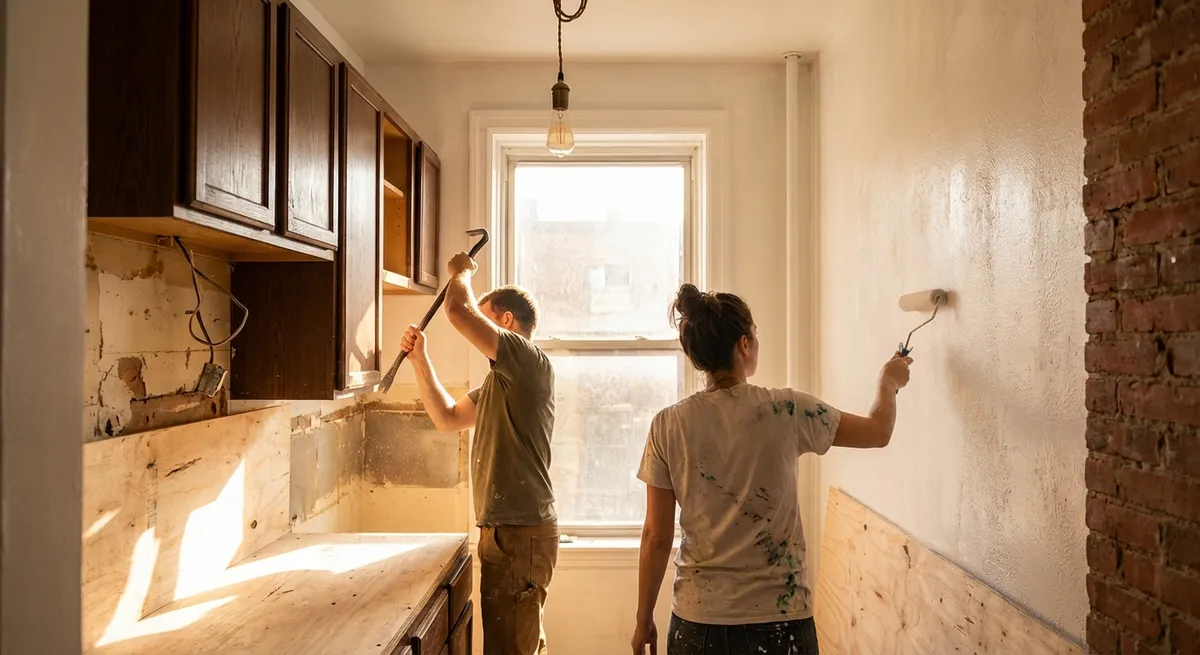
Step 1: Brighten Walls and Ceilings for Instant Visual Space
Light, continuous surfaces are the fastest way to make a kitchen feel larger and more open.
Start at the top: a dingy or off-white ceiling can pull the room down. Gently clean the ceiling with a damp microfiber mop and a mild cleaner to remove grease and smoke residue. Repair nail pops and small cracks with joint compound, then sand smooth when dry. Paint the ceiling with a flat or matte paint in a bright white tone; this reflects maximum light and visually lifts the room.
For walls, choose a light, neutral paint with a warm or neutral undertone so the space feels inviting, not sterile. Soft off-whites, light greiges, or pale warm grays work well in most kitchens. Avoid visually chopping the space with strong color blocks; instead, use one main color for continuity.
Proper prep matters: de-gloss oily walls around cooking areas with a degreaser, lightly sand glossy surfaces, and use a stain-blocking primer if you see any yellowing, water stains, or heavy cooking residue. Cut in edges carefully and roll in consistent sections to avoid lap marks.
If you have a short or low ceiling, avoid a dark accent wall that meets the ceiling sharply—it emphasizes the room’s height. Instead, let the wall, trim, and ceiling colors be close in value so edges visually “disappear,” making the space feel larger and more continuous.
Step 2: Update Lighting to Eliminate Shadows and Dark Zones
Poor lighting can make even a well-designed kitchen feel like a cave. Improving your lighting is one of the highest return DIY upgrades.
Think in three layers: ambient (overall room light), task (focused light for work areas), and accent (visual interest and depth). Start by checking your existing fixtures. If your overhead light still uses a single, old-style bulb, switch to a modern LED fixture with higher lumen output and a wide, diffuse lens.
Choose LEDs with a color temperature between 2700K–3500K for a warm, natural look that’s still bright. Aim for a high CRI (color rendering index) rating—90+ is ideal so your food and finishes look accurate, not dull or greenish. Replace all mismatched bulbs so the room has consistent light quality.
Add task lighting under upper cabinets to remove harsh shadows on the countertop. Plug-in LED strip or puck lights are beginner-friendly: mount the strips to the underside of cabinets with adhesive or small clips, then route the cord neatly along cabinet undersides using cable clips. If you have a microwave over the range, make sure its built-in light has a fresh bulb and clean lens.
Consider swapping outdated pendants or flush mounts over islands and sinks. Turn off the breaker, verify wires are dead with a voltage tester, and follow fixture instructions carefully. Use wire nuts, proper grounding, and secure mounting brackets. If box locations or wiring look questionable, stop and call an electrician.
Lastly, use reflective surfaces strategically: a glossy backsplash, light countertops, and even a small mirror near a window can bounce light deeper into the room, making it feel airier without adding more fixtures.
Step 3: Lighten and Streamline Cabinets Without Replacing Them
Bulkier, dark cabinets are a common culprit in cramped-feeling kitchens. You can dramatically change their impact without a full tear-out.
First, declutter and reorganize. Empty your uppers and get rid of unused or rarely used items. The fewer things you need, the easier it is to store them out of sight, reducing visual noise. Adjust shelf heights to better fit what you keep; this often frees up an entire cabinet or two.
Next, consider your cabinet finish. If you have dark or orangey wood, painting the uppers a light color (white, cream, or light greige) instantly brightens the room. You can keep lowers a bit darker for contrast and practicality. Clean cabinets thoroughly with a degreaser, lightly sand the old finish, and use a bonding primer designed for glossy or previously finished surfaces.
When painting, remove doors and label both doors and their hinges so everything goes back correctly. Use a quality enamel paint or cabinet paint kit for a smoother, more durable finish. Apply thin, even coats with a high-density foam roller and a small brush for profiles. Let each coat fully cure before rehanging doors.
If full painting feels too big, try smaller visual “lightening” changes. Swap heavy, ornate hardware for simple, slim pulls or knobs in a finish that matches your appliances or lighting (like brushed nickel or matte black). Replace solid upper cabinet doors over a key area (like near the sink) with glass inserts or remove a couple of doors entirely to create open shelves. Keep what’s displayed there minimal and coordinated.
If your cabinets go up to the ceiling but feel oppressive, use lighter paint only on the doors and leave the face frames close in color to the wall—this visually separates them a bit and reduces the blocky effect while still using existing cabinets.
Step 4: Open Up Sightlines with Smart Storage and Selective Openness
You don’t need to knock down walls to “open” your kitchen; you can open sightlines and reduce visual clutter instead.
Start by clearing all but the daily essentials from your countertops. Toasters, blenders, stacks of mail, utensil crocks, and multiple knife blocks all add up visually. Relocate appliances you use less than once a week to lower cabinets, pantry shelves, or a nearby closet. Use drawer organizers for utensils and cooking tools that used to live in crocks on the counter.
Look for one upper cabinet run or corner that feels especially heavy. You can remove a single cabinet or a pair of cabinets and replace them with open shelving to create visual breathing room. Before removing anything, check inside the cabinet for wiring, venting, or plumbing. If you see electrical lines or ductwork, leave that cabinet alone.
If the cabinet is clear, use a drill/driver to remove screws securing it to neighboring cabinets and the wall studs. Have a helper support the cabinet as you back out the final screws. Patch screw holes and repair the wall as needed.
Install simple, sturdy floating shelves using heavy-duty brackets or concealed shelf supports anchored directly into studs. Use a level and stud finder to plan bracket locations. Store only a few attractive, frequently used items on these shelves—matching dishes, glassware, or a couple of plants—so they feel airy, not cluttered.
Even without removing cabinets, you can open sightlines by lowering the visual weight of items near eye level. Replace dark, busy window treatments with simple roller shades or light, sheer curtains. Keep the area above the fridge and upper cabinets mostly clear instead of stacked with boxes or decor. The more you can see uninterrupted wall and ceiling surface, the bigger the room feels.
Step 5: Refresh Floors and Backsplash to Tie the Brighter Look Together
Once walls, lighting, and cabinets are lighter, your floors and backsplash either support the new airy feel or fight it.
Start with a deep clean. Degrease backsplash tiles and grout with an appropriate cleaner and a stiff brush. Mop floors thoroughly, paying attention to corners and baseboards where grime accumulates. Sometimes, a deep clean alone reveals a surface you can work with rather than replace.
For backsplashes that are dated but sound, consider resurfacing instead of removal. If you have plain drywall, peel-and-stick backsplash tiles can be a good short-term upgrade. Choose light, simple patterns—subway-style or small-scale tiles in white or soft neutrals. Follow the manufacturer’s prep instructions carefully: walls must be clean, dry, and smooth.
If you already have tile but dislike the color, backsplash-safe paint or epoxy kits exist, though they require good ventilation, clean surfaces, light sanding, and a strong primer. Painted tile can be a budget-friendly temporary fix to brighten a dark, busy pattern until you’re ready for a full replacement.
For flooring, focus on consistency and tone rather than intricate patterns. Light to medium wood tones, luxury vinyl planks, or large-format porcelain tiles in neutral shades work well in most kitchens. If you’re installing a floating floor like click-together vinyl or laminate, ensure it’s rated for kitchens and follow acclimation instructions so the planks adjust to your home’s temperature and humidity before installation.
Plan your plank or tile direction to visually stretch the room—running boards along the length of the kitchen can make it appear longer, while running them across a narrow galley can make it look wider. Use transition strips where the kitchen meets other rooms for a clean, deliberate look.
Finally, add a low-profile runner or mat in front of the sink or main prep area in a light, simple design. Avoid dark, heavy, or highly patterned rugs that cut up the floor. Everything you add should support the sense of a single, continuous, bright plane underfoot.
Conclusion
Transforming a dark, cramped kitchen into a bright, open-feeling space doesn’t require knocking down walls or starting from scratch. By focusing on light, color, and visual clutter—and tackling projects in a logical order—you can change how your kitchen feels and functions in a surprisingly short time. Start with walls and ceilings, then upgrade lighting, lighten cabinets, open up sightlines, and finish with supportive floors and backsplash choices.
Work safely, take your time with prep, and make one intentional change at a time. As each layer comes together, you’ll see your kitchen shift from closed-in and gloomy to brighter, more spacious, and more enjoyable to cook and gather in—without leaving the DIY zone or your budget behind.
Sources
- [U.S. Department of Energy – Lighting Choices to Save You Money](https://www.energy.gov/energysaver/lighting-choices-save-you-money) - Overview of efficient lighting types, color temperature, and energy-saving considerations
- [Energy Star – LED Lighting](https://www.energystar.gov/products/lighting_fans/light_bulbs) - Guidance on LED bulbs, efficiency ratings, and performance standards
- [Sherwin-Williams – How Light Affects Color](https://www.sherwin-williams.com/en-us/homeowners/color/understanding-color/light-and-color) - Explains how lighting and paint color interact to influence room brightness and perception
- [This Old House – Cabinet Refacing & Painting Basics](https://www.thisoldhouse.com/cabinets) - Practical information on cabinet prep, painting, and refacing options
- [Family Handyman – Kitchen Lighting Tips](https://www.familyhandyman.com/project/kitchen-lighting-tips/) - DIY-friendly ideas and instructions for improving kitchen lighting layouts
Key Takeaway
The most important thing to remember from this article is that this information can change how you think about Renovation.


