A full kitchen renovation is expensive, messy, and time-consuming. Painting your existing cabinets, on the other hand, can deliver a dramatic upgrade in a single weekend (or two) for a fraction of the cost. If your cabinet boxes are solid but the finish looks tired, this project gives you the biggest visual impact per dollar you’ll spend.
This guide walks you through a practical, DIY-friendly process for painting kitchen cabinets, focusing on durability and a clean, professional look—without specialty tools or contractor prices.
Step 1: Evaluate Your Cabinets and Plan the Upgrade
Before you touch a brush or buy paint, make sure your cabinets are good candidates for a refresh.
First, check that the cabinet boxes are structurally sound. Open every door and drawer. Look for wobbling, loose joints, swollen areas from water damage, or soft spots in particleboard. If parts are crumbling or falling apart, paint alone won’t fix it—you may need repairs or partial replacement first.
Next, identify your current surface. Most kitchen cabinets are either solid wood, wood veneer over plywood or particleboard, or laminate. Wood and veneer are ideal for painting; laminate can be painted with the right primer but needs extra prep and care.
Then, decide your color and finish. Light colors brighten small or dark kitchens but show dirt more easily. Dark colors hide grime but will highlight dust and chips. For finish, a satin or semi-gloss is usually best for cabinets—they’re easier to clean and more resistant to moisture and grease than flat paint.
Finally, plan your work zones and timing. You’ll need a place to lay doors flat while they dry (a garage, basement, or even a cleared-out room). Expect at least 2–3 days for the full process: one day for prep, one day for priming, and one or two days for painting and curing. Avoid starting right before hosting guests—you won’t want cabinet doors off and tools everywhere.
Step 2: Remove Hardware, Label Everything, and Prep the Space
Good organization at the start will save you hours and a lot of frustration later.
Begin by removing all cabinet doors and drawer fronts. Use a drill or screwdriver to take off hinges, knobs, and pulls. Put each set of screws and hardware in its own labeled bag. A simple system is to number each door with painter’s tape (e.g., “1, 2, 3…”) and write the same number on the bag holding its matching hinges and screws.
Label the cabinet frames too. Inside each cabinet, stick a small piece of painter’s tape marked with the same number as the door that belongs there. When you reinstall, you won’t be guessing what goes where or fighting with misaligned doors.
Next, protect your kitchen. Lay down rosin paper or old sheets on the floor and tape plastic over countertops, appliances, and backsplashes near your work area. Use painter’s tape along wall edges, under the cabinet frames, and around any areas you don’t want painted.
Remove or tape around anything you can’t take off, like fixed shelf supports or non-removable trim. If you plan to replace hardware with a new style, measure the current hole spacing. If you’re changing from a single knob to a longer pull, you might need to fill old holes and drill new ones after painting.
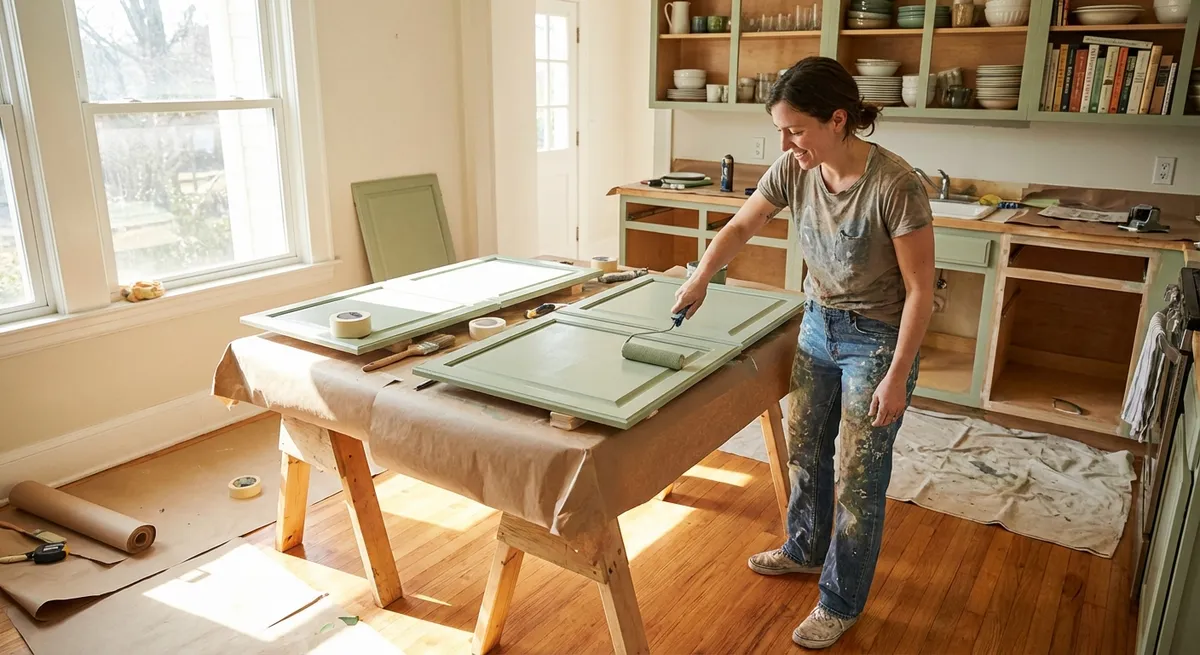
Lastly, set up a painting station in a well-ventilated area. Two simple options: lay doors on 2x4s across sawhorses, or use a clean table covered with a drop cloth. Leave enough space around each door so you can walk and paint from all sides without bumping into anything.
Step 3: Clean, Sand, and Repair for a Long-Lasting Finish
Prep is where most of the quality comes from. Rushing this step is the fastest way to get peeling paint and rough surfaces.
Start by cleaning thoroughly. Kitchen cabinets collect grease, smoke residue, and cooking grime that will prevent paint from sticking. Use a degreasing cleaner (like a TSP substitute) and a non-scratch scrub pad. Work on doors, drawer fronts, and the cabinet frames, especially around handles, knobs, and the area above the stove.
After cleaning, rinse with a damp cloth and let everything dry completely. Any residue left behind can affect adhesion, so don’t skip the rinse.
Next, lightly sand all surfaces you’ll paint. For most cabinet finishes, 120–150 grit sandpaper works well. You’re not trying to remove all the old finish; you just want to scuff the surface so primer can grip. On detailed trim or routed edges, use a sanding sponge to get into grooves.
Inspect for damage. Fill small dings, old hardware holes, and hairline cracks with wood filler or spackling compound. Let it dry, then sand smooth with 180–220 grit paper. Run your fingertips over the surface—if you can feel ridges or dips, they’ll show through the final paint.
Wipe everything down with a tack cloth or a slightly damp microfiber cloth to remove dust. Dust trapped under primer or paint creates a rough, gritty finish that’s hard to fix later.
If your cabinets are laminate or have a very glossy, factory-applied coating, sand a bit more aggressively (still not down to bare substrate) and plan on using a bonding primer in the next step for reliable adhesion.
Step 4: Prime Smart and Apply Your Cabinet Paint
Primer and paint choice can make or break this project, especially in a high-use area like the kitchen.
Start with the right primer. For most wood and previously painted cabinets, a stain-blocking, bonding primer works well. If you’re dealing with laminate or a very slick surface, look for a primer specifically labeled for “bonding” or “difficult surfaces.” If your existing cabinets are very dark and you’re going much lighter, a high-hiding primer can cut down on how many paint coats you need.
Stir your primer thoroughly before use. Begin with the cabinet frames inside the kitchen: cut in along edges and corners with a quality angle brush, then smooth larger flat areas with a small foam roller. Work in thin, even coats. Thick coats take longer to dry and are more likely to drip or show brush marks.
Move to doors and drawer fronts at your painting station. An efficient order is: back side of the door first, then the front. Apply primer to the recessed areas and edges with a brush, then roll the flat panels. Lay the door flat while drying to reduce runs. Let the back dry, then flip and prime the front.
After the primer dries fully (follow the can’s instructions), lightly sand with very fine sandpaper (220–320 grit) to knock down any raised grain or dust nibs. Wipe clean.
For topcoat, choose a durable paint designed for trim or cabinets. These are usually either acrylic latex, alkyd-modified acrylic, or waterborne enamels. They cure harder and resist chipping and stains better than standard wall paint.
Apply paint in two (sometimes three) thin coats rather than one thick coat. Use the same method as with primer: brush corners and profiles, roll flat panels, and always maintain a wet edge so you don’t get lap marks. Let each coat dry fully before sanding very lightly and applying the next.
Avoid over-brushing—once the paint starts to set, going back over it can leave visible brush strokes. If you see a small flaw, resist the urge to keep fiddling with it; it’s often better to fix it with a light sand after drying and then touch up with the next coat.
Step 5: Let Paint Cure, Reassemble, and Add Finishing Touches
Rushing the final stage is a common mistake. Paint can feel dry to the touch long before it’s fully cured and hard.
After the final coat of paint, let doors and frames dry for at least the manufacturer’s recommended time. Then, give them extra curing time—often 24–48 hours before light handling and up to a week before heavy use—especially if your kitchen is humid.
Once they’re safe to handle, reinstall hardware and hinges. Work systematically, matching each numbered door to the cabinet frame it came from. Attach hinges to the doors first, then mount them on the boxes. Start all the screws loosely, adjust for even gaps between doors and along edges, then tighten.
If you’re adding new hardware, use a simple template or jig (store-bought or homemade from cardboard) so that knobs and pulls line up consistently across all doors and drawers. Measure twice before drilling any new holes—misaligned hardware is one of the quickest ways to make a fresh paint job look amateur.
Check door swing and alignment. Adjust hinge screws to level doors and set reveal gaps. Soft-close hinges or bumpers are inexpensive upgrades that make cabinets feel higher-end and help protect the fresh paint from slamming impact.
For the first week or two, treat cabinets gently. Avoid scrubbing aggressively or slamming doors while the paint fully cures. After that, clean with a mild soap-and-water solution—no harsh abrasives or strong solvents.
To finish the upgrade, consider small, low-cost add-ons: under-cabinet LED strips, a new faucet, or updated outlet covers. These touches complement your newly painted cabinets and help the whole kitchen feel more like a thoughtful renovation than a single-project refresh.
Conclusion
Painting kitchen cabinets is one of the most effective DIY renovation projects you can tackle: it transforms the room, stretches your budget, and doesn’t require advanced carpentry skills. The keys to success are thorough prep, using the right primer and paint, and giving everything enough time to dry and cure.
With a clear plan, some patience, and careful step-by-step work, you can turn dated, worn cabinets into a clean, modern, and durable finish that makes your kitchen feel completely refreshed—without tearing out a single box.
Sources
- [U.S. Department of Housing and Urban Development – Rehab Guide, Volume 6: Kitchens](https://www.huduser.gov/portal/publications/rehabguide_vol6.html) - Background on kitchen components, durability, and rehab considerations
- [Consumer Reports – Best Paints for Your Home](https://www.consumerreports.org/home-paints/best-interior-paints-of-the-year-a2823106494/) - Independent testing and recommendations on interior and cabinet-worthy paints
- [Sherwin-Williams – Cabinet Painting Project Advice](https://www.sherwin-williams.com/painting-contractors/how-to/painting-kitchen-cabinets) - Manufacturer guidance on primers, paint types, and application techniques for cabinets
- [Benjamin Moore – How to Paint Kitchen Cabinets](https://www.benjaminmoore.com/en-us/interior-exterior-paints-stains/how-to-advice/interior-how-to/how-to-paint-kitchen-cabinets) - Step-by-step manufacturer tips on prep, priming, and finishing for cabinet painting
- [Mayo Clinic – Household Chemical Safety](https://www.mayoclinic.org/healthy-lifestyle/adult-health/in-depth/household-chemicals/art-20046411) - Safety considerations when working with cleaners, degreasers, and paint products
Key Takeaway
The most important thing to remember from this article is that this information can change how you think about Renovation.


