A full kitchen remodel is expensive and disruptive, but you don’t need a sledgehammer or huge budget to make your space feel new. With a focused “mini-makeover,” you can update the look and function of your kitchen in a weekend using basic tools and smart planning. This guide walks you through a practical, step‑by‑step approach any DIY‑minded homeowner can follow.
Start With a Quick Kitchen Audit
Before you buy anything, take a hard look at how your kitchen actually works day to day. The goal isn’t perfection—it’s to find the smallest changes that will make the biggest difference.
Walk your kitchen and write down:
- What annoys you daily (dark corners, cluttered counters, nowhere to put the trash).
- What’s worn out or damaged (peeling caulk, loose hardware, dingy paint).
- What already works well (good natural light, solid cabinets, decent layout).
Open every cabinet and drawer. Note what’s stuffed, what’s underused, and where you always hunt for the same items. This helps you plan improvements that match how you really use the room instead of how you wish you used it.
Snap photos of each wall and key areas (sink, stove, prep zone). These pictures will help you compare “before and after” and make shopping easier—especially for matching finishes and sizes.
Finally, set a realistic ceiling for time and money. A weekend mini‑makeover should prioritize jobs you can complete (or nearly complete) in 1–2 days without specialized tools or permits.
Step 1: Brighten the Space With Paint and Simple Prep
If your kitchen feels dull or dated, paint often gives the biggest visual upgrade for the least money. Even if you don’t touch the cabinets, fresh wall color can change the whole mood.
- Choose the right paint and finish.
- Look for washable, moisture‑resistant paint labeled for kitchens or baths.
- A matte or eggshell finish hides wall imperfections better than high‑gloss, but make sure it’s scrubbable.
- Prep smarter, not longer.
- Move small appliances off counters and pull furniture away from walls.
- Wipe walls with a mild degreaser, especially near the stove, to help the paint adhere.
- Patch nail holes or small dings with lightweight spackle; sand smooth once dry.
- Tape around trim, backsplash, and outlets if you’re not confident with cutting in.
- Paint in the right order.
- Cut in at the ceiling, corners, and around trim with a brush.
- Use a roller for the larger wall areas, working in sections from top to bottom.
- Apply a second coat if the old color is dark or patchy shows through.
- Upgrade trim while you’re at it.
- If baseboards and window trim are beat up, a fresh coat of bright white semi‑gloss can make the whole room look cleaner.
- Caulk any gaps between trim and wall before painting for a sharper finish.
By the end of this step, your kitchen should already feel cleaner, lighter, and more intentional—without moving a single cabinet.
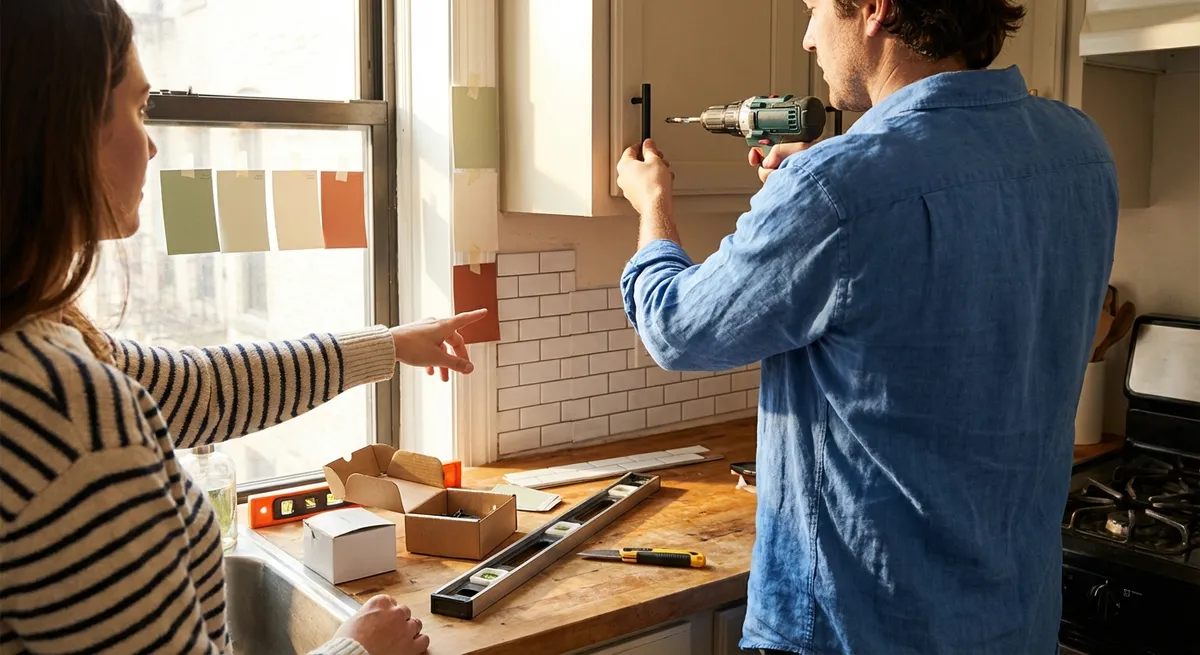
Step 2: Refresh Cabinets Without Replacing Them
New cabinets are one of the biggest renovation expenses. In many homes, the boxes are structurally fine—they just look tired. You can get a big visual upgrade with a few targeted changes.
- Deep clean all cabinet surfaces.
- Grease and grime make finishes look worse than they are.
- Use a degreaser or warm water with dish soap. Rinse and dry thoroughly.
- Decide: hardware swap, door refresh, or both.
- Hardware only: If the cabinet finish is decent, new handles and knobs can modernize the look quickly.
- Door refresh: If doors are scratched or orange‑toned, consider painting just the doors or applying a wood‑tone restorer.
- Both: Best overall impact if time allows.
- Swap hardware the right way.
- Count existing knobs and pulls before shopping, and bring one with you to match spacing (center‑to‑center distance on pulls).
- If your new pulls don’t match old hole spacing, use a hardware template to drill new holes consistently and fill the old ones with wood filler before painting.
- Tighten hinges and adjust door alignment while you work: doors should hang straight and close cleanly.
- Paint or refinish cabinet doors (weekend‑friendly version).
- Remove doors and label them by location (painter’s tape on the edge works).
- Lightly sand to scuff the surface; wipe dust away.
- Use a bonding primer made for glossy or previously finished surfaces.
- Apply 1–2 coats of cabinet or trim paint with a small foam roller for a smooth finish.
- Let doors dry fully before reinstallation to avoid tacky edges.
This step turns “old but solid” cabinets into a feature instead of an eyesore, without the cost and complexity of a full replacement.
Step 3: Make Counters More Usable With Smart Add‑Ons
You might not be ready to replace countertops, but you can still make them more functional and visually cohesive with simple upgrades.
- Declutter strategically.
- Clear everything off the counters. Only put back what you use daily (coffee maker, toaster, knife block).
- Group small items on a tray or lazy Susan so they look intentional, not scattered.
- Relocate rarely used appliances to a cabinet or pantry shelf.
- Use quick visual fixes for tired counters.
- For laminate with small chips or stains, use color‑matched repair paste to blend damage.
- Add a large cutting board, butcher block slab, or stone serving board in a heavy‑use prep area. It breaks up a dated pattern and creates a defined workspace.
- If your counters clash with the backsplash, choose accessories (like a tray, utensil crock, or rug) that pick up both colors to visually tie them together.
- Add functional zones.
- Coffee station: Keep mugs, coffee, filters, and spoons in one spot with a small shelf or caddy.
- Prep zone: Store knives, cutting boards, and mixing bowls near the largest clear section of counter.
- Cooking zone: Keep frequently used oils, salt, and spatulas near the stove in a heat‑safe tray or container.
- Improve outlet access safely.
- If cords are always stretched across the counter, consider UL‑listed plug‑in power strips or under‑cabinet units designed for kitchens.
- Never overload outlets or daisy‑chain extension cords; if you consistently run short on power, note this as a future project for a licensed electrician.
The result is less visual noise, more usable work surface, and a kitchen that’s easier to work in every day.
Step 4: Update the Backsplash With Peel‑and‑Stick or Paint
A dated or damaged backsplash can make the whole kitchen feel older. Full tile jobs take more time, but there are DIY‑friendly options you can finish over a weekend.
- Assess your starting point.
- If you already have tile that’s structurally sound but ugly, you may be able to clean and paint it with tile‑appropriate products.
- If you have bare wall, you can add a backsplash with peel‑and‑stick materials or a simple tile project if you’re comfortable with basic tiling.
- Peel‑and‑stick backsplash basics.
- Clean the wall thoroughly and let it dry. Any grease will prevent adhesion.
- Use a level and a straight edge to mark a reference line so your first row is perfectly straight.
- Dry‑fit pieces before removing the backing, especially around outlets and edges.
- Press firmly from the center outward to avoid bubbles; a laminate roller helps with adhesion.
- Trim around outlets with a sharp utility knife and reinstall outlet covers on top.
- Painting an existing tile backsplash.
- Clean and lightly sand glossy tile to help primer stick.
- Use a bonding primer labeled for tile, then a high‑quality enamel or tile‑specific paint.
- A small foam roller gives a smoother finish than a brush alone.
- For grout lines, you can either keep the original grout color or repaint it with a grout pen for a fresh contrast.
- Protect where water hits.
- Behind the sink, make sure any painted or peel‑and‑stick surface is rated for humid or splash‑prone areas.
- Run a fresh bead of kitchen‑grade caulk where the counter meets the backsplash to prevent water intrusion.
This step adds instant style and can visually anchor your counters and cabinets without the cost of a full tile job.
Step 5: Improve Storage and Flow With Simple Organizers
A kitchen that looks good but functions poorly will still frustrate you. The last step is all about making everyday tasks easier by organizing what you already own.
- Re‑think cabinet layouts.
- Store items where you use them: pots and pans near the stove, plates and glasses near the dishwasher, spices away from heat and light.
- Move rarely used serving pieces or specialty gadgets to higher shelves or another storage area.
- Add organizers that don’t require tools.
- Use shelf risers for plates and bowls to double vertical space.
- Add pull‑out baskets or bins in deep base cabinets to avoid losing items in the back.
- Install tension rods upright under the sink to hang spray bottles and free up floor space.
- Tackle drawers with simple inserts.
- Use adjustable dividers for cooking utensils so they don’t pile into one tangled mass.
- Dedicate one drawer to food storage containers with a small bin just for lids. This prevents the classic “plastic avalanche” when you open cabinet doors.
- Create a landing zone.
- If mail, keys, or school papers always land on the counter, designate one small section as the “landing zone.”
- Add a wall‑mounted file holder or small basket so the clutter is contained but still accessible.
- Do a 15‑minute reset at the end of the weekend.
- Once all upgrades are done, put everything in its new home and walk through your typical cooking routine in your head.
- Adjust anything that doesn’t feel natural now instead of waiting until the new habits are set.
These storage tweaks make your mini‑makeover feel like a full‑blown upgrade because the kitchen not only looks better, it works better too.
Conclusion
You don’t need a massive budget or months of disruption to make your kitchen feel fresh and functional. By focusing on paint, cabinet refreshes, counter usability, quick backsplash upgrades, and smarter storage, you can dramatically improve your space over a single weekend. Start with a clear audit, set realistic limits, and tackle these steps in order. When Monday comes, you’ll be cooking, cleaning, and spending time in a kitchen that finally matches how you want to live—without a full renovation.
Sources
- [U.S. Department of Energy – Energy Saver: Kitchen Remodeling](https://www.energy.gov/energysaver/kitchen-remodeling) - Overview of energy‑efficient choices to consider when updating a kitchen
- [This Old House – How to Paint Kitchen Cabinets](https://www.thisoldhouse.com/cabinets/21015141/how-to-paint-kitchen-cabinets) - Detailed cabinet painting techniques and product recommendations
- [Family Handyman – Kitchen Storage and Organization Ideas](https://www.familyhandyman.com/list/kitchen-storage-and-organization-ideas/) - Practical examples of DIY‑friendly organizers and layout improvements
- [Consumer Reports – Best Interior Paints](https://www.consumerreports.org/home-garden/paints/ratings-overview/) - Independent testing and ratings for interior paints suitable for kitchens
- [The Spruce – Peel and Stick Tile Backsplash Guide](https://www.thespruce.com/peel-and-stick-tile-backsplash-4588218) - Pros, cons, and installation tips for peel‑and‑stick backsplash products
Key Takeaway
The most important thing to remember from this article is that this information can change how you think about Renovation.


