A bathroom renovation can quickly go from exciting to overwhelming if you dive in without a plan. Between plumbing, tile, electrical, and all the little fixtures, it’s one of the most complex rooms to remodel. The good news: with a clear sequence and realistic prep, DIY‑minded homeowners can handle a lot of the work themselves—and know when to bring in pros. This guide walks you through a practical, step‑by‑step approach to planning and executing a bathroom renovation that stays on budget, on schedule, and out of disaster territory.
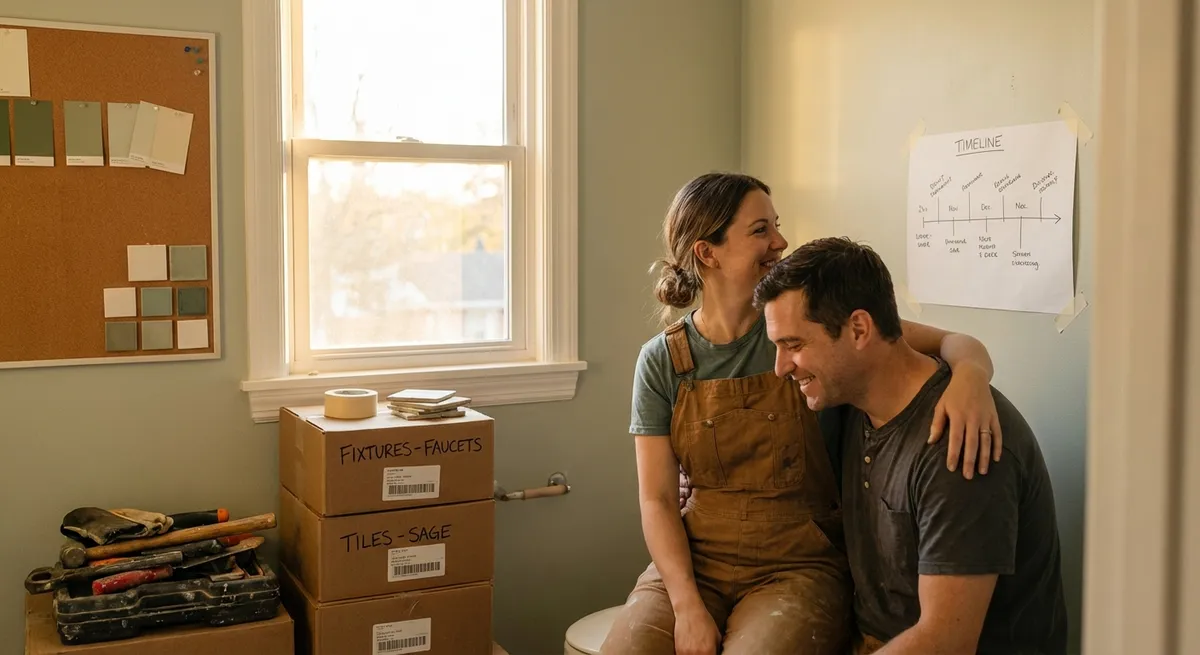
Step 1: Define the Scope and Budget Before You Touch Anything
Before you swing a hammer, decide exactly what you’re changing and what you’re keeping. Scope creep (adding more and more tasks as you go) is a major reason bathroom projects drag on and blow the budget.
Start by asking:
- Are you keeping the existing layout (toilet, tub/shower, sink in the same spots) or moving fixtures?
- Are you replacing the tub with a shower, or swapping a shower for a tub?
- Do you need to update electrical (more outlets, better lighting, GFCI upgrades)?
- Is there any known water damage, mold, or soft floor spots that must be addressed?
Create a simple list with must‑haves and nice‑to‑haves. Price out your major items first: tub or shower system, vanity, countertop, toilet, flooring, and tile. Then add 10–20% as a contingency for surprises—bathrooms almost always hide something behind the walls or under the floor.
Practical tips:
- Visit stores to see fixtures in person. Dimensions on paper are one thing; seeing how deep a vanity really is helps avoid cramped spaces.
- Measure your bathroom at least twice, and sketch a simple floor plan with every dimension written down (wall‑to‑wall width, window size, door swing, ceiling height).
- Check your local building department’s website to see if you need permits for plumbing, electrical, or structural changes. Factor permit fees and inspection timing into your plan.
Locking in your scope and budget early will guide every other decision—including what you attempt yourself and what you hire out.
Step 2: Make a Realistic Demo and Prep Plan
Demolition seems straightforward: tear out the old, bring in the new. In reality, sloppy demo creates damage and extra repair work. A simple, methodical plan keeps you safe and avoids breaking things you meant to keep.
Work in this order:
- Shut off utilities and protect the rest of the house.
Turn off the bathroom’s water supply at the shutoff valves or main line. Flip the breaker for the bathroom circuits. Tape plastic sheeting over nearby doors and vents to control dust. Lay down drop cloths along the path from the bathroom to the exit.
- Remove fixtures and accessories.
Take out the mirror, towel bars, toilet paper holder, light fixtures (once power is off), and vanity doors/drawers. Removing these first makes walls and floors easier to access.
- Pull the toilet and vanity.
Flush to empty most of the tank water, then use a sponge and bucket to remove the rest. Disconnect the water lines and unbolt the toilet. Plug the drain with an old rag to block sewer gas. Remove the vanity by turning off water supplies, disconnecting plumbing, and cutting through any caulk along the wall and floor.
- Demo tub/shower surrounds and flooring.
Start at an exposed edge, like a corner or niche. Cut drywall or cement board in manageable sections. For tile, use a hammer and chisel or demolition hammer, working from a broken tile rather than intact surfaces. For floors, remove baseboards first, then pry up old tile or vinyl. Go slowly where plumbing lines may be close to the surface.
- Inspect structure and utilities.
With walls and floors open, look for rot, mold, or damaged framing. Note any electrical that doesn’t meet current safety standards (like missing GFCI protection or ungrounded wiring) and plan updates before you close anything back up.
Don’t rush demolition. A careful, controlled tear‑out saves money on repair materials and reveals hidden problems while there’s still time to fix them.
Step 3: Tackle Plumbing and Electrical Rough‑Ins the Right Way
Once everything is opened up, you’re in the “rough‑in” phase—when plumbing and electrical lines are installed or adjusted before new walls and finishes go in. Even if you’re handy, some of this work may be better left to licensed pros, especially if local code requires it or you’re altering drain lines and circuits.
Focus on these key areas:
- Plumbing layout:
If you’re keeping fixtures in the same locations, rough‑in may be as simple as updating shutoff valves, replacing corroded supply lines, and switching to modern drain fittings. If you’re moving a toilet or changing from tub to walk‑in shower, you may need to reroute drain lines and venting—often a job for a plumber.
- Shower pan and waterproofing prep:
Decide now whether you’ll use a prefabricated shower base or a custom mortar pan. Each has specific drain placement requirements; your plumbing rough‑in must match.
- Electrical upgrades:
Plan for at least one GFCI‑protected outlet near the vanity. Consider separate circuits for lighting, a fan, and outlets to avoid overloading. If adding recessed lights or a heated floor, rough‑in those wires now. Install an appropriately rated exhaust fan that vents to the outside, not just into the attic.
- Height and placement details:
Standard outlet heights, switch placement, and fixture locations (like vanity light centerline) should be decided and measured before closing the walls. Double‑check against your vanity and mirror dimensions so the light isn’t too high or too low.
Practical tips:
- Take photos of every wall and floor once rough‑ins are complete. These “X‑ray” photos will be invaluable if you ever need to locate a stud, pipe, or wire later.
- Use nail plates on studs where plumbing and wires pass through near the surface to protect them from future screws or nails.
- Schedule inspections (if required) before you insulate or hang backer board. Failing an inspection after closing up the walls usually means re‑demo.
Getting the rough‑in stage right makes every step after this smoother, safer, and code‑compliant.
Step 4: Build a Solid, Waterproof Shell Before You Think About Pretty Finishes
The difference between a long‑lasting bathroom and a future mold problem is almost always in the waterproofing. This is the stage where you install backer board, vapor barriers, and shower pans—basically building a shell that keeps water where it belongs.
Work through these tasks in order:
- Repair or reinforce framing and subfloor.
Replace any rotted studs or joists. Add blocking for future grab bars, shower doors, and heavy towel bars—these are easiest to install before walls are closed. Ensure the subfloor is solid, flat, and rated for tile if you’re using it.
- Install the shower base or build the pan.
For prefabricated pans, follow manufacturer instructions carefully: level the base, use the recommended mortar bed if required, and ensure the drain connection is watertight. For custom pans, build the sloped mortar bed, install the liner or membrane, then the final sloped layer, maintaining a consistent fall toward the drain.
- Hang proper wall backer.
Use cement board or fiber‑cement backer in wet areas; standard drywall is not a substitute in shower surrounds. Leave a small gap above the tub or shower lip and fill/cover with waterproofing, not grout alone.
- Apply waterproofing membranes.
Use either a sheet membrane (applied over backer board) or a liquid waterproofing product painted/rolled on per manufacturer directions. Pay special attention to corners, niches, and seams—these are common failure points. Overlap or seam‑tape as specified.
- Install underlayment for floors.
For tile flooring, install cement backer board or an uncoupling membrane over the subfloor. Stagger seams and avoid four corners meeting in one spot. Fasten according to the product instructions and tape seams as required.
Practical tips:
- Don’t skip the waterproofing step even if you’re using “water‑resistant” materials. “Resistant” doesn’t mean waterproof.
- Run the exhaust fan vent through the roof or side wall with proper flashing; dumping humid air into the attic can lead to major long‑term issues.
- Let all mortar beds and waterproofing products cure fully before you tile. Rushing this step is a shortcut to cracked grout or leaks.
Think of this stage as building the skeleton and raincoat of your bathroom. Once it’s sound and sealed, you can move on to the aesthetics.
Step 5: Finish With Tile, Fixtures, and Details in a Logical Sequence
With the structure and waterproofing done, you finally get to work on the visible finishes. A smart sequence prevents you from damaging new work while you’re installing the rest.
A practical order:
- Tile walls and shower surrounds.
Start with the most complex area—the shower or tub surround. Use a layout that minimizes tiny slivers at corners or edges. Use spacers, a level, and a ledger board to keep tile lines straight. Cut around niches and plumbing openings carefully, dry‑fitting before thinset.
- Tile or install other flooring.
Once wall tile is in and grouted (or at least set), move to the floor. If using tile, leave appropriate expansion gaps at the perimeter (later covered by baseboards). For vinyl planks or sheets, follow manufacturer requirements around toilets and tubs for sealing.
- Grout and seal as needed.
Mix grout in small batches and work it into joints fully. Wipe with clean water and a sponge, being careful not to wash out joints. Once cured, apply sealer if your grout or tile requires it. Silicone caulk corners and where tile meets tubs, shower pans, and counters instead of grouting those joints.
- Install the vanity, toilet, and trim.
Set the vanity level and secure it to studs. Install the countertop, sink, and faucet. Reset the toilet with a new wax ring or modern seal and tighten bolts evenly. Then install baseboards and any trim.
- Finish with lighting, accessories, and touch‑ups.
Install light fixtures, mirror, towel bars, and shelves—using wall anchors or blocking where necessary. Caulk where trim meets walls, then do final paint touch‑ups. Test all fixtures for leaks and function, and run the exhaust fan to confirm good airflow.
Practical tips:
- Keep a box labeled “spare tile and grout” for future repairs. Store it somewhere dry with the exact grout color noted.
- Protect new tile and tubs with cardboard or rosin paper while you install heavy items or tools in the room.
- Do a final checklist: GFCIs working, fan vented and quiet, no slow drips at any connection, door and drawers clear of hardware and trim.
Finishes are where the bathroom feels “done,” but don’t rush them—careful, clean work here is what you’ll see every day.
Conclusion
A bathroom renovation doesn’t have to be chaotic or unmanageable if you break it into clear stages: define your scope and budget, demo with care, get rough‑ins right, build a solid waterproof shell, then finish in a smart sequence. DIY enthusiasts can confidently handle many parts of the process, especially demo, prep, tiling, and fixture installation, while bringing in licensed pros for complex plumbing and electrical. With a realistic plan, the right order of operations, and attention to waterproofing, you’ll end up with a bathroom that looks great, functions better, and holds up for years—without turning your home into a long‑term construction zone.
Sources
- [U.S. Department of Energy – Bathroom Remodeling Guide](https://www.energy.gov/energysaver/remodeling-advice/bathroom-remodeling) - Covers ventilation, lighting, and efficiency considerations during bathroom remodels
- [U.S. Consumer Product Safety Commission – Ground-Fault Circuit Interrupters](https://www.cpsc.gov/safety-education/safety-guides/home/gfci) - Explains GFCI requirements and safety in wet areas like bathrooms
- [Family Handyman – How to Remodel a Bathroom](https://www.familyhandyman.com/project/how-to-remodel-a-bathroom/) - Step-by-step overview of bathroom remodel stages and DIY tips
- [This Old House – How to Waterproof a Shower](https://www.thisoldhouse.com/bathrooms/21015030/how-to-waterproof-a-shower) - Detailed instructions and best practices for shower waterproofing
- [International Association of Certified Home Inspectors – Bathroom Ventilation and Humidity](https://www.nachi.org/bathroom-ventilation.htm) - Discusses proper exhaust fan installation and moisture control in bathrooms
Key Takeaway
The most important thing to remember from this article is that this information can change how you think about Renovation.


