A home doesn’t need a full remodel to feel better. Often, a few smart, focused DIY fixes can make everyday life smoother, safer, and more comfortable. This guide walks you through five practical home projects you can actually finish, using tools many DIYers already own or can easily borrow.
Each project includes clear, step‑by‑step instructions so you can move from “I should fix that” to “Done” without getting stuck in the middle.
Project 1: Stop a Dripping Faucet
A dripping faucet wastes water, adds to your bill, and is just plain annoying. The good news: most drips come from worn internal parts you can replace in under an hour.
Tools and materials
- Adjustable wrench
- Screwdriver (Phillips or flathead, depending on your faucet)
- Replacement parts (cartridge, washer, or O‑rings, depending on faucet type)
- Plumber’s grease
- Rag or small towel
Step-by-step instructions
Step 1: Turn off the water supply
Find the shutoff valves under the sink (one for hot, one for cold). Turn them clockwise until they stop. Open the faucet to release any remaining water and confirm the supply is off.
Step 2: Plug the drain and remove the handle
Use the sink stopper or a rag to plug the drain so you don’t lose screws or small parts. Look for a cap or screw on the faucet handle. Remove it with a screwdriver and gently pull off the handle.
Step 3: Expose and remove the internal parts
Under the handle, you’ll see a nut or mounting hardware. Use an adjustable wrench to loosen it. Carefully pull out the cartridge or stem assembly. Take note of how everything is oriented, or snap a quick photo for reference.
Step 4: Inspect and replace worn components
Look for cracked, flattened, or brittle rubber washers and O‑rings. If you’re not sure what to buy, bring the old parts or entire cartridge to the hardware store and match them. Install the new parts in the same order and position. Use a small amount of plumber’s grease on O‑rings to help them seal and move smoothly.
Step 5: Reassemble and test
Reinstall the cartridge or stem, tighten the nut snugly (but don’t overtighten), and reattach the handle and screw. Turn the water supply back on slowly while watching for leaks. Open and close the faucet a few times—if the drip is gone, you’re done. If there’s still a slow leak, confirm everything is seated correctly and tightened.
Project 2: Anchor a Wobbly Bookcase or Cabinet
Tall furniture can tip over—especially if you have kids, pets, or uneven floors. Anchoring a bookcase or cabinet to the wall is a simple safety upgrade that also makes your space feel more solid and intentional.
Tools and materials
- Stud finder
- Drill and drill bits
- Tape measure
- Pencil
- Furniture anchoring kit (straps or brackets, plus screws)
- Level (optional, but helpful)
Step-by-step instructions
Step 1: Empty and position the furniture
Remove items from the top shelves so you can move and adjust the piece safely. Place the bookcase or cabinet where you want it to stay long‑term, keeping it flush with the wall.
Step 2: Locate studs in the wall
Use a stud finder to locate studs behind the top of the furniture. Run the stud finder horizontally and mark stud locations with a pencil. Anchoring into studs is much stronger than using drywall anchors alone.
Step 3: Attach brackets or straps to the furniture
Most anchoring kits include L‑brackets or fabric/metal straps. Attach these to the top back edge of the bookcase or cabinet using the screws provided. Pre‑drill pilot holes if the wood is hard to prevent splitting.
Step 4: Mark and drill holes in the wall
With the furniture in place, hold the loose part of the bracket or strap against the wall where it meets a stud. Mark these spots with a pencil. Move the furniture slightly away if needed and drill pilot holes into the stud at your marks.
Step 5: Secure everything and check for wobble
Slide the furniture back into place. Use the provided screws to attach the bracket or strap into the wall studs. Gently rock the furniture front‑to‑back and side‑to‑side; it should feel noticeably more stable. Adjust or tighten fasteners if there’s still movement.
Project 3: Swap Out a Tired Light Fixture
Replacing a basic, dated ceiling light with a modern fixture can transform a room’s look in one afternoon. If you’re comfortable turning off power at the breaker and following basic wiring steps, this is a manageable DIY upgrade.
> Important: If you’re unsure about any electrical step, consult or hire a licensed electrician.
Tools and materials
- New light fixture (with mounting bracket and hardware)
- Voltage tester
- Screwdrivers
- Wire stripper
- Wire connectors (wire nuts)
- Ladder or step stool
Step-by-step instructions
Step 1: Turn off power at the breaker
Do not rely on a wall switch. Go to your electrical panel and turn off the breaker for the room you’re working in. Back at the fixture, flip the light switch on to confirm it doesn’t light up. Use a voltage tester at the fixture wires to double‑check power is off.
Step 2: Remove the old fixture
Take off any glass shades or bulbs. Unscrew the decorative cover (canopy) to expose the mounting bracket and wiring. Support the fixture with one hand while loosening the mounting screws. Once it’s hanging loose, carefully disconnect the wires by unscrewing the wire connectors.
Step 3: Inspect the electrical box
Confirm the ceiling box is firmly attached and rated for the type of fixture you’re installing (especially important for heavier lights or ceiling fans). If it’s damaged or loose, stop and replace it or call a pro.
Step 4: Install the new mounting bracket
Your new fixture should include a mounting bracket. Attach it to the electrical box using the provided screws. Adjust it so the fixture will sit flush against the ceiling when installed.
Step 5: Connect wires and mount the new fixture
Match the house wires to the fixture wires: typically black (hot) to black, white (neutral) to white, and bare or green (ground) to the green/bare ground wire or ground screw. Twist wires together and secure each connection with a wire connector. Gently tuck the wires into the box, then attach the fixture to the mounting bracket using the included screws. Add bulbs and any shades, turn the breaker back on, and test the light.
Project 4: Seal Drafty Windows with Weatherstripping
Drafty windows make rooms uncomfortable and energy bills higher. Weatherstripping is a low‑cost, high‑impact fix that can be installed in an afternoon and removed later if needed.
Tools and materials
- Adhesive foam weatherstripping or V‑strip (vinyl weatherstripping)
- Scissors or utility knife
- Measuring tape
- Mild cleaner and rag
Step-by-step instructions
Step 1: Identify where air is leaking
On a windy day or with your HVAC running, hold your hand around the window frame edges and sash (moving parts of the window) to feel for cold air. You can also move a piece of tissue or a lit incense stick around the frame; movement in the smoke or tissue indicates a draft.
Step 2: Clean the surfaces
Use a mild cleaner and rag to clean the window stops and frame where the weatherstripping will stick. Let everything dry completely—adhesive won’t hold well on dusty or damp surfaces.
Step 3: Measure and cut the weatherstripping
Measure the lengths along the sides and top (and bottom, if needed) of the window frame where you’ll apply the material. Cut pieces of weatherstripping to fit, leaving them just a hair longer than needed so you don’t end up with small gaps at corners.
Step 4: Apply the weatherstripping
Peel off a small section of the backing and start at one corner. Press the weatherstripping firmly into place along the frame, removing more backing as you go. Keep it straight and snug, but avoid stretching it, which can cause it to shrink back over time.
Step 5: Test window operation and seal
Close and latch the window. It should close firmly but not require force. Check around the frame again for drafts. If the sash won’t close properly, you may need thinner weatherstripping or slight adjustments to placement. Once it feels snug, you’ve improved both comfort and efficiency.
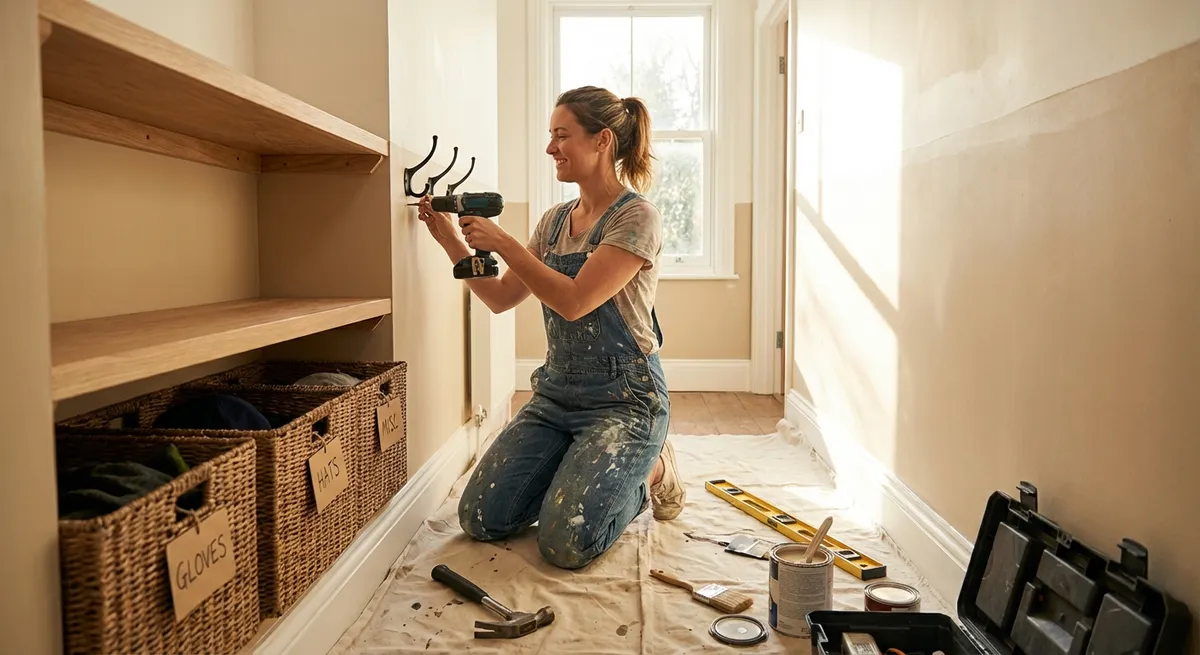
Project 5: Build a Simple Wall-Mounted Coat Rack
A wall‑mounted coat rack near your entryway or mudroom cuts clutter and gives your home a more organized feel. This basic build uses a single board and some hooks—no advanced carpentry needed.
Tools and materials
- 1 board (e.g., 1x4 or 1x6), cut to desired length
- Sandpaper (120–220 grit)
- Wood stain or paint and brush (optional)
- Coat hooks (4–6, depending on board length)
- Drill and bits
- Screws and wall anchors (or screws for studs)
- Level
- Tape measure and pencil
Step-by-step instructions
Step 1: Size and prep the board
Decide how wide you want your rack (commonly 24–36 inches). Have the board cut to length at the store or use a saw at home. Lightly sand all surfaces and edges until smooth. Wipe away dust.
Step 2: Finish the wood (optional but recommended)
Apply stain or paint according to the product directions. Let it dry fully, then lightly sand with fine‑grit sandpaper if needed and apply a second coat or clear sealer. This protects the wood from scuffs and moisture.
Step 3: Lay out hook placement
Measure the length of the board and mark hook positions so they’re evenly spaced and centered vertically. For example, on a 30‑inch board with five hooks, you might place the first and last hooks 3 inches from each end, then space the remaining three evenly between them.
Step 4: Attach hooks to the board
Pre‑drill small pilot holes for each hook’s screws to prevent splitting. Then attach the hooks securely using the provided screws. Make sure all hooks align straight.
Step 5: Mount the rack to the wall
Hold the rack against the wall at a practical height (typically 60–66 inches from the floor, depending on your household). Use a level to ensure it’s straight. Mark the screw hole locations through the board. If possible, align at least two mounting points with wall studs; if not, use appropriate wall anchors. Drill pilot holes, insert anchors if needed, then screw the rack tightly to the wall. Test it with a few heavy coats or bags.
Conclusion
You don’t need a full toolbox or a free week to make real improvements at home. Fixing a leaking faucet, anchoring furniture, swapping a light fixture, sealing drafty windows, and adding a simple coat rack all deliver visible, everyday benefits: less noise, more safety, better comfort, and less clutter.
Choose one project, gather your tools, and work through it step by step. As you finish each fix, you’ll build both a better home and more confidence for whatever you tackle next.
Sources
- [U.S. Environmental Protection Agency – Fix a Leak](https://www.epa.gov/watersense/fix-leak-week) - Explains the impact of household leaks on water use and provides basic guidance on identifying and repairing common leaks
- [U.S. Consumer Product Safety Commission – Furniture and TV Tip-Over Information Center](https://www.cpsc.gov/Safety-Education/Safety-Education-Centers/Tipover-Information-Center) - Details safety recommendations and statistics related to furniture tip-over hazards
- [U.S. Department of Energy – Weatherstripping Your Home](https://www.energy.gov/energysaver/weatherstripping) - Covers different types of weatherstripping, where to install them, and tips for effective air sealing
- [Family Handyman – How to Replace a Light Fixture](https://www.familyhandyman.com/project/how-to-replace-a-light-fixture/) - Step-by-step photo guide for safely swapping out ceiling fixtures
- [Lowe’s – How to Install Coat Hooks](https://www.lowes.com/n/how-to/install-coat-hooks) - Practical instructions and layout tips for adding wall-mounted hooks and racks
Key Takeaway
The most important thing to remember from this article is that this information can change how you think about DIY Projects.


