If you’re gearing up for a big DIY project, your tools need as much prep as your plans. Dull blades, dead batteries, and gunked‑up tools slow you down, make messy cuts, and can be downright unsafe. This guide walks you through a practical, step‑by‑step routine to get your core tools ready so you can work faster, cleaner, and with fewer surprises halfway through the job.
Step 1: Inspect Your Tools Like a Pro Safety Check
Before you sand, cut, or drill anything, do a quick safety inspection. Treat this like your pre-flight checklist.
Look over cords on any corded tools for cracks, cuts, or exposed wires; if you see damage, don’t tape it—either replace the cord or have it serviced. Check plugs for bent prongs or scorch marks, and skip using any that look burned or melted.
On battery tools, inspect the battery housing for cracks or swelling (a sign the battery may be failing) and make sure terminals are clean and free of corrosion. Flip switches, triggers, and locks to confirm they move smoothly and spring back properly.
For tools with guards—like circular saws, miter saws, and grinders—manually move the guard to ensure it returns to its closed position without sticking. Verify that all adjustment knobs and depth or angle locks clamp down securely.
If a tool smells like burning plastic, overheats quickly, makes grinding noises, or vibrates excessively, set it aside and have it professionally checked. A five‑minute inspection now can prevent shocks, kickback, or a mid‑project breakdown when you need that tool most.
Step 2: Sharpen, Replace, or Reset Cutting Edges
Cutting tools are the backbone of most DIY projects, and dull edges are one of the fastest ways to ruin your work—and strain your hands.
Start with your saw blades: remove circular saw and miter saw blades and check for chipped or missing carbide teeth, heavy pitch buildup, or warping. If teeth are damaged or the blade is bent, replace it rather than trying to salvage it. For blades that are just dirty, use a commercial blade cleaner or a degreasing solution and a plastic brush to remove built‑up resin before drying thoroughly.
Switch to your drill bits. Sort them by size so you know what you actually have, then toss any that are bent or visibly blunted. For twist bits, you can sharpen high‑speed steel bits with a drill bit sharpener or carefully on a bench grinder if you’re experienced. Masonry and specialty bits are usually better replaced than re‑sharpened at home.
Don’t forget hand tools: sharpen chisels and plane irons with a sharpening stone or honing guide, keeping consistent angles; finish with a fine stone or strop for a cleaner edge. Utility knives should get a fresh blade—blades are cheap, and a sharp one reduces the chance of slips.
Once edges are in good shape, label or store sharp tools in a way that protects the edge (blade guards, cases, or a dedicated drawer) so they’re still ready by the time your project starts.
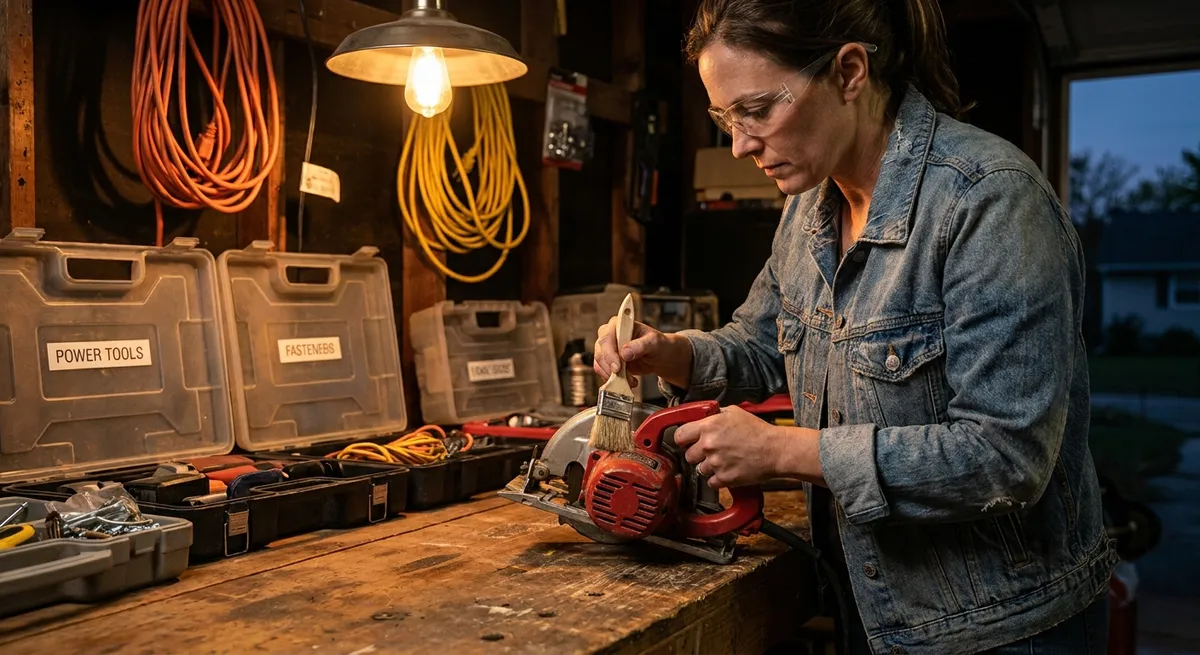
Step 3: Clean, Lubricate, and Tighten Moving Parts
Dust and debris build up faster than most DIYers expect, especially if you’ve been cutting plywood, MDF, or drywall. A simple cleaning and tune‑up will keep tools running smoother and cooler.
Begin with a dry clean: blow dust out of vents and motor housings with a shop vacuum or compressed air (short bursts, not continuous blasting). Wear safety glasses and a dust mask to avoid inhaling fine particles. Brush out crevices, switches, and adjustment tracks with a small paintbrush or nylon brush.
Next, target moving joints and mechanisms. For tools like circular saws, jigsaws, and planers, lightly lubricate metal pivot points and slides with a dry lubricant or light machine oil, avoiding belts, blades, and any surfaces that contact your workpiece. Wipe off any excess—drippy lubricant attracts dust.
On ratchets, pliers, and adjustable wrenches, wipe down handles and jaws, then drop a tiny bit of oil into the joint and work it back and forth. For tape measures, clean the blade with a damp cloth, dry it, then add a little silicone spray to help it retract smoothly.
Finally, go around with the right screwdriver or hex key and snug up any loose screws, handles, depth stops, and fence clamps. Loose parts cause chatter, inaccurate cuts, and can vibrate free during use. A clean, well‑lubricated, and tightened tool not only feels better to use; it also tends to last much longer.
Step 4: Get Your Batteries and Power Setup Project‑Ready
Nothing derails momentum like stopping to charge a dead battery or hunting for an extension cord that’s just a bit too short. Handle your power situation before the first cut.
For cordless tools, fully charge all batteries and label them if you have multiple packs (e.g., “Set A,” “Set B”) so you can rotate them systematically. Check your charger’s indicator lights; if a battery refuses to charge or shows an error, recycle it according to your local guidelines and replace it. Keep batteries off the floor and away from direct heat sources while in use or charging.
Plan your “charging station” near an outlet but away from sawdust and liquids. Use a power strip with surge protection if you’re plugging in multiple chargers. Keep chargers on a shelf, wall mount, or bench space where cords aren’t under tension.
For corded tools, inspect and organize your extension cords by gauge and length. Use heavy‑duty, properly rated cords for high‑draw tools like circular saws and compressors. Avoid daisy‑chaining multiple extension cords; use one cord of the correct length instead. Unravel cords fully during use to prevent overheating.
Think through your workspace layout: where will your main tools live? Where are the outlets or power strips? Plan cord routes so they’re not crossing common walkways; tape them down or run them along walls or overhead when possible. Solid power planning reduces tripping hazards and helps you work continuously instead of in short, frustrating bursts.
Step 5: Set Up a Simple “Grab‑and‑Go” Tool System for the Project
Even if your shop isn’t perfectly organized, you can create a temporary, project‑specific setup that keeps what you need close at hand and easy to find.
Start by defining the core tools for the upcoming job—things like your drill/driver, impact driver, level, stud finder, measuring tape, key hand tools, and any specialized items (tile cutter, sander, etc.). Lay them out on a bench or table and double‑check that each is in working order from the earlier steps.
Next, choose a portable carrier system: a sturdy tool bag, toolbox, bucket organizer, or rolling cart. Group tools by function—measuring and layout in one section, fastening (drivers, bits, fasteners) in another, cutting and shaping in a third. Add a small container or organizer box for screws, anchors, nails, and specialty fasteners specific to the job.
Create a minimal “daily kit” you can move easily to the work area: this might include one drill, one impact driver, a bit set, a tape measure, a pencil/marker, utility knife, safety glasses, hearing protection, and dust mask. Keep this kit stocked and return items to it at the end of each work session so you’re not hunting the next day.
Finally, take a quick photo of your setup once it’s dialed in. That photo becomes a simple checklist you can reference mid‑project or for your next job, helping you repeat a system that works instead of reinventing your setup every time.
Conclusion
Well‑prepared tools turn a big DIY project from a fight into a flow. By inspecting for safety issues, tuning cutting edges, cleaning and tightening moving parts, organizing your power supply, and building a simple grab‑and‑go system, you set yourself up for cleaner results and fewer frustrating stops. Before your next project weekend, run through this routine—you’ll feel the difference in the first hour of work.
Sources
- [Occupational Safety and Health Administration (OSHA) – Hand and Power Tools](https://www.osha.gov/hand-power-tools) - Covers federal safety guidelines and best practices for using and maintaining tools safely
- [Consumer Product Safety Commission – Power Tool Safety Tips](https://www.cpsc.gov/s3fs-public/286.pdf) - Provides safety and inspection advice for common household power tools
- [Family Handyman – How to Sharpen Drill Bits](https://www.familyhandyman.com/project/how-to-sharpen-drill-bits/) - Step‑by‑step guidance on restoring drill bit cutting edges
- [Fine Woodworking – Cleaning and Maintaining Saw Blades](https://www.finewoodworking.com/2013/02/13/how-to-clean-saw-blades) - Explains how to clean and care for circular saw and table saw blades
- [U.S. Department of Energy – Energy Saver: Power Strips](https://www.energy.gov/energysaver/articles/smart-power-strips) - Discusses safe, efficient use of power strips, relevant when setting up tool charging stations
Key Takeaway
The most important thing to remember from this article is that this information can change how you think about Tools & Equipment.


