Turning a noisy room into a quiet, comfortable space doesn’t have to mean ripping out walls or hiring a full crew. With a few targeted upgrades and the right materials, you can dramatically cut noise from traffic, neighbors, or loud hallways—all while keeping your renovation manageable for a DIY weekend.
This guide walks you through a practical, step‑by‑step soundproofing plan that fits real homes, real budgets, and real schedules.
Understand Where the Noise Is Really Coming From
Before you buy anything, you need to know what you’re actually trying to fix. Not all noise behaves the same, and not all soundproofing materials solve the same problems.
Start by standing in the room at different times of day and listening carefully. Make notes:
- Do you hear footsteps or bass sounds (low rumbles) from above or below? That’s often impact noise traveling through the structure.
- Is it mostly voices, TV, traffic, or music from next door or outside? That’s airborne noise moving through gaps, thin walls, doors, and windows.
- Does sound seem louder near a specific wall, window, door, or vent? That’s likely your weak spot.
Turn everything off in the room—fan, TV, music—and walk along each wall, window, and door while the noise source is active (ask family, roommates, or neighbors to help if needed). Put your ear close and lightly press your hand around:
- If the sound increases near trim, outlets, vents, or window edges, air gaps are likely your biggest issue.
- If the full wall vibrates or hums, it’s probably thin construction or shared framing with another unit.
This simple “noise map” tells you where to focus your time and money instead of trying to soundproof everything.
Step 1: Seal Gaps and Cracks So Sound Has Fewer Paths In
Sound loves tiny openings. Even a well-built wall can leak noise if there are gaps around outlets, baseboards, doors, and windows. Sealing those paths is the cheapest, highest‑value step—and it makes all the other upgrades work better.
What you’ll need:
- Acoustic sealant (or high‑quality flexible caulk)
- Weatherstripping tape for doors and windows
- Door sweep for the bottom of doors
- Low‑expansion spray foam (for larger gaps, if needed)
- Utility knife and caulk gun
How to do it:
- Inspect all edges and penetrations. Look around baseboards, window and door casings, outlet covers, cable or pipe penetrations, and any visible cracks. Use a flashlight to spot shadow lines from gaps.
- Remove old, brittle caulk. Use a utility knife or scraper to take off failed caulk or loose material so new sealant can properly adhere.
- Apply acoustic sealant around stationary areas. Run a thin, continuous bead where trim meets walls and where walls meet floors or ceilings. Smooth with a damp finger or caulk tool. Acoustic sealant stays flexible, which is ideal for sound.
- Upgrade the door perimeter.
- Add adhesive weatherstripping around the sides and top of the door frame.
- Install a door sweep at the bottom to seal the large under‑door gap—one of the biggest noise leaks in any room.
- Improve window seals. For drafty windows, add compressible weatherstripping to the sash and frame. If they’re really leaky and you’re not ready to replace them, consider temporary interior window film kits in colder months for added sealing.
Give caulk and sealants the recommended curing time before painting or adding other layers. You won’t see this work when it’s done—but you’ll hear the difference.
Step 2: Add Mass to Walls to Block More Noise
Once gaps are sealed, the next move is to make your walls better at stopping sound. The more mass you add, the harder it is for sound waves to vibrate the surface and pass through.
You don’t have to demolish your drywall to add mass. Instead, think “layering” over what you already have.
Good DIY options for adding mass:
- 5/8" drywall (heavier than standard 1/2")
- Mass loaded vinyl (MLV) sheets
- Dense, large wall panels or built‑in shelving filled with books/items
How to do a direct‑to‑wall mass upgrade:
- Pick the noisiest wall first. Focus your effort on the wall that shares with a neighbor, busy hallway, or exterior street. You’ll get a better return than trying to treat every wall equally.
- Decide on your layer type.
- Extra drywall: Most cost‑effective and paintable.
- MLV: Thinner but heavy; good where you can hide it behind decorative panels or a new drywall layer.
- Locate studs with a stud finder. Mark them lightly with painter’s tape—this is where you’ll secure your new layer.
- Install the new mass layer.
- For drywall: Screw 5/8" drywall panels directly over the existing wall, staggering seams so they don’t line up with the original seams behind.
- For MLV: Hang sheets so they overlap slightly, then screw or staple into studs, sealing seams with acoustical tape.
- Seal the perimeter again. Once your new layer is up, run acoustic caulk along all edges (walls, ceiling, and floor intersections) to stop sound leaks at the new seams.
This step increases sound blocking significantly, especially for voices and TV noise. It’s more labor‑intensive than sealing gaps but still doable for most DIYers with basic tools.
Step 3: Soften and Tame Echo With Acoustic Surfaces
Even if you block outside noise, a bare, hard room can still sound harsh and echoey. That’s where sound absorption comes in—using soft, textured surfaces to soak up reflections so the room feels quieter and more comfortable.
This doesn’t require power tools or major construction and is ideal for renters or low‑commitment upgrades.
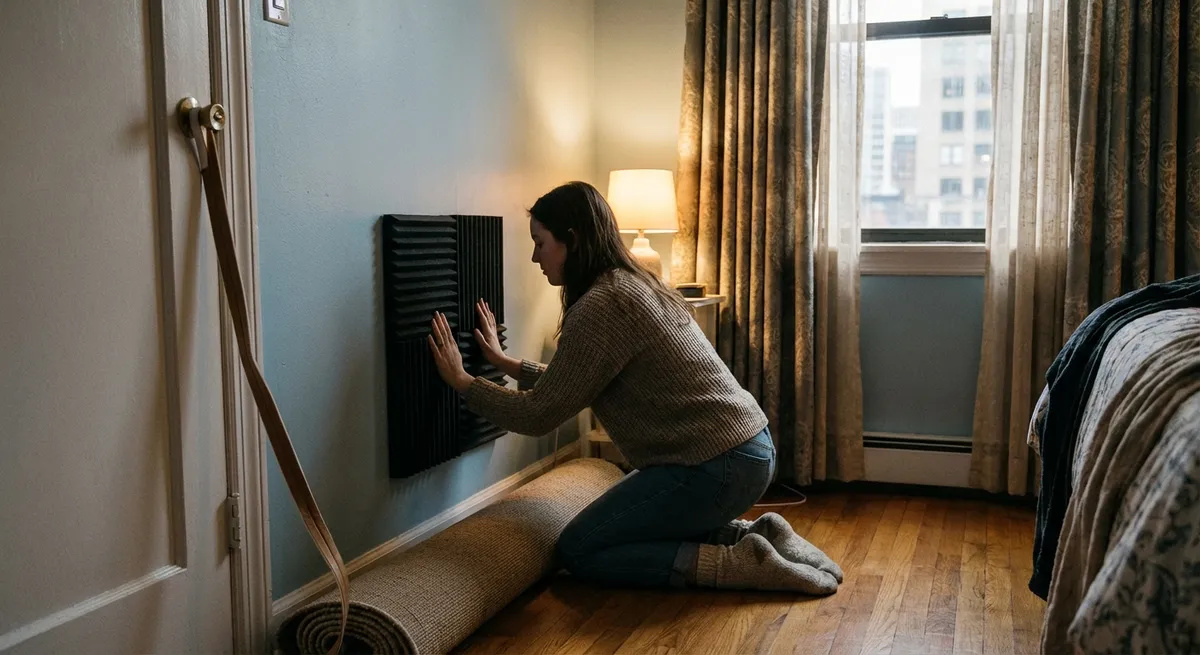
High‑impact absorption ideas:
- Acoustic wall panels (fabric‑wrapped or foam, designed for sound)
- Thick area rugs with dense rug pads
- Heavy curtains or dedicated acoustic drapes
- Upholstered furniture and bookshelves with varied items
How to improve a room’s sound with soft finishes:
- Cover hard floor areas. If you have wood, tile, or laminate floors, add a substantial rug with a dense pad underneath—especially in the center of the room and high‑traffic zones. This cuts down on footfall noise and reverberation.
- Treat at least one major wall.
- Hang acoustic panels at ear height on the wall opposite your usual listening spot (sofa, desk, bed).
- If budget is tight, even DIY fabric‑covered insulation panels (using rigid mineral wool inside a frame) can work well when safely built.
- Upgrade window coverings. Replace light, thin curtains with lined or “blackout” drapes. For even better performance, look for products marketed as “sound deadening” or “acoustic” curtains, and install the rod wider and higher than the window to overlap wall space.
- Break up flat surfaces. Place a bookcase or shelving unit against one wall and fill it with a mix of books, baskets, and decor. The irregular surfaces scatter and absorb sound instead of bouncing it straight back.
- Balance the coverage. Aim to treat multiple surfaces—floor, one or two walls, and windows—rather than overloading a single spot. This creates a more natural, calm sound instead of a “dead” or muffled feel.
Absorption won’t stop sound from entering the room, but it will make conversations clearer, reduce harsh echoes, and improve comfort for work, sleep, or media.
Step 4: Upgrade the Door and Window “Weak Spots”
Your room is only as quiet as its weakest opening, and in many homes that’s the door and windows. A hollow, builder‑grade interior door can undo much of your wall work, and thin single‑pane windows let in a lot of outside noise.
You don’t have to replace everything at once; start with the worst offender.
Door improvements (from simple to serious):
- Verify your seals first. If you haven’t added weatherstripping and a door sweep yet (Step 1), do that before anything else. A well‑sealed weak door can perform better than an unsealed stronger one.
- Add mass to the existing door.
- Attach a solid core “door panel” or MLV sandwich to the interior side and cover it with a decorative surface (thin plywood or MDF that you can paint).
- Make sure hinges and screws are upgraded to handle the added weight.
- Replace with a solid core door.
- Choose a solid core (not hollow) but still interior‑style door that fits your existing frame.
- Solid core doors are heavier and block sound far better than hollow doors, especially combined with good seals.
Window improvements (without full replacement):
- Enhance the seal. Confirm that weatherstripping is intact and that windows close tightly. Replace worn seals and latch hardware if needed.
- Consider interior window inserts. These are removable, clear panels that mount on the inside of your existing window frame to create an extra air gap. They can significantly reduce noise without exterior modifications.
- Add storm windows (where appropriate). For older homes, interior or exterior storm windows provide an extra barrier that helps with both sound and energy efficiency.
Whenever you add weight (door upgrades, storm windows), ensure hinges, frames, and fasteners are properly rated and securely anchored to avoid sagging or safety issues.
Step 5: Control Noise From Above and Below With Smart Layers
If noise is coming through the ceiling or floor—like footsteps, dragging chairs, or downstairs music—you’re dealing partly with impact sound, which travels through the structure itself. That’s tougher to fix without opening floors or ceilings, but you can still improve things with layered treatments.
Ceiling‑focused DIY options:
- Add a “floating” ceiling layer (where feasible).
- Install resilient channels or sound isolation clips to decouple a new drywall layer from the existing ceiling.
- Attach 5/8" drywall to the channels and seal the perimeter with acoustic caulk.
- This is more advanced DIY work but very effective for footstep and overhead noise.
- Use hanging acoustic clouds or baffles.
- In offices, studios, or tall rooms, lightweight acoustic panels hung a few inches below the ceiling can help absorb reflections and some overhead sound.
Floor‑focused DIY options (especially in upper stories):
- Upgrade under‑rug padding. Replace thin pads with thick, dense felt or rubber pads that cushion footfalls and damp vibration.
- Use interlocking acoustic floor mats in key areas. Great under desks, play areas, or workout spots to cut transmission to the space below.
- Add a “floating” laminate or engineered floor with sound‑rated underlayment.
- If you’re planning a flooring renovation, choose an underlayment labeled for sound reduction and follow manufacturer installation guides.
- Ensure expansion gaps are properly sealed at the edges with trim and caulk to avoid sound leaks.
These strategies won’t eliminate all impact noise—especially from heavy footsteps or dropped objects—but they can noticeably reduce everyday disturbances and make upper and lower rooms more peaceful.
Conclusion
You don’t need a full gut renovation to carve out a quieter room. By first understanding where noise is coming from, then methodically sealing leaks, adding mass, softening surfaces, and targeting doors, windows, and overhead/underfoot paths, you can dramatically improve how a space sounds and feels.
Start with the simplest steps—sealing gaps and adding soft finishes—then move up to heavier upgrades like extra drywall or solid core doors as your budget and confidence grow. Every layer you add makes the room just a little more private, a little more comfortable, and a lot more enjoyable to live in.
Sources
- [U.S. General Services Administration – Sound Control in Buildings](https://www.gsa.gov/technical-reference/sound-control-in-buildings) - Explains basic principles of sound transmission, absorption, and building strategies for noise control
- [U.S. Department of Energy – Windows and Noise Reduction](https://www.energy.gov/energysaver/windows-doors-and-skylights) - Covers how windows, doors, and storm systems impact both noise and energy efficiency
- [Johns Hopkins University – Office of Sustainability: Noise and Buildings](https://facilities.jhu.edu/) - Provides practical considerations for acoustic comfort in occupied spaces
- [National Research Council Canada – Guide for Sound Insulation](https://nrc-publications.canada.ca/eng/view/fulltext/?id=a83ae95f-7799-4e3d-8e94-6b1dc9bd678a) - Technical overview of wall, floor, and ceiling sound insulation strategies
- [CDC – Workplace Noise and Hearing Protection](https://www.cdc.gov/niosh/topics/noise/) - Background on noise, health impacts, and general noise mitigation concepts
Key Takeaway
The most important thing to remember from this article is that following these steps can lead to great results.


