Noise from traffic, neighbors, or even your own household can make a home feel more stressful than relaxing. The good news: you don’t need a full gut renovation or expensive studio-grade materials to noticeably quiet a space. With some smart planning and a few well‑chosen upgrades, you can cut echo, reduce outside noise, and make rooms feel calmer and more private.
This guide walks you through practical, renovation‑friendly soundproofing projects you can tackle yourself—without turning your house into a construction site.
Understand Where the Noise Is Coming From
Before you start sealing, stuffing, or building, you need to know what you’re actually fighting. Sound moves in different ways, and your approach changes depending on the problem.
First, identify the main sources: is it street traffic, upstairs footsteps, voices through a shared wall, or echo in a big, hard-surfaced room? Stand in the room at different times of day, turn off fans and music, and listen. Press your ear against walls, near windows, and at outlets to find “hotspots” where sound is worst.
Learn the basics: airborne noise (voices, TV, road noise) travels through gaps and thin materials, while impact noise (footsteps, things dropping) moves through structure—framing, floors, and ceilings. Once you know which is the bigger issue, you can decide whether to focus on sealing gaps, adding mass, decoupling structures, or softening surfaces. A quick sketch of the room noting problem areas will help you plan your projects and materials.
Step 1: Seal the Hidden Air Gaps That Leak Sound
If air can pass through, sound can too—often more than you think. Small cracks around trim and penetrations act like tiny speakers, letting noise pour in and out. Sealing these up is one of the cheapest and most effective first steps.
Start with doors and windows. Use a bright flashlight in a darkened room or wait until night and look for visible light leaking around frames and under doors. Run your hand around edges to feel for drafts. Install adhesive-backed weatherstripping around door and window stops to close small gaps. For the door bottom, attach a door sweep or adjustable threshold to block the gap to the floor.
Next, inspect outlets, light switches, cable penetrations, and gaps where plumbing or HVAC lines enter the room. Remove outlet and switch covers, and install foam gasket inserts behind the cover plates. Use paintable acoustic caulk around trim, baseboards, window frames, and any visible cracks between drywall and framing. Work slowly and neatly; smooth the bead with a damp finger or caulk tool. Let everything cure fully before painting or reinstalling fixtures. This step alone often makes a noticeable difference in traffic and voice noise.
Step 2: Add Soft Surfaces to Cut Echo and Room Reverb
Even if outside noise isn’t a big problem, hard surfaces can make your home feel louder than it needs to be. Bare walls, hard floors, and minimal furniture create echo, making conversations sharp and TV sound harsher. That’s not soundproofing in the strict sense, but controlling echo is a key part of making rooms feel quiet and comfortable.
Start with the floor if it’s hard (wood, tile, laminate). Add large, dense area rugs with thick rug pads underneath—felt or rubber/felt pads work especially well. Aim to cover the main walking and sitting areas rather than leaving big open expanses. In a hallway, runners can soften the “tunnel” effect of footsteps and voices.
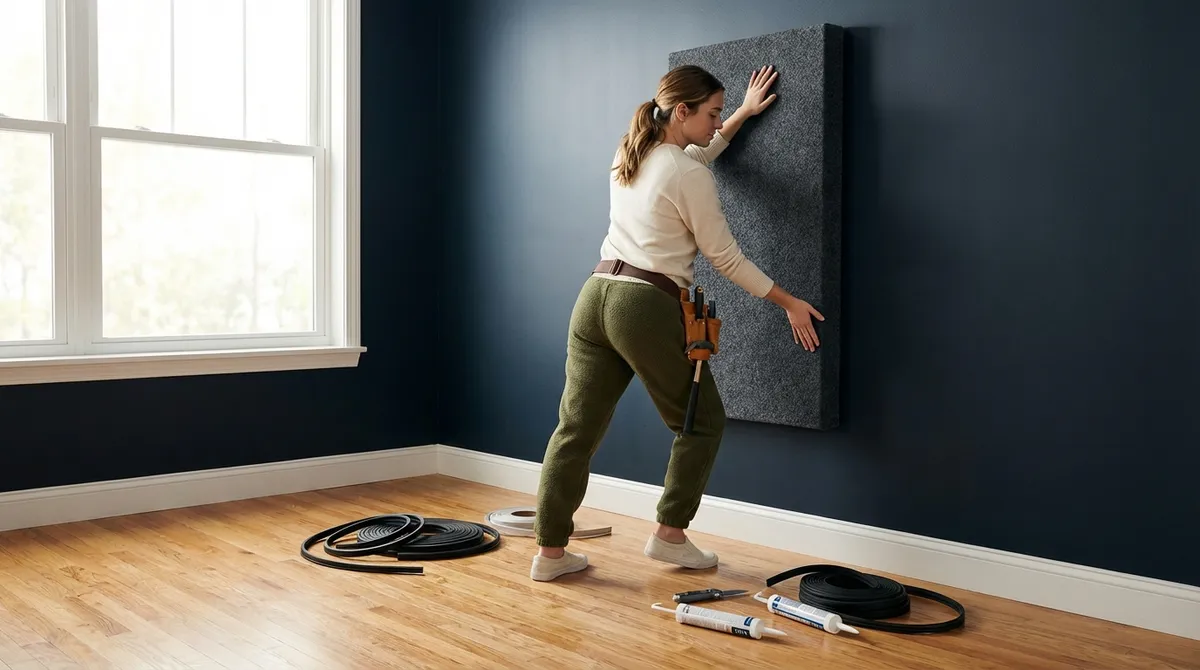
On the walls, avoid big blank spaces. Hang fabric wall art, bookcases filled with books, or dedicated acoustic panels. If you’re using DIY panels, build simple wood frames, fill them with mineral wool or acoustic-rated fiberglass, and wrap them in breathable fabric (like cotton or burlap). Mount them at ear height on the walls that reflect the most sound—often the wall directly opposite your main seating. Soft furnishings like upholstered sofas, curtains, and even overstuffed chairs help absorb sound as well. The goal is to break up hard, reflective surfaces, not to turn the room into a recording studio.
Step 3: Upgrade Interior Doors for Better Sound Blocking
Hollow-core interior doors are light and cheap—and terrible at blocking sound. If you can clearly hear conversation through a closed door, the door itself is usually the weak point. Replacing or upgrading doors is a straightforward renovation that can dramatically improve privacy between rooms.
First, check what you have. Knock on the door: a hollow, drum-like sound means hollow-core; a solid, dull thud suggests solid-core. If you’re open to replacing the slab, measure the existing door (height, width, thickness, hinge locations) and shop for a solid-core replacement with matching dimensions to simplify installation. Primed solid-core MDF doors are a good balance of cost and performance.
When installing the new door, make sure it closes snugly against the weatherstripping. Add adhesive-backed foam or rubber weatherstripping along the jamb where the door meets the frame to tighten the seal. Install a quality door sweep at the bottom—choose one with an adjustable rubber or silicone seal that just kisses the floor or threshold without dragging.
If replacing isn’t an option, you can improve a hollow-core door by adding mass. One DIY approach is to apply a layer of mass loaded vinyl (MLV) or a thin MDF panel to one or both sides, then cover with decorative panels or a new skin and repaint. Always use appropriate construction adhesive and screws (where needed), and don’t add so much thickness that it interferes with hinges or latch alignment. This upgrade won’t match a true solid-core door, but it can noticeably reduce noise transfer.
Step 4: Improve Wall Soundproofing with a Layered Upgrade
For rooms that share a wall with a noisy space—like a bedroom next to a living room—you can significantly boost sound blocking without tearing everything down. The main strategy: add mass and damping to the existing wall.
First, confirm what’s behind your walls if you can (a small inspection hole between studs can help). If you’re comfortable with a moderate renovation, plan to add a second layer of drywall with damping compound in between. Use 5/8" Type X drywall for better mass. Before hanging new drywall, locate and mark studs, turn off power to the room, and carefully extend electrical boxes forward with UL-listed box extenders so they sit flush with the new wall surface.
Apply a damping compound (often sold as “acoustic” or “sound-damping” compound) in a random pattern on the back of each new drywall sheet, then lift the sheet into place and screw it into studs—not just the existing drywall—following recommended screw spacing. Stagger seams relative to the original drywall if possible. Fill gaps between sheets with acoustic caulk, not regular joint compound, to maintain a flexible, sound-blocking seal.
Finish with joint tape and compound as usual, sand smooth, and paint. This layered upgrade works by increasing mass and converting some sound energy into heat through the damping compound. It’s especially effective against voices and TV noise and is a solid project for serious DIYers comfortable working with drywall.
Step 5: Tackle Ceiling and Floor Noise Between Levels
Noise between floors—footsteps, creaks, or voices from upstairs—can be one of the most frustrating sound problems. You can attack it from above (the floor) or below (the ceiling), depending on access and what you’re willing to change.
From above, focus on impact noise. If you have bare hard floors, add thick area rugs with dense pads in high-traffic areas—hallways, in front of couches, kids’ play zones. These will soften footsteps and dropped toys. Make sure furniture, especially chairs, have felt pads under legs to reduce sharp impact sounds. For more involved work, if you’re replacing flooring, consider an underlayment designed for sound reduction under floating floors.
From below, you’re mainly addressing airborne noise and some impact. The most robust DIY upgrade is adding insulation plus a new, decoupled drywall layer. If the ceiling is open (e.g., during a renovation), fill joist cavities with mineral wool or high-density fiberglass batts for sound control, not just thermal insulation. Then, install resilient channels perpendicular to the joists; these metal channels decouple the new drywall from the framing, reducing how much impact noise passes through.
Attach 5/8" drywall to the channels—not directly to joists—using the manufacturer’s recommendations for screw placement. Again, use acoustic caulk at seams and perimeter before mudding and finishing. If opening the ceiling isn’t realistic, even adding a second layer of drywall with damping compound (similar to the wall upgrade) can still help with voices and TV noise from upstairs.
Conclusion
You don’t need a complete remodel to make your home noticeably quieter. By sealing air gaps, softening echo with furnishings, upgrading doors, layering your walls, and improving ceilings and floors between levels, you can chip away at noise on multiple fronts.
Start with the easiest, lowest-cost projects—sealing gaps, adding rugs and curtains, and improving doors—and listen to how the room changes before moving on to bigger upgrades. Each step builds on the last, and over time you can turn loud, echoey rooms into calmer spaces that feel more private and comfortable, without sacrificing style or blowing up your budget.
Sources
- [U.S. General Services Administration – Sound Control in Buildings](https://www.gsa.gov/technical-procedures/sound-control-in-buildings) - Overview of sound transmission, basic principles, and strategies for controlling noise in building interiors
- [National Research Council Canada – Controlling Sound Transmission Through Doors](https://nrc-publications.canada.ca/eng/view/object/?id=6e9f0b95-5e43-4568-9cef-2df1d7955c60) - Technical discussion of door construction, sealing, and their impact on noise control
- [Johns Hopkins University – Soundproofing and Acoustic Materials Guide](https://hub.jhu.edu/2018/02/06/soundproofing-acoustics-basics/) - Accessible explanation of soundproofing vs. sound absorption and common material choices
- [Green Glue Company – Soundproofing Walls and Ceilings](https://www.greengluecompany.com/solutions/soundproof-walls-and-ceilings) - Practical information on using damping compounds and double drywall assemblies for DIY and pro projects
- [U.S. Department of Energy – Air Sealing Your Home](https://www.energy.gov/energysaver/air-sealing-your-home) - Techniques for finding and sealing air leaks, which directly relates to reducing airborne noise paths
Key Takeaway
The most important thing to remember from this article is that this information can change how you think about Renovation.


