Hardwood floors can look tired fast: scratches, dull finish, mystery stains from who-knows-when. Fully sanding and refinishing is messy, expensive, and often overkill. The good news: you can bring a tired floor back to life with a “screen and recoat” style refresh—without stripping it down to bare wood.
This step-by-step guide walks you through a DIY-friendly method to clean, lightly abrade, and refinish your floor so it looks sharper, lasts longer, and stands up better to everyday traffic.
Know Your Floor and Finish Before You Start
Before you touch a tool or buy any product, figure out what you’re working with. Not all floors or finishes can be easily refreshed without a full sand.
First, confirm your floor is real wood, not laminate or vinyl. Look for registers or exposed edges: hardwood boards will show actual grain and thickness, while laminate typically shows a thin printed layer on top of a composite core. Engineered hardwood can still be refinished, but only if the top wood layer is at least a couple of millimeters thick—check a floor edge or manufacturer specs if you can.
Next, test for wax or oil finishes. Drip a bit of mineral spirits on an inconspicuous spot and rub with a white rag. If the rag turns yellow or brown and the finish feels gummy, you may have an old wax layer that needs removal or a different approach. Also test with a few drops of water: if the water beads and sits on the surface, you likely have a surface finish like polyurethane; if it soaks in quickly and darkens the wood, you’re dealing with an oil-penetrating or very worn finish and may need deeper restoration.
If your floor has deep gouges, missing boards, severe water damage, or many areas where bare wood is exposed, this screen-and-recoat approach may not be enough—you may need a full sand and refinish. But for dull, scratched, and lightly worn surfaces, this method can dramatically improve looks and durability.
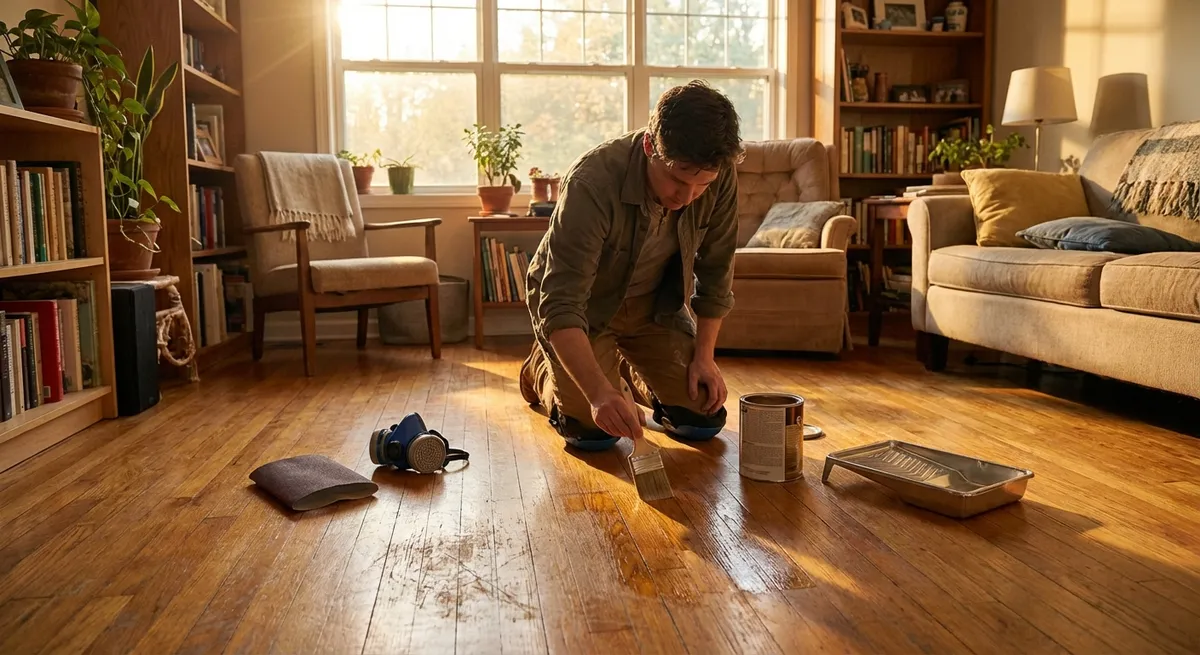
Step 1: Clear, Clean, and Inspect the Floor
Start by fully emptying the room—furniture, rugs, plants, and floor vents (if removable). The less you have to work around, the smoother and faster the job will go. Protect any built-ins or adjacent rooms with plastic sheeting or painter’s tape to control dust.
Vacuum the floor thoroughly with a soft-bristle floor attachment. Get along baseboards, under radiators, and in corners where grit tends to collect. Follow up with a microfiber dust mop to catch fine particles that vacuums can miss, especially if you have pets.
Next, wet-clean the floor, but do it smart. Avoid soaking the wood; instead, use a damp (not dripping) microfiber mop and a cleaner specifically labeled for hardwood finishes. Don’t use steam mops or all-purpose cleaners that contain ammonia or harsh solvents—they can cloud or soften the existing finish. Work in sections, changing the water or pad as it gets dirty to avoid dragging grit across the surface.
Once the floor is dry, slowly walk the space and inspect. Mark problem areas with painter’s tape: deep scratches, paint drips, pet stains, and any spots where the finish has completely worn off. This inspection will guide your touch-up work before you apply a new topcoat.
Step 2: Repair Minor Damage and Prep Problem Spots
Small repairs now will make your final finish look much better and help it wear more evenly. Start with gaps and nail holes. Use a wood filler or putty that’s stainable and close in color to your floor. Press it into gaps with a flexible putty knife, overfill slightly, then smooth flush. Let it dry thoroughly according to the manufacturer’s directions.
For light scratches that don’t cut through the finish to bare wood, you can often blend them out with a hardwood touch-up marker or blending pencil in a matching tone. Apply in the direction of the grain and wipe off excess quickly. Focus on high-visibility areas first, like near entryways and between doorways.
Deeper scratches or small gouges that have exposed raw wood need more attention. Lightly sand just the damaged spot with fine-grit sandpaper (180–220 grit), feathering out the edges to blend with the surrounding area. Wipe away dust with a slightly damp cloth. If the raw wood is much lighter, you may want to touch it with a compatible stain in a close color, allowing it to dry before moving on.
For paint splatters or stuck-on residue, use a plastic scraper and a bit of denatured alcohol or a finish-safe cleaner. Go slowly so you don’t dig into the finish. Once all repairs and spot treatments are complete, vacuum and damp-mop again to remove any residual dust or filler.
Step 3: Lightly Abrade the Existing Finish for Adhesion
The key to a successful no-sand refinish is creating a clean, slightly rough surface so the new coat can bond. You are not trying to remove all the old finish—just dull and scuff it uniformly.
For a DIY-friendly approach, use a pole sander with fine-grit sanding screens (120–150 grit) designed for floor or drywall work. Attach the screen securely and start in a far corner of the room, working in the direction of the boards. Use long, overlapping strokes with light even pressure; let the abrasive do the work. Avoid bearing down in one spot, which can create low spots or uneven sheen.
If you prefer a powered option and are comfortable with tools, a random-orbit floor buffer with a sanding screen can dramatically speed up the process. Practice in a closet or out-of-the-way area to get the feel for it: keep the machine moving, and never let it sit running in one place. Always follow grain direction when possible to minimize visible swirl marks.
After abrading the entire floor, wipe a small test area with a clean, damp white cloth. You should see a uniformly dull sheen, with no glossy patches left. Glossy areas mean the finish hasn’t been scuffed enough for proper adhesion—go back and lightly abrade those spots again.
When the floor is consistently dulled, vacuum thoroughly using a soft-brush attachment, then follow with a tack cloth or microfiber mop slightly dampened with water or a manufacturer-approved cleaner. The goal is to remove every trace of sanding dust, especially along baseboards and in corners, before you apply any new finish.
Step 4: Apply a Compatible Recoat or Refinishing Product
Choose a product specifically labeled for recoating or refreshing existing hardwood finishes. Water-based polyurethane or specialized floor refreshers are common choices because they dry fast, smell less, and don’t yellow as much as oil-based products. Always confirm the new finish is compatible with your current floor finish; many brands spell this out on their website or product label.
Stir the product gently; don’t shake, which can introduce bubbles that show in the final coat. Pour a small amount into a paint tray or directly onto the floor in a thin line, depending on the instructions. Use a synthetic applicator pad or microfiber floor coater designed for polyurethane—avoid regular mops or paint rollers unless the product specifically allows them.
Start along the wall farthest from your exit and work your way toward the door so you don’t trap yourself. Apply in smooth, even strokes with the grain, maintaining a wet edge to avoid lap marks. Work in manageable sections—often a 3–4 foot wide “zone” across the room—overlapping each pass slightly. Don’t overwork areas; lay the finish down and let it level out on its own.
Watch for drips, puddles, or missed spots as you go. Feather out any heavier areas quickly before they start to set. If you see bubbles, gently pass the applicator back over that area with very light pressure or stop and allow them to pop as the finish levels.
Once the first coat is applied, leave the room and keep it dust-free. Follow the manufacturer’s recommended drying time closely; this can range from a couple of hours for water-based products to longer for some specialty finishes. Avoid opening windows on windy days that might blow dust or pollen onto the wet surface.
Step 5: Build Protection with a Second Coat and Smart Curing
Most floors benefit from at least two coats of a recoat product, especially in high-traffic areas like hallways, living rooms, and kitchens. Once the first coat is fully dry to the touch and no longer tacky, lightly abrade again with a very fine sanding pad (220–320 grit or an extra-fine abrasive pad) to ensure the next coat bonds well and to knock down any minor dust nibs.
Vacuum and tack the floor thoroughly again to remove all dust. Apply the second coat using the same method: working with the grain, maintaining a wet edge, and exiting the room without stepping on the fresh finish. If your household is rough on floors (kids, pets, rolling furniture), consider a third coat in those traffic lanes, again following the product’s instructions.
Respect cure times, not just “dry to the touch” times. Many water-based products can be walked on in socks within 24 hours, but full hardness can take a week or more. Avoid replacing heavy furniture or rugs until the finish is fully cured; trapping moisture under a rug too soon can cause clouding or imprint patterns in the new finish.
When you do move furniture back, lift instead of dragging, or use sliders and felt pads on feet to prevent fresh scratches. Keep pet nails trimmed, and place mats at entry doors to capture grit. For ongoing maintenance, stick to manufacturer-approved cleaners and avoid wet mopping or steam.
By giving your floor time to reach full hardness and then treating it gently, you’ll get much more life and durability out of your work—and you’ll delay the day you ever need a full, messy sanding.
Conclusion
Refreshing a tired hardwood floor doesn’t have to mean renting drum sanders or living in dust for a week. By carefully cleaning, doing targeted repairs, lightly abrading the existing finish, and applying a compatible recoat product, you can dramatically improve the look and protection of your floors with tools most DIYers can handle.
The work is methodical more than difficult: patience with prep, discipline about dust, and respect for dry times will do most of the heavy lifting. Done right, this kind of no-sand refinish can buy you years of extra life from your floors and instantly sharpen the look of your entire space.
Sources
- [Minnesota Department of Natural Resources – Wood Floor Care and Maintenance](https://www.dnr.state.mn.us/woodfloors/maintenance.html) - Covers basic hardwood floor care, cleaning practices, and what damages finishes
- [This Old House – How to Refinish Hardwood Floors Without Sanding](https://www.thisoldhouse.com/flooring/21015279/how-to-refinish-wood-floors-without-sanding) - Step-by-step overview of screen-and-recoat methods and product considerations
- [Bona US – Hardwood Floor Recoating Guide](https://us.bona.com/homeowners/knowledge-center/floor-renovation/recoating-hardwood-floors.html) - Manufacturer guidance on surface prep, compatibility, and recoat technique
- [U.S. Environmental Protection Agency – Indoor Air Quality and Renovation](https://www.epa.gov/indoor-air-quality-iaq/renovation-and-indoor-air-quality) - Information on ventilation, fumes, and staying safe during home improvement projects
- [Home Depot – Hardwood Floor Refinishing Tips](https://www.homedepot.com/c/ah/how-to-refinish-hardwood-floors/9ba683603be9fa5395fab901cc6b0e5) - Practical DIY tips on tools, abrasives, and finish options for homeowners
Key Takeaway
The most important thing to remember from this article is that this information can change how you think about Renovation.


