A tired living room doesn’t always need new walls, new windows, and a five-figure budget. With a focused plan and some strategic DIY upgrades, you can dramatically change how your space looks and feels in a few weekends. This guide walks you through practical, step-by-step projects that deliver high impact without tearing your house apart.
Step 1: Start With a Simple Room Audit and Measured Plan
Before you buy paint or move furniture, you need a clear picture of what’s working, what’s not, and what you can realistically change.
Take 20–30 minutes to walk your living room and write down:
- What feels cramped, dark, or outdated
- What you actually like and want to keep (a window, a view, a piece of furniture)
- Functional issues (no outlets where you need them, nowhere to put drinks, glare on the TV)
Then:
- Measure the room: length, width, and ceiling height. Sketch a quick floor plan on paper.
- Measure your major furniture: sofa, chairs, coffee table, TV stand, rugs. Note dimensions on your sketch.
- Mark traffic paths: draw how people naturally move through the room (door to sofa, sofa to kitchen, etc.). You want clear walkways 30–36 inches wide.
- Set a realistic budget and timeline: decide what you’re comfortable spending and how many weekends you can devote.
- Prioritize problems: pick 2–3 main goals (e.g., “brighter lighting,” “better seating layout,” “more storage”) and focus your projects on those.
A simple plan keeps you from impulse-buying decor that doesn’t fit and helps you choose projects that actually improve how the room works.
Step 2: Rework the Layout for Better Flow and Use
Rearranging what you already own is one of the highest-impact, lowest-cost changes you can make. Done right, it can make your living room feel bigger and more comfortable without adding a single square foot.
Follow this process:
- Define a main focal point: In most living rooms, it’s either a TV, a fireplace, a large window, or a feature wall. Decide what you want people to naturally face when they sit down.
- Place the largest piece first: Usually the sofa. Position it so:
- It faces or flanks the focal point
- It doesn’t block doorways or windows
- You can still walk comfortably around it
- Create conversation zones: Arrange chairs and side tables so people can talk easily without shouting across the room. Aim for 4–8 feet between seating pieces.
- Check sightlines: Sit in each seat. Can you see the TV (if you use one), talk to others, and see the entryway without feeling boxed in? Adjust angles slightly until it feels natural.
- Float furniture when possible: Pull sofas a few inches off the wall and use rugs to define zones. This often makes a room feel more deliberate and less “pushed back.”
- Balance the weight: If all your large pieces are on one side, the room will feel lopsided. Use a bookcase, floor lamp, or larger plant to visually anchor the opposite side.
If you’re unsure, use painter’s tape on the floor to outline where furniture will go before you do the heavy lifting.
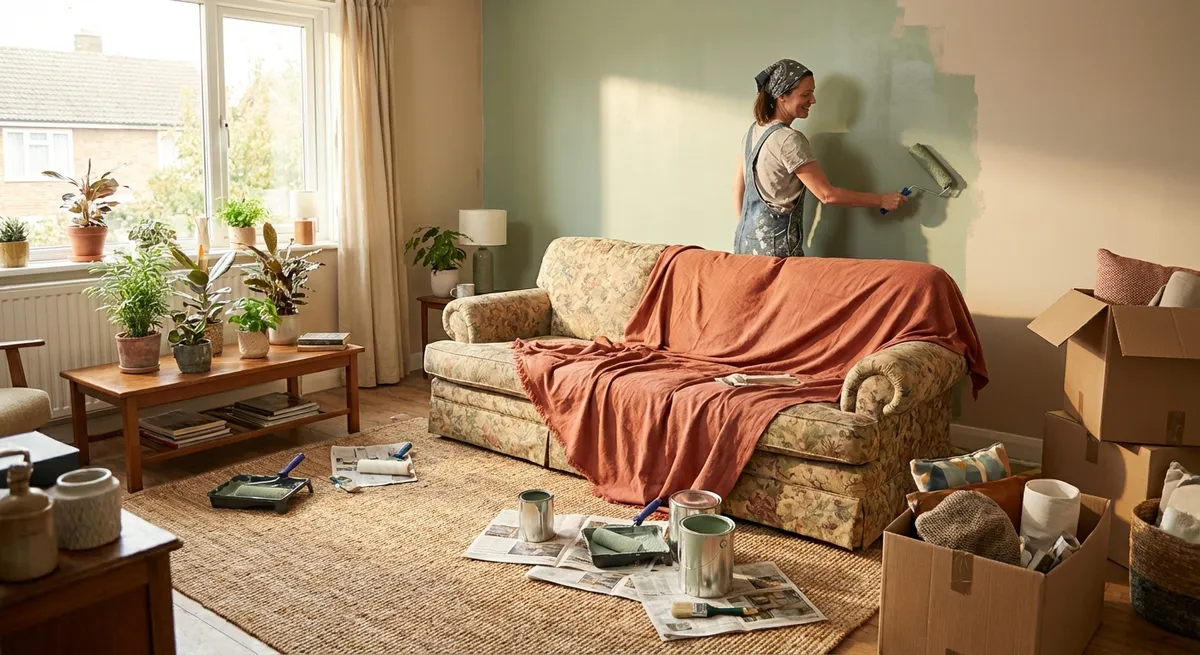
Step 3: Use Paint Strategically for a Big Visual Upgrade
Paint is still the most cost-effective renovation tool you have. Instead of repainting every surface, be strategic about color and placement to get maximum impact for your effort.
Here’s how to approach it:
- Choose a versatile main wall color: Soft neutrals (off-white, light greige, warm gray) reflect more light and make furniture easier to coordinate. Grab sample pots and test on multiple walls at different times of day.
- Consider an accent wall or zone: Use a deeper color behind the sofa, around the TV, or on built-in shelving to create depth. Darker tones can make a room feel more intentional, not necessarily smaller, when used carefully.
Prep properly:
- Clean walls with mild soap and water to remove dust and residue - Fill nail holes and small cracks with lightweight spackle - Lightly sand patched areas for a smooth surface
Cut in and roll in sections:
- Cut along ceilings, trim, and corners with a quality angled brush - Use a roller in a “W” pattern to avoid streaks - Maintain a wet edge so you don’t get lap marks 5. Update just the trim and doors if time is tight: A fresh coat of semi-gloss white on baseboards, door casings, and window trim can make the entire room feel cleaner and more modern even if the walls stay the same color. 6. Refresh built-ins or outdated pieces: Painting a tired TV unit, shelves, or a dated coffee table to match or contrast your new walls can unify the space at low cost.
Even one weekend of focused painting can completely change the feel of your living room.
Step 4: Upgrade Lighting and Switches for Function and Mood
Most living rooms suffer from flat, overhead-only lighting. Good lighting should be layered so you can switch between “bright and practical” and “soft and cozy” without hassle.
Tackle lighting in three layers:
Ambient lighting (overall light)
- If you have a ceiling fixture, consider swapping in a more modern design with a higher lumen output and a diffuser for even light. - Use LED bulbs with a warm-white color temperature (around 2700–3000K) to avoid harsh, blue light.
Task lighting (for reading and work)
- Add a floor lamp near the main seating area. Place it slightly behind and to the side of the sofa or chair where people read. - Use table lamps on side tables for flexible, localized light that doesn’t glare on the TV.
Accent lighting (for depth and interest)
- Use small lamps on consoles or shelves to highlight decor. - Consider LED strip lights behind a TV, on the back of shelves, or under a floating media unit to create a soft glow.
Then improve control and efficiency:
- Install dimmer switches where possible: Dimmers let one fixture serve multiple purposes—bright for cleaning, dim for movie nights. Use compatible dimmable LEDs and follow manufacturer instructions or hire an electrician if you’re not comfortable with electrical work.
- Group lamps with smart plugs or switched outlets: This lets you turn multiple lamps on/off with one button or voice command, making layered lighting practical to use daily.
- Minimize glare: Angle fixtures and position lamps so they don’t reflect directly on screens or glossy surfaces.
A well-lit room feels larger, more inviting, and far more functional than one relying on a single overhead bulb.
Step 5: Add Smart Storage and Surfaces to Control Everyday Clutter
Living rooms often double as playrooms, offices, and entertainment zones. If you don’t plan storage into the design, clutter will undo your hard work faster than any bad paint color.
Build storage into what you already need:
Choose multi-purpose furniture:
- Storage ottomans for blankets, games, or controllers - Coffee tables with shelves or drawers for remotes and magazines - Side tables with a closed cabinet or basket underneath
Create a dedicated “drop zone” for the living room:
- A tray on the coffee table for remotes and small items - A small box or basket near the sofa for chargers and cables - A magazine file or slim bin near seating for laptops/tablets
Use vertical storage:
- Wall-mounted shelves over low furniture - A narrow bookcase instead of multiple small accent pieces - Hooks or peg rails near entrances for bags and headphones
Corral kids’ items or hobby gear:
- Use labeled bins or baskets in a low cabinet or TV unit - Limit each person to a defined space (one bin or basket) so clutter doesn’t spread across the room
Protect surfaces you just improved:
- Use coasters and small trays on wood tables - Add washable, removable pillow covers and throw blankets - Consider a flat, low-profile rug pad under area rugs to reduce slipping and extend rug life
Once storage is in place, spend five minutes at the end of each day putting items back into their “home.” The room will keep its renovated feel much longer with that small habit.
Conclusion
You don’t need to rip out walls or spend months living in a construction zone to transform a dated living room. By auditing your space, improving the layout, using paint strategically, upgrading lighting, and building in smart storage, you can get a room that looks updated and works better for real life.
Start with one step—often layout or paint—finish it completely, then move to the next. Small, well-planned DIY changes stacked together can make your living room feel like a new space without a full renovation.
Sources
- [U.S. Department of Energy: Energy-Efficient Lighting](https://www.energy.gov/energysaver/lighting-choices-save-you-money) - Explains LED lighting, color temperature, and efficiency basics useful for planning layered lighting
- [U.S. Consumer Product Safety Commission – Home Electrical Safety Checklist](https://www.cpsc.gov/s3fs-public/513.pdf) - Guidance on safe DIY work around electrical fixtures and switches
- [Benjamin Moore – How to Paint Interior Walls](https://www.benjaminmoore.com/en-us/interior-exterior-paints-stains/how-to-advice/interior-painting-how-to-paint-a-room) - Step-by-step instructions and tips on surface prep, cutting in, and rolling for best paint results
- [IKEA – Living Room Storage Inspiration](https://www.ikea.com/us/en/rooms/living-room/gallery/) - Real-world examples of multi-purpose furniture and integrated storage solutions
- [Harvard Joint Center for Housing Studies – Improving America’s Housing 2023](https://www.jchs.harvard.edu/research-areas/reports/improving-americas-housing-2023) - Research overview on home improvement trends and where homeowners get the most impact from renovation spending
Key Takeaway
The most important thing to remember from this article is that this information can change how you think about Renovation.


