A dated bathroom can drag down your whole home, but a full gut renovation is expensive and disruptive. The good news: you can make a huge difference without moving walls, rerouting plumbing, or blowing your budget. This guide walks through practical, DIY‑friendly upgrades that focus on surfaces, storage, and lighting—areas where smart changes deliver big visual impact.
Below are five clear, step‑by‑step projects you can tackle over a few weekends to make your bathroom look and feel renewed.
Step 1: Plan the Makeover So You Don’t Overspend
Before you buy paint or tile, get clear on what you’re changing and what stays. A few hours of planning can save you days of rework and hundreds of dollars.
- Evaluate what’s worth keeping. Look at the tub, toilet, vanity, and tile. If they’re functional and not damaged, plan to work with them. Matching your new finishes to what stays (for example, off‑white tub = warm white paint) will make the room feel intentional instead of patched together.
- Set a realistic budget ceiling. Pick a total number you’re comfortable with, then roughly divide it:
- 30–40%: paint, caulk, and surface repair
- 30–40%: fixtures (faucet, showerhead, lighting, hardware)
- 20–30%: accessories (mirror, storage, textiles, decor)
- Choose a simple color palette. Stick to 2–3 core colors:
- Main neutral (white, light gray, beige) for walls
- Secondary neutral (black, dark bronze, or brushed nickel) for metals
- One accent color in towels or art
This makes finishes easier to match and reduces decision fatigue.
- Measure everything once, then again. Measure:
- Wall widths and heights (especially around the vanity and shower)
- Existing mirror and light fixture size
- Distance between plumbing holes on your faucet (4" centerset vs. 8" widespread)
- Door swing clearance
Keep these numbers in your phone so you can reference them in-store.
- Prioritize tasks in logical order. A practical sequence:
- Repair and prep surfaces
- Paint ceiling and walls
- Upgrade lighting and ventilation
- Update fixtures and hardware
- Add storage and finishing touches
A thought-out plan reduces surprises and keeps your project from stalling halfway.
Step 2: Prep and Paint for an Immediate Visual Upgrade
Painting is one of the highest-impact, lowest-cost changes you can make, especially in a small room like a bathroom.
- Pick the right paint type. Look for:
- Interior paint labeled “bath,” “kitchen & bath,” or “mold resistant”
- At least an eggshell or satin sheen for walls (easier to wipe)
- Semi‑gloss for trim and doors
Avoid flat finishes—they show moisture marks and are harder to clean.
- Remove or protect what you can. Take off:
- Switch and outlet covers
- Towel bars, toilet paper holders (if easy to unscrew)
- Small mirrors or shelves
Tape plastic over the vanity top, toilet tank, and floor near the baseboards.
- Clean and de-gloss the surfaces. Bathrooms collect soap residue and hairspray:
- Wash walls and trim with a degreasing cleaner or a mix of mild detergent and warm water.
- Rinse and let dry completely.
- Lightly sand glossy areas with 120–220 grit to help paint adhere.
- Repair and caulk. Fill nail holes and dents with lightweight spackle; sand smooth when dry. Re-caulk:
- Along the top of baseboards where they meet the wall
- Around window trim
- At the vanity backsplash junction
Use paintable latex caulk and smooth with a damp finger or caulk tool.
- Prime stains and problem spots. If you have:
- Water stains on the ceiling
- Mildew stains (after cleaning with a mildew remover)
- Patchy drywall repairs
Spot-prime with a stain-blocking primer. This prevents discoloration from bleeding through your new paint.
- Paint from top to bottom. To avoid drips and lap marks:
- Start with the ceiling.
- Cut in around edges with a brush (corners, trim, fixtures).
- Roll the main wall areas in overlapping sections, keeping a wet edge.
- Do 2 coats, allowing proper dry time between coats.
A fresh, even paint job immediately makes old tile and fixtures look cleaner and more intentional.
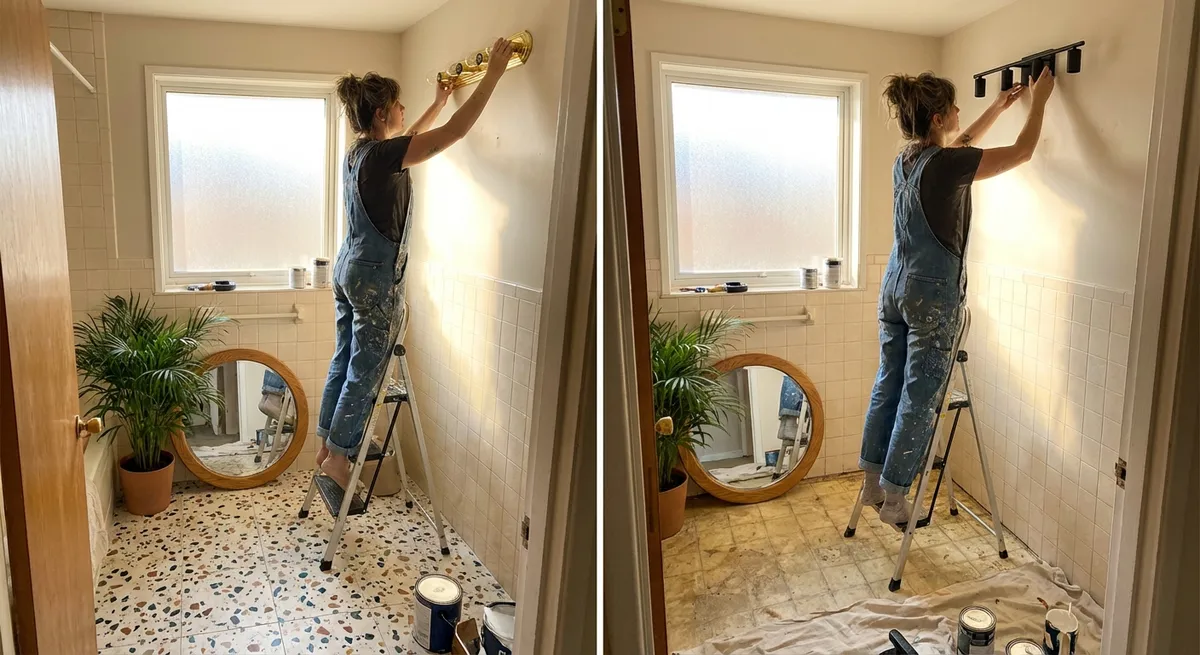
Step 3: Swap Out Lighting and Ventilation for Comfort and Style
Better lighting and airflow make your bathroom feel larger, safer, and more modern—without moving any wires.
- Assess your current setup. Note:
- How bright the room is at night and on cloudy days.
- Whether the fan actually clears steam within 10–15 minutes after a hot shower.
- Whether you have shadows on your face at the mirror.
- Choose a new light fixture that fits your wiring. If you’re replacing an existing vanity light:
- Match the mounting width so it covers the old electrical box and any unpainted areas.
- Pick a fixture that directs light both up and down for less harsh shadows.
- Use LED bulbs in the 2700K–3000K color range for warm, flattering light.
- Turn off power and confirm it’s off. At the breaker panel, switch off the bathroom circuit. Use a non-contact voltage tester at the fixture wires before touching anything. This is non‑negotiable for safety.
- Replace the fixture. Standard process:
- Remove the old fixture and mounting bracket.
- Attach the new bracket to the electrical box.
- Connect wires: black to black (hot), white to white (neutral), ground to ground or metal box (use wire nuts and electrical tape as needed).
- Mount the new fixture, install bulbs, and turn the breaker back on to test.
- Upgrade or clean the exhaust fan. If your fan is noisy or weak:
- First, clean the grille and fan blades (vacuum and wipe).
- If it’s still underperforming, consider a replacement with higher CFM (cubic feet per minute) appropriate for your bathroom size.
- Choose a fan rated for continuous or frequent use and, ideally, one with a low sone (noise) rating for quiet operation.
- Add task and accent lighting where possible. If adding circuits is beyond your comfort level, consider:
- Plug‑in LED strip lights under a floating shelf or behind the mirror frame.
- Battery‑powered motion lights inside deep cabinets.
Good lighting and ventilation not only modernize the space but also help control moisture and mildew long term.
Step 4: Update Fixtures and Hardware Without Replacing the Vanity
You can dramatically change how your bathroom feels by focusing on what you touch every day—faucets, showerheads, and cabinet hardware—while keeping the existing vanity and tile.
- Match finishes intentionally. Decide on one main metal finish (e.g., brushed nickel, black, or brass) and use it for:
- Faucet
- Showerhead and tub spout
- Towel bars and toilet paper holder
- Cabinet knobs/pulls
Mixing too many metals makes a small bathroom feel cluttered.
- Replace the faucet the right way. Before buying:
- Check the number and spacing of holes on your sink.
- Choose a faucet that matches exactly (single-hole, 4" centerset, or 8" widespread).
When installing:
- Upgrade the showerhead. A newer, water-efficient but higher‑pressure showerhead can feel like a luxury:
- Unscrew the old head (use a wrench with a cloth to protect the finish if it’s stuck).
- Clean old thread sealant from the shower arm.
- Wrap the threads with plumber’s tape.
- Screw on the new showerhead and hand-tighten, then snug gently with a wrench if needed.
- Refresh the vanity top without replacing it. Options:
- Deep clean and re-caulk the edges.
- Use a specialty countertop refinishing kit (for laminate or cultured marble) if it’s stained but structurally sound.
- Add a simple backsplash strip (tile or waterproof peel‑and‑stick) behind the faucet to protect the wall and upgrade the look.
- Swap cabinet hardware. Measure the distance between screw holes on existing handles; buy new pulls with the same “center‑to‑center” measurement to avoid drilling new holes. For knobs, you can usually reuse the same hole. Tighten everything securely so it feels solid.
These changes make your bathroom function and feel new, while avoiding the cost of new cabinets or major plumbing work.
Step 5: Build In Smart Storage and Finishing Details
Clutter can make even a freshly painted bathroom feel messy. Smart, wall‑based storage and thoughtful details help your renovation feel truly complete.
- Use vertical wall space. Look for:
- A narrow shelving unit or open shelves above the toilet.
- Hooks on the back of the door for towels or robes.
- A shallow medicine cabinet (recessed or surface‑mount) if you lack counter space.
- Anchor everything safely. When mounting shelves or cabinets:
- Use a stud finder to locate studs and screw into them whenever possible.
- If you must drill into drywall only, use appropriate anchors rated for the load (especially for glass or wood shelves).
- In tile, use a carbide or diamond-tipped bit and drill slowly with minimal hammer action.
- Organize the inside of your vanity. Add:
- Stackable bins for toiletries.
- Pull‑out baskets or trays so the back of the cabinet is usable.
- A simple drawer organizer for small items (razors, floss, hair ties).
Labeling containers can help the system stay intact over time.
- Swap the mirror and textiles strategically. A larger or framed mirror can make the room feel bigger and more finished:
- Choose a mirror slightly narrower than the vanity top.
- Mount it so the center is roughly at eye level for most users (usually 57"–65" from the floor).
For textiles:
- Add moisture‑smart details. To keep your upgrade looking good:
- Use mildew‑resistant caulk at seams and joints.
- Install a simple towel bar or hook near the shower so towels dry fully.
- Keep a small squeegee in the shower to quickly pull water off glass or tile after use.
- Do a final safety and function check. Confirm:
- GFCI outlets test and reset properly.
- All fixtures are tight with no slow leaks.
- The fan clears steam effectively.
- Doors and drawers open fully without hitting new fixtures or shelves.
These finishing touches turn a series of individual projects into a cohesive, comfortable room you’ll actually enjoy using.
Conclusion
You don’t need a full demolition or a massive budget to transform a tired bathroom. By planning carefully, focusing on paint, lighting, fixtures, and storage, you can create a space that looks modern, functions better, and stands up to daily use—all without moving a single pipe.
Tackle the steps in order, pace yourself over a few weekends, and take the time to do proper prep and installation. The result is a refreshed bathroom that adds value to your home and feels good every time you walk in.
Sources
- [U.S. Department of Energy – Bathroom Ventilation Fans](https://www.energy.gov/energysaver/bathroom-ventilation-fans) – Guidance on selecting properly sized, efficient exhaust fans for moisture control
- [EPA – Mold and Moisture in Your Home](https://www.epa.gov/mold/mold-and-moisture-your-home) – Information on preventing and managing moisture and mold issues in bathrooms and other spaces
- [Consumer Product Safety Commission – Ground-Fault Circuit Interrupters (GFCIs)](https://www.cpsc.gov/safety-education/safety-guides/home/electrical-safety-in-the-home/ground-fault-circuit-interrupters) – Explains GFCI protection requirements and safe usage in wet areas like bathrooms
- [Energy Star – Lighting Basics](https://www.energystar.gov/products/lighting_fans/light_bulbs/learn_about_led_bulbs) – Overview of LED lighting, color temperature, and efficiency for choosing appropriate bulbs
- [Lowe’s – How to Replace a Bathroom Faucet](https://www.lowes.com/n/how-to/replace-a-bathroom-faucet) – Step-by-step instructions and visuals for DIY faucet replacement
Key Takeaway
The most important thing to remember from this article is that this information can change how you think about Renovation.


