A full kitchen remodel is expensive, messy, and time‑consuming. You don’t always need new cabinets or a full gut job to get a kitchen that feels cleaner, brighter, and more functional. With some focused planning and a few strategic upgrades, you can refresh a tired kitchen in stages—weekends instead of months, hundreds of dollars instead of tens of thousands.
This guide walks through five practical, step‑by‑step projects you can tackle yourself. Each one can stand alone, or you can combine them into a simple, budget‑friendly mini‑renovation plan.
Step 1: Plan the Refresh Around What You Already Have
Before you touch a tool, you need a clear plan. Most DIY mistakes start with skipping this step.
- Assess what must stay and what can change.
Stand in the kitchen and list what’s fixed (layout, major appliances you’re not replacing soon) and what’s flexible (lighting, hardware, paint, backsplash). Keep anything that’s solid and safe, even if it’s dated.
- Set a realistic budget range.
Decide on a total amount you’re comfortable spending, then break it down: 40–50% for surfaces (paint, counters, backsplash), 20–30% for lighting and hardware, 10–15% for organization, and hold 10–15% for surprises.
- Identify your biggest eyesores.
Common culprits: yellowed walls, old cabinet hardware, mismatched lighting, cluttered counters, grimy backsplash. Rank them by how much they bother you and how noticeable they are when you first walk in.
- Choose one main “upgrade” and two supporting changes.
Example:
- Main: Paint cabinets
- Supporting: New hardware + better lighting
This keeps the project focused and prevents money from disappearing into a dozen half‑finished ideas.
- Gather measurements and photos.
Measure: wall length for backsplash, cabinet runs, counter depth, and ceiling height. Take photos from multiple angles. Measurements keep you from overbuying; photos help when comparing finishes and asking for advice at the store.
Practical tip: If you’re unsure where to start, fix what makes cleaning difficult first (like bad lighting or grime‑trapping surfaces). A kitchen that’s easier to clean feels “newer” every single day.
Step 2: Brighten the Space With Smart, DIY‑Friendly Lighting Upgrades
Good lighting can make old cabinets and countertops look noticeably better without touching them.
- Evaluate current lighting types and levels.
Stand in the kitchen with all lights on at night. Look for dark corners, shadowy counters, and harsh glare. Most kitchens need three layers: overhead (ambient), task (under‑cabinet), and accent (pendants or small fixtures).
- Upgrade bulbs before fixtures.
Swap old bulbs for LED versions with a warm or neutral white color temperature (around 2700K–3000K). Use higher CRI (color rendering index) bulbs—90+ is ideal—so food and finishes look more natural.
- Add or improve under‑cabinet lighting.
- For renters or ultra‑tight budgets: stick‑on, battery or USB‑powered LED strips or puck lights.
- For a more permanent solution: plug‑in or hardwired LED strips mounted to the underside of cabinets (concealed behind the face frame).
Install from one end of the run to the other, keeping the strip straight and tucked back from the cabinet front edge to reduce glare.
- Replace at least one outdated overhead or pendant fixture.
Choose a fixture that fits your ceiling height (flush or semi‑flush for low ceilings, pendants for higher ones or over an island). Follow the manufacturer’s instructions, shut off power at the breaker, and use a voltage tester before touching any wires.
- Add dimmers where possible.
Install dimmer switches for main and task lighting to shift between bright cooking light and softer evening light. Make sure dimmers are compatible with your LED bulbs to avoid flicker.
Practical tip: If your budget only allows one lighting project, do under‑cabinet lights first. They directly improve how you prep food and instantly modernize the look.
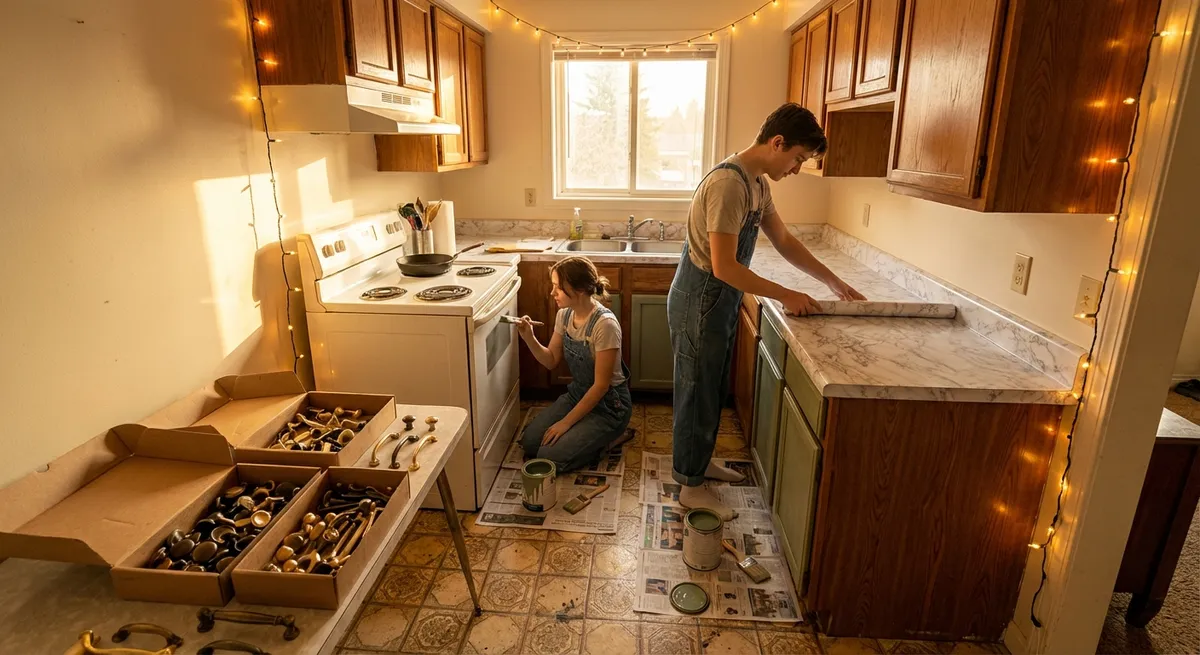
Step 3: Update Cabinets With Paint and New Hardware
If your cabinets are structurally sound but dated, paint and hardware can completely change how they feel.
- Inspect cabinet condition and material.
Solid wood and factory‑finished cabinets are great candidates for paint. Laminate can be painted with the right primer, but needs more careful prep. If doors are cracked, warped, or falling apart, painting won’t fix the underlying problem.
- Clean and label everything before you remove it.
Degrease door and drawer fronts with a degreaser or a mix of warm water and a few drops of dish soap. Number each door and its matching hinge location with painter’s tape (e.g., “1A door / 1A frame”) so rehanging is easy.
- Sand and prime properly.
Lightly sand with 120–220 grit to scuff the finish, then vacuum and wipe with a tack cloth. Use a high‑adhesion bonding primer, especially for glossy or laminate surfaces. Apply thin, even coats and let them fully dry.
- Apply cabinet‑rated paint in multiple thin coats.
Use enamel or cabinet paint designed for trim and doors. A small foam roller for flat surfaces and a quality brush for profiles works well. Two to three thin coats are usually better than one thick coat. Lightly sand between coats if needed for smoothness.
- Update hardware and hinges.
Measure hole spacing on existing pulls (center‑to‑center) so you can buy hardware that fits without drilling new holes, unless you want a new configuration. Replace old knobs and pulls with simple, modern shapes. If hinges are visible and dated, swap them for concealed or matching finishes.
Practical tip: Choose cabinet colors that work with your existing countertops and flooring instead of fighting them. Warm whites, soft grays, or muted greens often blend well with older finishes.
Step 4: Improve Function With Simple Storage and Organization Upgrades
A kitchen that works better automatically feels “renovated,” even if the surfaces are the same.
- Empty one cabinet or drawer bank at a time.
Avoid emptying the entire kitchen at once. Start with the cabinet or drawer that irritates you most (the chaotic pot cabinet, the junk drawer, or the crowded spice area).
- Sort, declutter, and group by how you use items.
Remove anything duplicate, broken, or rarely used. Group by task: baking, prep, coffee/tea, storage containers, kids’ items. Keep your most‑used items between waist and shoulder height.
- Install simple upgrades that multiply space.
- Pull‑out shelves or baskets in deep base cabinets
- Tiered racks for spices and canned goods
- Vertical dividers for baking sheets and cutting boards
- Lazy Susans in corner cabinets
These usually require just a tape measure, drill, screws, and 30–60 minutes per cabinet.
- Claim wasted vertical and door space.
Add hooks or slim racks inside cabinet doors for pot lids, cutting boards, or cleaning tools. Use wall‑mounted rails with hooks for frequently used utensils, mugs, or pans to free up drawer and cabinet space.
- Create one clear “landing zone.”
Dedicate one counter section as a no‑clutter zone for meal prep. Relocate mail piles, small appliances you barely use, and random gadgets. If it doesn’t help you cook or clean daily, it should live elsewhere or in a cabinet.
Practical tip: When you finish each cabinet or drawer, take a quick photo. It helps you maintain the system you set up and reminds you what “organized” looks like when you start slipping back into old habits.
Step 5: Refresh High‑Impact Surfaces: Walls, Backsplash, and Small Repairs
You don’t have to replace everything to make the room feel new. Target a few surfaces that visually dominate the space.
- Repaint walls in a light, wipeable finish.
Choose a light neutral that works with your cabinets and counters (soft white, light beige, pale gray). Use at least an eggshell or satin finish on kitchen walls—they’re easier to clean than flat paint. Patch nail holes and dings with spackle, sand smooth, then paint.
- Update or fake a new backsplash.
- If you have no backsplash: paint the wall with a durable, scrubbable paint and add a simple tile, peel‑and‑stick tile, or washable panel behind the stove and sink.
- If you have dated tile: deep clean and consider regrouting or using grout colorant before deciding to demo. Sometimes clean, bright grout changes the entire feel.
- Repair caulk and sealant around sinks and counters.
Remove cracked or moldy caulk with a caulk remover tool or utility knife. Clean and dry the area completely. Apply kitchen/bath rated caulk (mold and mildew resistant), smooth with a damp finger or caulk tool, and let it cure as directed.
- Address small but noticeable damage.
Fix chipped drywall corners, loose outlet covers, missing trim pieces, and wobbly cabinet knobs. These tiny repairs add up visually and make the kitchen feel cared for instead of worn out.
- Add one or two subtle style elements.
Once the basics are clean and updated, add a runner or mat that’s washable, a couple of functional decorative items (like a wooden cutting board, a plant that tolerates low light, or matching canisters for staples) and stop there. Too much décor will quickly lead back to clutter.
Practical tip: Always prioritize durability where water, grease, and heat are involved. It’s better to choose a simple, sturdy solution you can keep clean than a trendy one that looks rough in six months.
Conclusion
Renovating a kitchen doesn’t have to mean tearing everything out or living in a construction zone. By planning around what you already have, improving lighting, updating cabinets and hardware, tightening up storage, and refreshing the most visible surfaces, you can get a kitchen that functions better and looks significantly newer—without full remodel costs.
Tackle these five steps one weekend at a time, work within your budget, and focus on upgrades that you’ll notice daily: better light, smoother storage, cleaner walls, and cabinets that feel intentional instead of dated. Those small, thoughtful changes are what make an older kitchen feel “ready” again.
Sources
- [U.S. Department of Energy – LED Lighting](https://www.energy.gov/energysaver/led-lighting) - Explains LED bulb efficiency, color temperature, and cost savings, useful for planning lighting upgrades
- [Energy Star – Residential Light Fixtures](https://www.energystar.gov/products/residential_light_fixtures) - Guidance on efficient lighting choices and why fixture and bulb selection matters
- [This Old House – How to Paint Kitchen Cabinets](https://www.thisoldhouse.com/cabinets/21016412/how-to-paint-kitchen-cabinets) - Step‑by‑step walkthrough of cabinet prep, priming, and painting techniques
- [Family Handyman – Kitchen Storage & Organization Ideas](https://www.familyhandyman.com/list/clever-kitchen-storage-ideas/) - Practical examples of pull‑outs, racks, and space‑saving storage upgrades
- [Mayo Clinic – Household Chemical Safety](https://www.mayoclinic.org/healthy-lifestyle/adult-health/in-depth/household-chemicals/art-20046411) - Safety tips for using cleaners, degreasers, and other products during renovation work
Key Takeaway
The most important thing to remember from this article is that this information can change how you think about Renovation.


