Updating a room doesn’t always need new furniture, expensive decor, or a full-on renovation. A single, well-done accent wall can completely change how a space feels—brighter, cozier, more modern—using tools and materials you can handle on your own.
This guide walks you through five clear, practical methods for creating an accent wall, from simple paint to budget-friendly wood and texture upgrades. Pick one that matches your skill level, tools, and budget, and follow the step-by-step instructions.
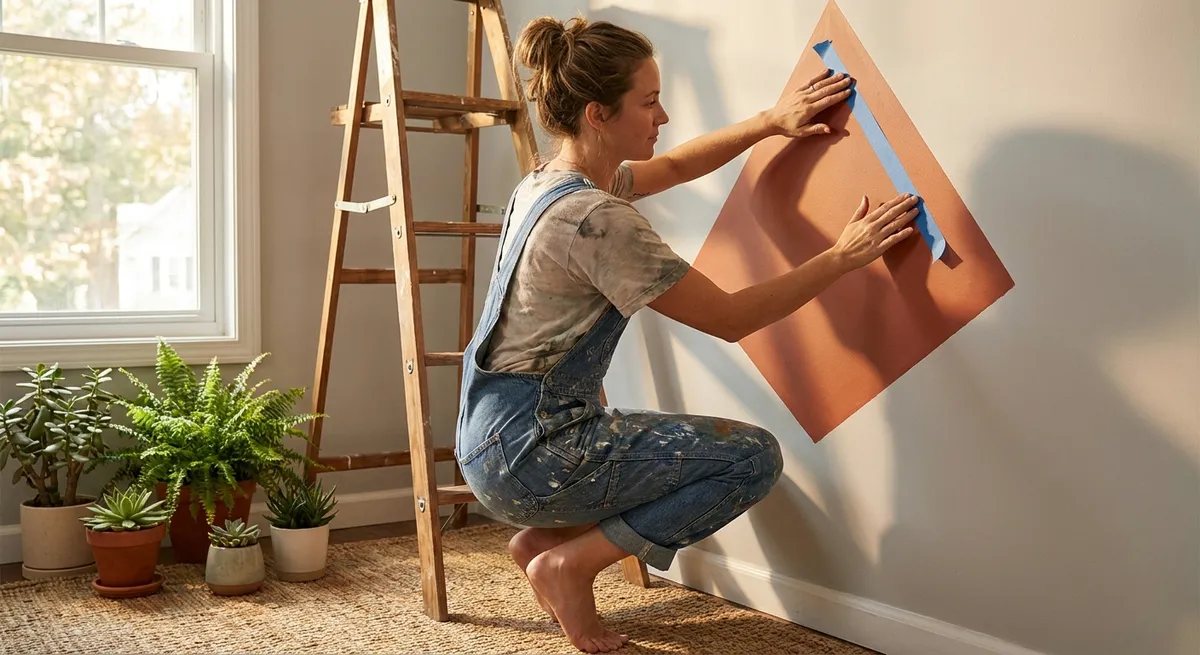
Step 1: Plan the Right Wall and Style for Your Space
Before you buy anything, you need a solid plan. A good accent wall feels intentional, not random.
- Choose the wall that naturally draws attention. This is often behind a bed, sofa, dining table, or the wall you see first when walking into the room. Avoid walls already cluttered with doors or multiple windows if you want a clean focal point.
- Check light and shadows. Walls that get strong natural light will show every roller stroke and minor flaw, especially with darker paint or sheen. If your wall has harsh side lighting, plan to spend more time on prep and smoothing.
- Decide the role of the accent wall.
- To make a room feel cozier, lean into darker, warmer colors or rich textures (like wood).
- To make a room feel brighter or taller, use lighter colors, vertical patterns, or narrow vertical boards.
- To add personality, consider patterns, stripes, or a bold color behind a simple, neutral sofa or bed.
- Measure carefully. Measure the width and height of the wall and write it down. This will guide:
- How much paint you need (most gallons cover 350–400 sq ft)
- How many boards, panels, or tiles you’ll buy
- Where you’ll place patterns or trim for symmetry
- Take inventory of tools you already have. Many accent wall projects only require basic tools: tape measure, level, pencil, caulk, sandpaper, utility knife, paint roller, and brush. For wood or trim, a miter saw (or miter box and hand saw) plus a nail gun or hammer and finish nails are ideal.
A few extra minutes planning now prevents uneven patterns, running short on materials, and awkward layouts later.
Step 2: Prep the Wall So Your Finish Actually Looks Professional
Most DIY accent walls look “off” not because of bad color choices, but because the wall underneath wasn’t prepared. Proper prep makes paint smoother, wallpaper stick better, and wood look cleaner.
- Clear the area. Move furniture away from the wall, remove switch plates and outlet covers, and take down art and hooks. Lay down a drop cloth to protect floors.
- Clean the wall.
- Dust and vacuum along baseboards, corners, and the ceiling edge.
- Wipe the wall with a damp cloth and mild detergent to remove dirt, grease, or smoke residue, especially in kitchens or high-traffic areas.
- Repair imperfections.
- Fill nail holes and small dings with lightweight spackle.
- For deeper dents or cracks, use a more durable joint compound and a putty knife.
- Let dry fully, then sand smooth with fine-grit sandpaper (180–220 grit).
- Deal with glossy paint or heavy texture.
- Lightly scuff-sand glossy surfaces to help new paint, wallpaper, or adhesive grip.
- If the wall is heavily textured and you want a smooth look, you may need to skim coat (apply a thin layer of joint compound), let it dry, and sand it smooth.
- Prime as needed.
- Use primer if you’re going from dark to light, painting over stains, or installing wallpaper on previously painted surfaces.
- Choose a primer that matches your topcoat type (latex with latex, etc.).
- Mask edges properly.
- Use painter’s tape along adjacent walls, ceiling, trim, and baseboards.
- Press the tape down firmly with a putty knife or fingernail to prevent bleed-through.
A well-prepped wall makes every subsequent step easier and gives you that “clean-edged, pro” finish, even if it’s your first time.
Step 3: Paint a Clean Accent Wall (with Crisp Edges and Even Coverage)
A painted accent wall is the fastest, most budget-friendly way to transform a room. Done right, it can look like a designer choice, not a last-minute decision.
- Select the right paint finish.
- Matte/eggshell: Forgiving on imperfect walls, ideal for living rooms and bedrooms.
- Satin: Slightly more durable and easier to wipe, great for kids’ rooms or hallways.
- Avoid high-gloss unless your wall is very smooth—it highlights flaws.
- Cut in the edges first.
- Use a quality angled brush to paint a 2–3 inch border along the ceiling line, corners, and baseboards.
- Don’t overload the brush; multiple smooth passes beat one thick, drippy one.
- Roll the main area correctly.
- Use a 3/8" to 1/2" nap roller depending on your wall texture (shorter nap for smoother walls).
- Load the roller evenly, roll in overlapping “W” or “M” patterns, and then smooth out in vertical passes without pressing too hard.
- Work in sections and maintain a “wet edge” so you don’t see lap lines.
- Apply a second coat.
- Let the first coat dry fully (check the can, typically 2–4 hours) before the second.
- The second coat evens out any patchiness and deepens the color.
- Pull tape at the right time.
- Remove painter’s tape while the paint is still slightly tacky—not fully cured—to avoid peeling.
- Pull it back on itself at a 45-degree angle for the cleanest line.
- Optional: Add simple visual interest.
- Use the same color in a different sheen (e.g., matte wall with satin stripes or rectangles) for a subtle, tone-on-tone pattern that doesn’t require multiple colors.
- Lightly mark your lines with a level and pencil, tape them carefully, and paint the higher-sheen areas last.
If you can handle basic painting, this step alone can completely shift the mood of your room in a single afternoon.
Step 4: Install a Simple Wood or Board-and-Batten Accent Wall
If you want something more dimensional than paint, a wood or board-and-batten wall adds texture and depth without a full carpentry remodel.
- Choose your material.
- For board-and-batten, use 1x3 or 1x4 primed MDF or pine boards.
- For a wood plank wall, consider thin tongue-and-groove boards or plywood ripped into strips for a budget option.
- Plan your layout with measurements, not guesses.
- Sketch the wall and mark where vertical boards or planks will go.
- Dry-fit the spacing with painter’s tape first to see how it looks.
- Aim for even spacing and symmetry around windows, outlets, and corners.
- Find studs and mark them.
- Use a stud finder and lightly pencil vertical lines where studs are.
- Attaching heavier boards into studs improves stability, especially for thicker wood.
- Cut and dry fit boards.
- Use a miter saw for straight, clean cuts (or a miter box and hand saw if you don’t have power tools).
- Label the back of each board (top/bottom and position) so you don’t lose track of your layout.
- Attach boards to the wall.
- Apply a thin bead of construction adhesive to the back of each board, then press it into place.
- Secure with a brad nailer or finish nails at studs and top/bottom. Work from the top down or from one side across the wall to maintain consistency.
- Fill, caulk, and sand.
- Fill nail holes with wood filler or spackle and sand smooth once dry.
- Caulk along all edges where boards meet the wall to remove gaps and create a seamless look.
- Prime and paint.
- Prime raw wood or MDF, then paint everything (boards and wall sections between them) in the same color for a cohesive, built-in look.
- Use a brush for edges and a small roller for faster coverage on larger sections.
This step gives you a custom, architectural feel at a fraction of what built-in paneling or custom carpentry would cost.
Step 5: Add Texture with Peel-and-Stick Wallpaper or Panels
If you want pattern or texture without permanent changes, peel-and-stick wallpaper or lightweight panels are a good DIY option—especially for renters or commitment-shy designers.
- Choose a pattern and material that fits your space.
- Bold, large-scale prints work best on larger walls with minimal furniture.
- Subtle geometric or textured prints fit smaller rooms, hallways, or behind open shelving.
- For panels, look at faux brick, shiplap, or geometric foam options designed for interior walls.
- Check the wall surface.
- Peel-and-stick adheres best to smooth, clean, painted walls.
- Heavily textured surfaces may require a smoothing skim coat or a different product designed for texture.
- Create a plumb starting line.
- Never assume your wall or ceiling is perfectly straight.
- Use a level to draw a vertical plumb line a few inches from the starting corner; align your first wallpaper strip or panel to that line, not the corner.
- Apply peel-and-stick carefully.
- Peel back just the top 6–12 inches of the backing, position the strip at the top of the wall, and stick it along your plumb line.
- Slowly peel more backing as you smooth downward with a plastic smoother or a clean, soft cloth, pressing out air bubbles as you go.
- Match patterns and trim edges.
- Overlap or butt strips according to the manufacturer’s instructions, carefully matching the pattern.
- Use a sharp utility knife and a straightedge to trim excess along baseboards, ceilings, and around outlets.
- For panels, follow fastening guidelines.
- Some panels use adhesive only; others need small brad nails at edges.
- Start at your most visible corner or center point and work outward, checking alignment as you go.
Done with care, this step can give you a high-impact designer look in a weekend—without permanently altering the wall.
Conclusion
An accent wall is one of the most efficient DIY projects you can take on: low material cost, limited tools, and a huge visual payoff. By:
- Planning the right wall and style,
- Prepping your surface properly,
- Choosing between paint, wood, or texture based on your comfort level,
you can transform a tired room into a space that feels intentional and updated, without hiring a contractor or taking on a full renovation.
Start with the method that feels most manageable for you right now. Once you see how much difference one wall can make, you’ll have the confidence to tackle bigger DIY projects throughout your home.
Sources
- [How to Paint an Accent Wall](https://www.bhg.com/decorating/paint/how-to/painting-an-accent-wall/) - Better Homes & Gardens guide on accent wall planning and painting basics
- [Board and Batten Wall Tutorial](https://www.lowes.com/n/how-to/install-a-board-and-batten-wall) - Lowe’s step-by-step instructions for installing a board-and-batten accent wall
- [Choosing Interior Paint Finishes](https://www.sherwin-williams.com/en-us/homeowners/color/paint-finishes-101) - Sherwin-Williams overview of paint sheens and where to use them
- [Hanging Peel-and-Stick Wallpaper](https://www.homedepot.com/c/ah/how-to-hang-peel-and-stick-wallpaper/9ba683603be9fa5395fab901620a6dd) - Home Depot guide to installing removable wallpaper
- [Wall Preparation Before Painting](https://www.familyhandyman.com/project/how-to-prepare-walls-for-painting/) - Family Handyman’s instructions for cleaning, repairing, and priming walls before a project
Key Takeaway
The most important thing to remember from this article is that this information can change how you think about DIY Projects.


