A full kitchen remodel is expensive and disruptive, but tired cabinets don’t have to stay that way. With the right prep and a weekend (or two) of focused work, you can make old cabinets look fresh, modern, and custom—without tearing anything out. This guide walks you through a practical, step-by-step process DIYers can follow safely and confidently.
Plan Your Cabinet Refresh (Style, Budget, and Scope)
Before you pick up a sander, decide exactly what you’re changing. Are you repainting, swapping hardware, adding trim, or all three? Clarifying your goals early helps you avoid “project creep” and surprise costs.
Walk through your kitchen and take photos from different angles. Note what bothers you most: the color, the door style, the worn finish, or outdated hardware. Decide whether you want a light, bright look, a deep, dramatic color, or a natural wood tone. Check your existing countertops, floor, and backsplash so your new cabinet finish doesn’t clash.
Set a realistic budget. Paint, primer, sandpaper, and patch materials are relatively low-cost. Hardware, new hinges, or adding crown molding will increase the total. Write down your priorities so if you need to cut something, it’s not a last‑minute decision.
Finally, plan your schedule. A serious cabinet refresh often takes several days because of drying times. Map out which days you’ll clean, sand, prime, paint, and reassemble so your kitchen stays as functional as possible during the project.
Step 1: Prep Like a Pro (Clean, Label, and Protect)
Good prep is the difference between a finish that peels and one that lasts. Most kitchen cabinets are coated in a mix of grease, dust, and cooking residue that paint will not stick to unless you remove it.
Start by clearing countertops and emptying upper cabinets in the areas you’re working on. Use painter’s tape and plastic sheeting or rosin paper to protect countertops, appliances, backsplash, and flooring. Remove doors and drawer fronts one at a time; as you do, label each piece and its hardware with painter’s tape (for example: “Upper L of stove – Door 1”) so everything goes back in the right place.
Clean all surfaces you plan to refinish with a degreasing cleaner or a TSP/TSP substitute following the manufacturer’s instructions. Pay special attention to areas around handles, knobs, and near the stove. Rinse with clean water and allow everything to dry fully.
Remove knobs, pulls, and hinges if you’re replacing them or refinishing around them. Store hardware in labeled bags. Don’t skip the labeling step—misplaced doors and hinges are one of the most frustrating (and avoidable) issues in cabinet projects.
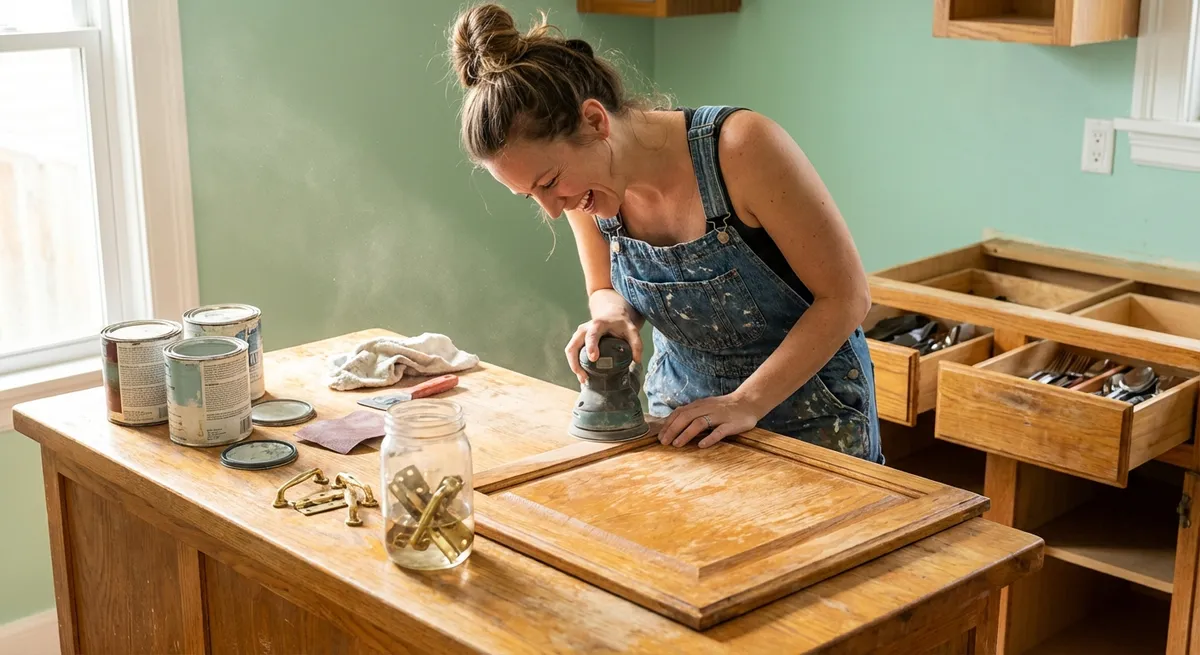
Step 2: Sand and Repair the Surfaces
Once everything is clean and dry, focus on getting a smooth, paint‑ready surface. This is where you correct dings, fill holes, and knock down old finish so new coatings adhere properly.
Lightly sand cabinet boxes, doors, and drawer fronts with medium‑grit (120–150) sandpaper or a sanding sponge. The goal is to scuff the surface, not remove all the old finish. On heavily varnished or glossy cabinets, you may need a stronger initial grit, then a finer grit to smooth.
Inspect for damage: chips in the wood or MDF, gouges, and old hardware holes you no longer need. Fill these with a suitable wood filler or spackle rated for painted finishes. Slightly overfill deeper holes so you can sand them flush once dry. Follow drying times on the product label; rushing here leads to visible patches later.
After patching, sand again with fine‑grit (180–220) sandpaper until surfaces feel smooth and consistent. Wipe all dust with a vacuum plus a tack cloth or a slightly damp microfiber cloth. Dust left behind will create bumps in your finish and can cause adhesion problems.
If you’re only repainting and your existing finish is intact (not peeling or flaking), you may also consider a liquid deglosser as an alternative or supplement to sanding. Always follow safety instructions and ventilate well if you take that route.
Step 3: Prime Smart for a Durable Finish
Primer is essential, especially on older cabinets, stained wood, or laminate surfaces. It helps paint stick, blocks stains, and evens out color. Skipping primer is one of the fastest ways to end up with peeling paint or tannin bleed‑through from wood.
Choose a primer that matches your cabinet material and paint type (for example, a bonding primer for laminate or slick factory finishes, or a stain‑blocking primer for oak and other tannin‑rich woods). Check the can for compatibility with your topcoat paint.
Apply primer to cabinet boxes first, then doors and drawer fronts. Use a quality angled brush for corners and grooves, and a small foam roller or high‑density roller for flat surfaces. Work in thin, even coats; thick coats are more likely to drip and take longer to cure.
Watch for drips along edges and in recessed panel areas, especially on door rails and stiles. Feather out any heavy spots immediately. Allow the primer to dry fully according to manufacturer instructions—don’t just go by touch; curing times matter for durability.
When dry, lightly sand with fine‑grit (220) sandpaper to knock down any raised grain or rough spots, then remove dust. This step gives you a smooth foundation so your paint can level nicely and look more “factory finished” instead of brush‑marked.
Step 4: Paint for a Professional-Looking Finish
With solid prep and primer done, painting should be straightforward. The right technique and tools will make your cabinets look closer to custom work than DIY.
Use a high‑quality enamel or cabinet‑specific paint (often labeled as trim or cabinet paint). These are formulated to be harder, more durable, and easier to clean than standard wall paint. Choose a sheen that fits your space: satin or semi‑gloss are common for cabinets because they balance wipeability and appearance.
Start with cabinet boxes, then move to doors and drawer fronts. Cut in corners and detailed profiles with an angled brush, then immediately roll the flat areas with a foam or high‑density microfiber roller to minimize brush marks. Work in the same direction as the wood grain where possible.
Apply thin coats. It’s better to do two to three light coats than one heavy coat that runs or takes forever to cure. Let each coat dry completely based on the paint label, not just on appearance. Lightly sand between coats with very fine (320) sandpaper or a sanding pad, especially if you feel any texture or dust nibs, and wipe clean.
If you have access to a paint sprayer and a proper setup area, spraying can give an ultra‑smooth finish on doors and drawer fronts, but it requires more masking, ventilation, and practice. If you’re newer to DIY, a careful brush‑and‑roll approach is usually safer and still delivers excellent results.
Step 5: Add Hardware and Final Details
Once the final coat is dry and has had time to cure (often at least 24–48 hours before light use), you can reassemble and upgrade the details that make your cabinets feel finished and modern.
Reinstall doors and drawer fronts using your labels so everything goes back where it belongs. If you upgraded hinges (for example, to soft‑close), follow the manufacturer’s installation template and adjust doors so they hang straight and line up with adjacent fronts.
Next, install new knobs and pulls or reattach your cleaned existing hardware. If you changed hardware style or size, use a simple cabinet hardware jig or template to keep screw holes consistent and level. For old holes you filled, make sure the filler is completely hard before drilling new ones.
Check all moving parts: open and close every door and drawer to confirm there’s no sticking, rubbing, or hardware misalignment. Make tiny adjustments as needed; a few extra minutes here prevents daily annoyances later.
Finally, give the painted surfaces extra care during the first couple of weeks while the paint fully cures. Avoid harsh cleaners and scrubbing at this stage—wipe spills gently and let the coating harden up. Once cured, maintain your cabinets with mild soap and water and soft cloths for long‑lasting results.
Conclusion
Refreshing existing kitchen cabinets is one of the highest‑impact, lowest‑cost renovations you can tackle as a DIYer. With thorough cleaning, careful sanding and repairs, the right primer and paint, and attention to detail when reassembling, you can dramatically change how your kitchen looks and feels—without ripping anything out. Take your time at each step, follow product directions closely, and you’ll end up with a durable, custom‑looking finish that holds up to everyday use.
Sources
- [U.S. Department of Housing and Urban Development – Rehab a Home](https://www.hud.gov/topics/home_improvements) - General guidance on planning home improvement and renovation projects
- [Family Handyman – How to Paint Kitchen Cabinets](https://www.familyhandyman.com/project/how-to-paint-kitchen-cabinets/) - Practical step-by-step advice for cabinet painting and prep
- [This Old House – Painting Kitchen Cabinets](https://www.thisoldhouse.com/cabinets/21015138/painting-kitchen-cabinets) - Detailed techniques, tool recommendations, and finish suggestions
- [Sherwin-Williams – Cabinet Painting Guide](https://www.sherwin-williams.com/en-us/homeowners/how-to/paint-kitchen-cabinets) - Professional recommendations on primers, paints, and application methods
- [EPA – Lead in Paint, Dust and Soil](https://www.epa.gov/lead) - Essential safety information if your home was built before 1978 and may contain lead-based paint
Key Takeaway
The most important thing to remember from this article is that this information can change how you think about Renovation.


