Tired of dated kitchen cabinets but not ready for a full remodel? Updating the cabinets you already have is one of the highest-impact, lowest-cost renovations you can tackle. With some planning, basic tools, and the right products, you can transform a tired kitchen into a space that feels clean, modern, and custom—without ripping anything out.
This guide walks you through a practical, DIY-friendly process that focuses on prep, durability, and a pro-looking finish, not just a quick cosmetic fix.
Plan Your New Look and Evaluate Your Cabinets
Before you pick up a sander or paintbrush, you need a clear plan and a reality check on what you’re working with.
First, inspect your cabinets. Open and close doors and drawers. Look for peeling veneer, sagging shelves, water damage under the sink, or soft spots in the boxes. If the cabinet boxes are structurally weak or swollen from moisture, cosmetic updates won’t last and you may need partial replacement instead.
Next, decide on the type of refresh: paint, stain, or a combination. Solid wood or wood veneer can usually be painted or re-stained. Laminate can often be painted too, but it needs specific primers designed for slick surfaces. If you like the wood grain but want a cleaner look, you could keep the boxes wood and paint only the doors, or vice versa. At the same time, think through hardware (handles and knobs), hinges, and any small upgrades like soft-close add-ons, pull-out organizers, or under-cabinet lighting.
Measure your cabinets and count doors, drawers, and hardware pieces. This helps you buy the right amount of primer, paint, sandpaper, and new hardware in one trip. Take photos of your kitchen in daylight; they’ll help you choose colors that work with your flooring and countertops. Finally, set a realistic schedule: a full cabinet refresh usually takes several days because of drying time, even if the hands-on work per day is manageable.
Step 1: Remove Doors, Drawers, and Hardware (and Label Everything)
Starting clean and organized saves frustration later. Trying to paint cabinets in place with the doors attached almost always leads to drips, missed spots, and sticky edges.
Use a drill or screwdriver to remove all doors from the frames and take drawers out of their slides. Lay them flat on a large, clean surface like a folding table or makeshift workbench. As you remove each door, label it and its corresponding location. A simple system is to use painter’s tape on the hinge side with a code like “U1” for upper cabinet 1 or “B3” for base cabinet 3, and put the same label inside the cabinet box. Do the same for drawer fronts if they’re removable from the drawer boxes.
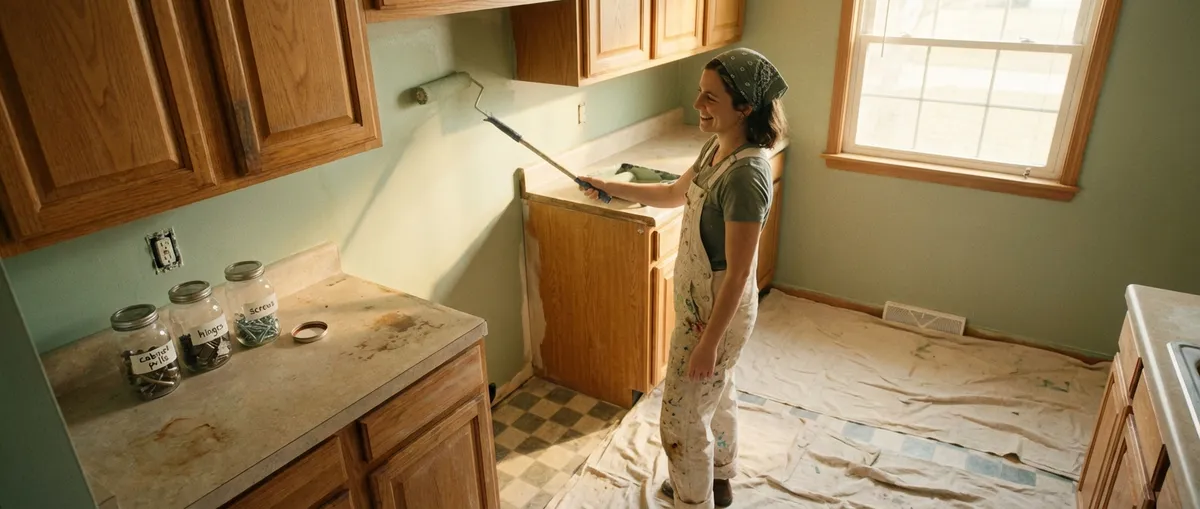
Remove all hinges, handles, and knobs, and store the screws and hardware in clearly labeled bags or containers. Even if you’re replacing hardware, keep the old pieces until the project is complete; they can be useful if a new part doesn’t fit as expected. If you plan to switch from single knobs to wider pulls, note that you may need to fill old holes and drill new ones, so figure that into your plan now.
Set up a dedicated work zone for doors and drawers, ideally in a garage or well-ventilated room with drop cloths or rosin paper on the floor. Elevate your doors on painter’s pyramids, scrap blocks, or even sturdy cups so you can paint edges without sticking them to the surface underneath.
Step 2: Deep Clean and Degloss the Surfaces
Kitchens accumulate grease, steam, and grime that regular wiping doesn’t fully remove. If you skip serious cleaning, paint or finish will not bond well and will chip or peel quickly.
Start with a heavy-duty degreaser or a cleaner specifically labeled for pre-paint prep. Work in sections, scrubbing all cabinet faces, doors, and drawer fronts with a sponge or non-scratch pad. Pay extra attention to areas above the range and around handles where hands touch frequently. Rinse thoroughly with clean water and allow everything to dry completely before moving on.
Once clean, you’ll need to take the shine down. If your cabinets have a glossy or semi-gloss finish, that surface is designed to resist adhesion. You can lightly sand with a fine-grit sandpaper (around 220-grit) to scuff the surface, or use a liquid deglosser according to its instructions. If you choose sanding, use a sanding block or sanding sponge to keep even pressure and prevent gouging.
Vacuum up dust with a brush attachment and wipe everything again with a tack cloth or a slightly damp microfiber cloth to remove remaining dust. At this stage the cabinets may look dull and streaky—that’s good. You want a uniform, dull surface that your primer can grab onto.
Step 3: Repair Damage and Create a Smooth Base
The quality of your repairs and surface prep will show in the final finish. Taking time here is what makes a DIY job look professionally done.
Inspect all surfaces under good lighting. Fill small dents, old hardware holes, and chips with a high-quality wood filler or spackling designed for cabinets and trim. If you’re changing hardware hole spacing (for example, going from single knobs to 5-inch pulls), fill the old holes fully and let the filler dry completely before sanding. For deeper damage, you may need to apply filler in layers, allowing each layer to dry before adding the next.
Once filler is fully dry, sand those areas smooth with fine-grit sandpaper until they’re flush with the surrounding wood. Run your hand over the surface; if you can feel ridges, they’ll show through the paint. For peeling veneer or loose edges, use wood glue or construction adhesive to reattach the veneer and clamp or tape it in place until cured. Large sections of missing veneer might be better covered with a new veneer sheet or, in some cases, a thin plywood skin.
Clean off all sanding dust again, then inspect for any missed cracks or defects. This is the last easy chance to fix imperfections before priming. It’s worth stepping back, looking from different angles, and using a raking light (a flashlight held low to the surface) to reveal bumps and dips that normal overhead lighting can hide.
Step 4: Prime and Paint (or Stain) for a Durable Finish
Primer and the right finish coat make the difference between cabinets that look good for a month and cabinets that hold up to years of use.
Choose a high-adhesion primer suitable for your cabinet material (wood, veneer, or laminate). For kitchens, stain-blocking primers are helpful if you have knots, water stains, or tannins from certain woods that might bleed through. Apply primer in thin, even coats with a quality brush for corners and details and a small foam or microfiber roller for flat surfaces. Follow the manufacturer’s drying times before sanding or recoating.
After the primer dries, lightly sand with very fine-grit sandpaper (320–400 grit) to knock down any raised grain or dust nibs, then wipe clean. This quick scuffing step creates an ultra-smooth surface for your topcoat and is especially important if you’re aiming for a sleek, modern look.
For paint, look for products labeled specifically for cabinets, trim, or doors. These are usually harder, more durable, and easier to clean than standard wall paint. Satin, semi-gloss, or a low-sheen enamel are typical choices; ultra-gloss shows imperfections, while flat can be harder to clean. Apply two to three thin coats rather than one thick coat, allowing full drying and, ideally, a light sand between coats.
If you’re staining instead of painting, use a pre-stain conditioner on bare wood to help prevent blotchiness, especially with softwoods. Apply stain with a cloth or brush, working with the grain, and wipe off excess. Once the stain is fully dry, protect it with multiple coats of a clear topcoat such as polyurethane or a water-based cabinet varnish, again sanding lightly between coats. The goal is a hard, washable surface that can handle regular scrubbing and kitchen humidity.
Step 5: Reassemble, Upgrade Hardware, and Fine-Tune the Details
Once your finish has cured (check the can for “cure” time, which may be longer than “dry” time), you can put everything back together and dial in the final look.
Start by reinstalling hinges on the doors while they’re flat on your work surface. If you’re using the same hinges and hardware style, your existing holes will guide you. If you’ve upgraded to new hinges or are switching from surface-mounted to concealed (European-style) hinges, use a template or jig to ensure consistent placement. A simple plastic jig for handles and pulls can save a lot of measuring and keep everything lined up.
Mount doors back on their cabinet boxes using your labeling system so each door returns to its original location. Adjust hinges so door gaps are even and doors don’t rub against each other or the frames. Many concealed hinges have simple screws that adjust up/down, left/right, and in/out; a few minutes of tweaking can dramatically improve the overall look.
Install your new handles or knobs, drilling new holes where necessary and using a level or jig for consistent alignment. If you added soft-close adapters, test every door and drawer to make sure they close smoothly and don’t slam. Stick-on felt bumpers on the inside corners of doors help protect your new finish and reduce noise.
Finally, clean up any stray paint on hinges or hardware with a razor blade or touch-up brush, and remove any painter’s tape. Step back and look at the space as a whole—consider adding small, complementary touches like updated switch plates, new under-cabinet LED strips, or a simple backsplash refresh to tie the new cabinet finish into the rest of the kitchen.
Conclusion
Refreshing your kitchen cabinets instead of replacing them can dramatically change how your home feels, often at a fraction of the cost and disruption of a full remodel. The keys are honest assessment, thorough prep, appropriate products, and patience with drying and curing times. By following this step-by-step approach—disassembling, deep cleaning, repairing, priming and painting, then carefully reassembling—you end up with a durable, custom-looking result that you can be proud of every time you walk into the kitchen.
Sources
- [U.S. Environmental Protection Agency – Lead-Based Paint in Homes](https://www.epa.gov/lead/protect-your-family-sources-lead) - Important safety information if your home was built before 1978 and you may disturb old paint during cabinet work
- [This Old House – How to Paint Kitchen Cabinets](https://www.thisoldhouse.com/cabinets/21015114/how-to-paint-kitchen-cabinets) - Practical pro-level tips on cabinet prep, priming, and painting techniques
- [Bob Vila – How to Refinish Kitchen Cabinets](https://www.bobvila.com/articles/how-to-refinish-kitchen-cabinets/) - Guidance on stripping, staining, and sealing wood cabinets for a long-lasting finish
- [The Family Handyman – Kitchen Cabinet Hardware Installation Tips](https://www.familyhandyman.com/project/how-to-install-cabinet-hardware/) - Detailed advice on positioning, drilling, and installing cabinet handles and pulls
- [Consumer Reports – Best Paints for Your Home](https://www.consumerreports.org/home-maintenance-repairs/best-interior-paints-a1932497929/) - Independent testing and recommendations on durable interior and cabinet paints
Key Takeaway
The most important thing to remember from this article is that this information can change how you think about Renovation.


