A full kitchen remodel can drain your budget and your patience. The good news: you don’t have to rip everything to the studs to get a space that looks and feels new. With some planning, a realistic weekend timeline, and the right order of operations, you can dramatically update your kitchen while keeping it functional and affordable. This guide walks you through a practical, step‑by‑step “refresh” that DIYers can tackle with basic tools and a bit of persistence.
Start With a Clear Plan (And Realistic Budget)
Before you buy a single can of paint, define what “finished” looks like for you. Are you aiming for a brighter, more modern look? Better storage? A cleaner, less cluttered feel? Write down three priority outcomes (for example: “lighter cabinets,” “new hardware,” “better lighting”) and let those guide every decision.
Measure your kitchen and list each surface you might touch: cabinets, walls, backsplash, counters, floors, and fixtures. Decide what you’ll keep, what you’ll refresh, and what you’ll replace. A typical budget-friendly refresh focuses on painting or refinishing cabinets, updating hardware, adding or changing a backsplash, upgrading lighting, and tightening up organization inside cabinets.
Set a budget range with a hard ceiling. Price out core materials online—primer, paint, hardware, lighting, backsplash materials, and organizational inserts—before committing. Build in a 10–15% cushion for extras like sandpaper, caulk, cleaning solutions, and replacement fasteners. Finally, plan your work in phases so your kitchen stays at least partially usable; for example, avoid removing all cabinet doors and emptying every cabinet at once if you rely on the space daily.
Step 1: Deep Clean and Small Repairs Before Any “Pretty” Work
It’s much easier to spot problems and work effectively when surfaces are truly clean. Grease, dust, and old food residue will ruin paint adhesion, make hardware installation harder, and hide minor damage you should fix first.
Start by clearing countertops and open shelves. Remove items you don’t use regularly and box them for donation or storage. Then wash cabinet faces, walls near the stove, and backsplash areas with a degreasing cleaner or a mix of warm water and a few drops of dish soap. Pay special attention to handles, corners, and trim where grime builds up.
As you clean, note any issues: loose hinges, cracked caulk around the sink, peeling finish, or small wall dings. Tighten screws, re-secure any wobbly brackets, and scrape away failing caulk with a utility knife. Patch small holes or dents in the wall with lightweight spackle, let it dry, sand smooth, and dust off the surface. Addressing these basics first gives you a much better base for painting, tiling, or installing new fixtures, and it often makes the kitchen feel noticeably better even before the cosmetic upgrades begin.
Step 2: Refresh Cabinets With a Durable Paint Upgrade
Painting cabinets is one of the highest-impact changes you can make without replacing them. Done correctly, it can make dated wood or worn finishes look custom and modern, but rushing this step almost always leads to chipping and frustration.
Begin by labeling every door and drawer with painter’s tape so you can put everything back in the right spot later. Remove doors, drawers, and all hardware. Lay doors flat on stands or a work surface; this helps prevent runs and sags in the finish. Clean each surface again with a degreaser, then lightly sand with a medium-grit sandpaper (around 120–150 grit) to scuff the finish. Wipe away dust with a tack cloth or damp rag.
Apply a high-adhesion primer designed for glossy or previously finished surfaces. This is critical for kitchens where cabinets are exposed to grease and frequent handling. After the primer dries, lightly sand again with a fine-grit paper (220 grit) and remove dust. Then apply two thin coats of a cabinet-rated enamel or acrylic-alkyd paint, allowing proper dry time between coats. Work methodically with a quality brush and small foam roller for a smooth finish. Let doors cure fully before reassembly; a surface that’s “dry to the touch” may still be soft and prone to fingerprints or sticking if you rush to rehang everything.
Step 3: Upgrade Hardware and Fixtures for Instant Modernization
Once cabinets are painted and cured, swapping hardware is a quick way to push the entire look in a new direction. New pulls, knobs, and hinges can make builder-grade cabinets feel intentional and cohesive. When possible, choose hardware that matches existing hole spacing to avoid filling and redrilling; this speeds up the job and reduces the risk of misalignment.
Use one door or drawer front as a test piece. Install your new hardware there first to confirm the look and feel. If you need to drill new holes (for example, switching from single knobs to wider pulls), create a simple cardboard or store-bought template to keep everything consistent. Clamp the door on a stable work surface, drill slowly with a sharp bit, and support the back to minimize splintering.
Look at your faucet and sink hardware next. A new faucet—especially with a pull-down sprayer or taller spout—often makes daily use easier and visually updates the space. Before buying, check how many mounting holes your existing sink has and match your replacement accordingly. Shut off water at the supply valves, relieve pressure by opening the faucet, then disconnect and swap out the fixture following the manufacturer’s instructions. When you reinstall, use plumber’s tape on threaded connections where specified and test carefully for leaks before declaring the job done.
Step 4: Add or Refresh a Backsplash Without Full Demolition
A backsplash frames your counters and cabinets; changing it often transforms the room more than people expect. You don’t necessarily need to demolish tile and create a mess. Depending on your starting point and budget, you can lightly update, cover, or fully replace this area.
If you have painted drywall, you can install peel-and-stick backsplash panels for a fast, low-commitment upgrade. Clean the wall thoroughly, ensure it’s dry and smooth, then follow the panel layout from the center outward to minimize visual seams. Use a sharp utility knife and straightedge to cut tiles to fit around outlets and corners. For more durability, consider classic ceramic subway tile. You’ll need a tile cutter or wet saw, thinset or mastic, spacers, grout, and a notched trowel. Work in small sections, checking level regularly and allowing adhesive to set before grouting.
If you already have dated tile and want a cleaner slate without extensive demo, you have a few options. You can tile over existing tile if it’s solidly attached and properly prepared (cleaned, lightly scuffed, and sometimes primed with a bonding agent), though this adds thickness and may affect outlet depth and trim. Alternatively, specialized tile paints and epoxy coatings can refresh color at lower cost, but they require careful prep and tend to be less forgiving of application mistakes. In any case, protect countertops with drop cloths and tape off edges to keep lines clean.
Step 5: Improve Lighting and Storage for Daily Ease
A kitchen can look “renovated” on the surface but still feel frustrating if lighting and storage don’t support how you cook and move. Upgrading these last makes the whole refresh feel intentional rather than cosmetic.
Start at the ceiling. If your main fixture is dim or dated, replace it with an LED semi-flush mount or a simple track system that throws light where you need it most. Turn off power at the breaker before working on electrical, confirm with a non-contact voltage tester, and follow fixture instructions closely. When in doubt, or if your wiring looks questionable, bring in a licensed electrician for this part only and DIY the rest.
Next, consider task lighting. Plug-in under-cabinet LED strips or puck lights are easy to install without opening walls. Mount them toward the front underside of upper cabinets to light the countertop evenly, and route cords neatly along the underside using clips or cable raceways. Many kits come with adhesive backing and remote controls, making installation straightforward.
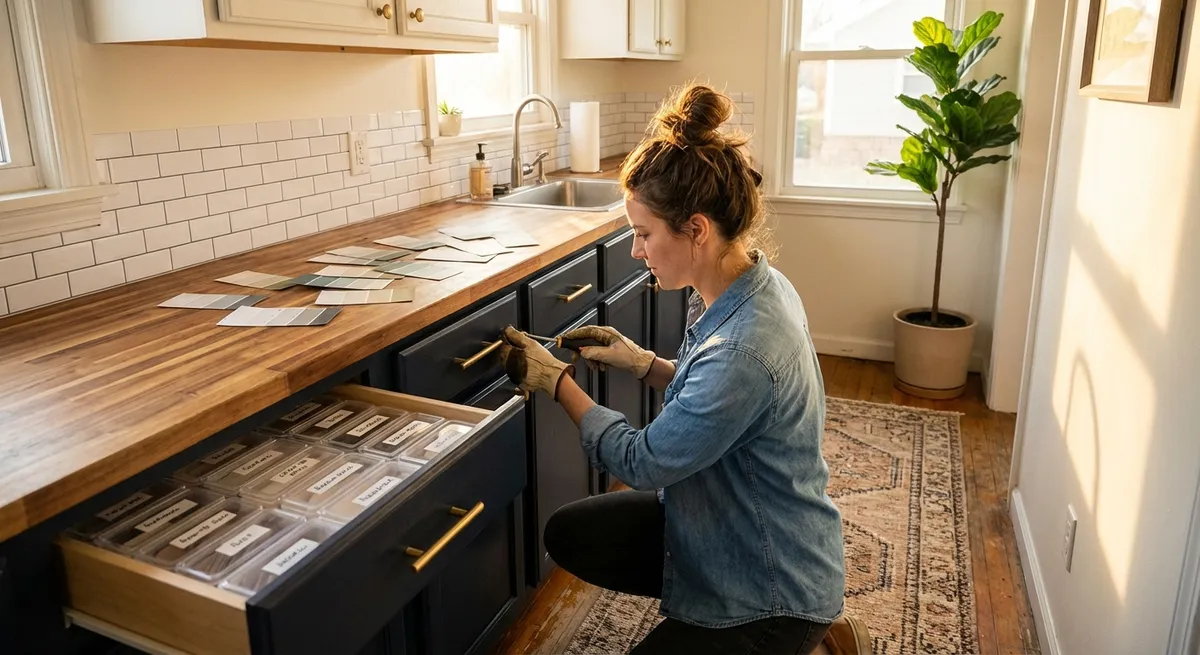
Finally, optimize storage inside cabinets and drawers. Install pull-out trays for lower cabinets to avoid digging for pots and pans. Add vertical dividers for baking sheets and cutting boards. Consider drawer organizers for utensils, spices, and small tools so every item has a dedicated spot. These small upgrades don’t show up in listing photos, but they dramatically change how the kitchen feels to use every day, which is the whole point of a smart, minimal-disruption renovation.
Conclusion
You don’t need a massive budget or months of construction to get a kitchen that looks sharper and works better. By cleaning and repairing first, then methodically tackling cabinets, hardware, backsplash, lighting, and storage, you can create a space that fits your style and daily routine. The key is preparation, patience between steps, and focusing on changes that deliver both visual impact and functional improvement. Start with one phase, keep your workspace organized, and your “old” kitchen will steadily turn into a room you actually want to spend time in.
Sources
- [U.S. Department of Housing and Urban Development – “Rehab a Home” Guide](https://www.hud.gov/program_offices/housing/sfh/203k/203k--df) - General guidance on home rehabilitation and planning improvements within a budget
- [This Old House – How to Paint Kitchen Cabinets](https://www.thisoldhouse.com/cabinets/21015023/how-to-paint-kitchen-cabinets) - Detailed, step-by-step instructions and pro tips for durable cabinet painting
- [Energy.gov – LED Lighting Basics](https://www.energy.gov/energysaver/lighting-choices-save-you-money/led-lighting) - Explains the benefits, efficiency, and lifespan of LED fixtures for home use
- [The Spruce – Kitchen Backsplash Ideas and Options](https://www.thespruce.com/kitchen-backsplash-ideas-4126154) - Overview of backsplash materials, styles, and installation considerations
- [Family Handyman – Kitchen Storage and Organization Projects](https://www.familyhandyman.com/list/kitchen-storage-ideas/) - Practical DIY storage upgrades to maximize cabinet and drawer space
Key Takeaway
The most important thing to remember from this article is that this information can change how you think about Renovation.


