Renovation projects don’t fall apart because you can’t use a drill — they fall apart because the space wasn’t prepared properly. Dust spreads, measurements are off, materials are missing, and suddenly a weekend project becomes a month-long headache. This guide walks you through a practical, step‑by‑step process for prepping any room for renovation so the work itself is faster, cleaner, and a lot less stressful.
Step 1: Define the Scope and Protect What Stays
Before you move a single piece of furniture, get very clear on what will and won’t change in the room.
Start by walking the space with a notebook or your phone and list what’s happening: Are you updating flooring, paint, trim, fixtures, or electrical? Note anything that must stay untouched (built‑ins, original trim, historic details, expensive appliances). Take wide and close‑up photos from every angle — they’re invaluable if you need to put things back exactly as they were.
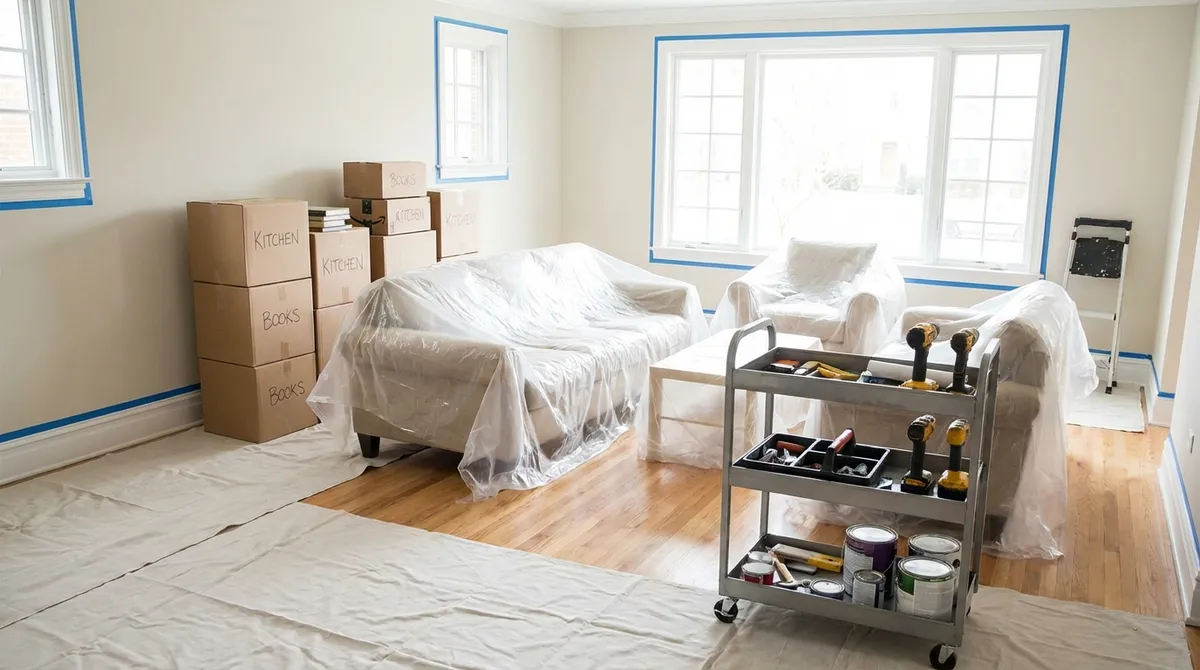
Next, remove anything that isn’t part of the renovation. Clear out decor, curtains, rugs, small furniture, and anything fragile. For large items that have to stay (a big sofa, a piano, built‑ins), move them to the center of the room and cover them with plastic sheeting or old bed sheets. Tape the covers down so dust can’t get in from underneath.
Finally, identify “no‑go” zones: walls that won’t be opened, floors that won’t be replaced, or fixtures that must remain installed. Mark them with painter’s tape if needed. This reduces mistakes and keeps helpers or contractors from accidentally demoing something you planned to keep.
Step 2: Disconnect, Shut Off, and Make It Safe
A safe workspace is non‑negotiable, especially when you’re doing demolition or working with tools.
Begin with utilities. For any area where you’ll be opening walls, changing outlets, or replacing fixtures, turn off power at the breaker panel, not just the light switch. Use a non‑contact voltage tester on outlets and switches to confirm they’re truly off. For plumbing work, shut off the water to that fixture (or the whole house if necessary) and open a faucet to relieve pressure.
Cap exposed wires with wire nuts and tuck them safely into electrical boxes; label each circuit with painter’s tape so you know what’s what when it’s time to reconnect. For plumbing, plug open pipes with clean rags or proper caps to keep debris out.
Check for potential hazards before you start tearing anything out. In homes built before 1978, assume paint could be lead‑based and be cautious about dust; in older homes, be wary of asbestos in floor tiles, pipe insulation, and some textured ceilings. If you suspect either, pause and get materials tested or hire a pro for removal.
Last, get your personal safety gear ready: safety glasses, dust masks or a respirator (rated N95 or better for fine dust), hearing protection, and sturdy gloves. Keep a basic first‑aid kit in or near the room so you don’t have to go searching when you actually need it.
Step 3: Build a Dust and Debris Control Plan
Dust is the number one complaint during renovation — and most of it is avoidable with a little planning.
Start by isolating the room. Use plastic sheeting and painter’s tape to create a temporary “door” over the room’s entrance if you don’t have an actual door you can close. If the project will be very dusty (sanding plaster, cutting tile, demoing walls), consider a zipper dust barrier you can open and close easily.
Next, control airflow. Turn off central HVAC in that zone if possible while you’re creating dust, or at least close supply and return vents and tape plastic over them. This prevents dust from being pulled into your ductwork and blown all over the house. Position a box fan in a window blowing outward to exhaust dusty air; seal around it with cardboard or plastic so air is drawn from the room and not from outside.
Create a debris path. Decide how you’ll move trash out of the room and to the curb or dumpster without tracking dust through the entire house. Lay down rosin paper or old cardboard in the hallway and on stairs along your path, and tape it in place. Keep a shop vacuum with a fine dust filter or HEPA filter in the room and vacuum as you go instead of waiting until the end — it’s far easier to keep up than to dig out from a dust avalanche.
Have a trash strategy ready: contractor‑grade trash bags for smaller debris, buckets or bins for heavy materials (tile, plaster), and a designated spot outside where you’ll stage everything until disposal day.
Step 4: Measure, Mark, and Stage Your Materials
Now that the space is protected and contained, switch gears from “protect” to “plan.” Good prep here prevents mid‑project surprises.
Start by measuring everything that matters for your specific renovation: wall lengths, ceiling height, window and door openings, existing trim sizes, outlet heights, and any obstacles (radiators, vents, uneven floors). Sketch the room and write measurements directly on your drawing. This doesn’t need to be pretty; it needs to be accurate.
With your measurements in hand, check your material quantities. Lay out or stack what you have in a dedicated “staging” area of the room or just outside it: flooring, underlayment, tile, thinset, paint, primer, caulk, screws, fasteners, and any specialty tools. Cross‑check your supplies against your project plan or materials list. If you’re short on anything, now is the time to make a store run — not halfway through installing the last row of flooring.
Do a dry layout where it matters. For flooring or tile, lay a few rows without adhesive to see how joints will land at walls and doorways. For a new vanity or cabinet, set it in place (or tape outlines on the floor and wall) to verify clearances for doors, drawers, and walking paths. Make adjustments now before anything is permanently installed.
Finally, mark the room. Use painter’s tape on walls and floors to indicate future cabinet edges, switches, outlets, or fixture centers. Mark stud locations with vertical tape and write “stud” above them; you’ll thank yourself later when you’re holding a heavy cabinet and trying to find a solid anchor point.
Step 5: Set Up a Small, Efficient On‑Site “Workshop”
The last part of room prep is building a mini work zone that lets you work efficiently without turning the entire house into a construction site.
Pick a corner of the room (or just outside it in a garage, porch, or driveway if weather allows) as your tool station. Set up a workbench or a sturdy surface — a pair of sawhorses with a sheet of plywood works fine. This is where you’ll do your measuring, cutting, and assembly.
Organize your essential tools within arm’s reach: tape measure, pencil, utility knife, drill/driver, bits, screws, level, square, pry bar, hammer, and any specialty tools for this specific project (tile cutter, miter saw, etc.). Use small bins or buckets to sort fasteners and small parts so you’re not constantly hunting through a mixed bag of screws.
Plan your cuts to minimize trips and mess. If you’re cutting a lot of material, set up a dedicated cutting zone with good lighting and, ideally, a shop vac that can be connected to tools with dust ports. Keep a trash bag or bin at your workbench so offcuts and packaging don’t pile up on the floor.
End each workday with a quick reset: sweep or vacuum the main walking areas, put hand tools back in one place, empty full trash bags, and coil extension cords. This 10–15 minute routine makes it much easier to restart the next day and reduces the chance of accidents from cluttered floors and hidden hazards.
Conclusion
Room prep isn’t the flashy part of renovation, but it’s the piece that makes everything else go smoother. When you clearly define what’s changing, make the space safe, control dust, stage materials, and set up a small, efficient work area, you turn a chaotic project into a manageable one. The actual work — painting, tiling, installing, wiring — becomes more focused, less stressful, and far more likely to finish on time. Treat preparation as part of the renovation, not a warm‑up, and every project you tackle after this will feel more under control.
Sources
- [U.S. Consumer Product Safety Commission – Home Renovation Safety](https://www.cpsc.gov/Safety-Education/Safety-Guides/home) - Safety guidance for home projects, including electrical and general tool use
- [U.S. Environmental Protection Agency – Renovation, Repair and Painting (RRP) Program](https://www.epa.gov/lead/renovation-repair-and-painting-program) - Information on working safely around lead-based paint in older homes
- [Occupational Safety and Health Administration – Protecting Workers from Lead Hazards](https://www.osha.gov/lead) - Background on lead exposure risks and protective measures relevant to DIYers
- [Energy.gov – Air Sealing Your Home](https://www.energy.gov/energysaver/weatherize/air-sealing-your-home) - Helpful for understanding airflow and why sealing vents and openings matters during dusty work
- [The Home Depot – How to Prepare a Room for Painting](https://www.homedepot.com/c/ah/how-to-prepare-a-room-for-painting/9ba683603be9fa5395fab90374c5f13) - Practical prep tips that also apply broadly to room renovation setups
Key Takeaway
The most important thing to remember from this article is that following these steps can lead to great results.


