Most renovation problems don’t start with tools or materials—they start with poor prep. Dust gets everywhere, outlets don’t work where you need them, walls crack after painting, and suddenly a “simple” project turns into a headache. The fix is learning how to prep a room properly before you swing a hammer or open a paint can.
This guide walks through a practical, five-step process any DIYer can follow to get a room truly renovation-ready—whether you’re planning new flooring, fresh paint, built-ins, or a full layout change.
Step 1: Strip the Space Down the Smart Way
Before you can improve a room, you need to clear it like a job site, not just “tidy up.”
Move out as much as possible.
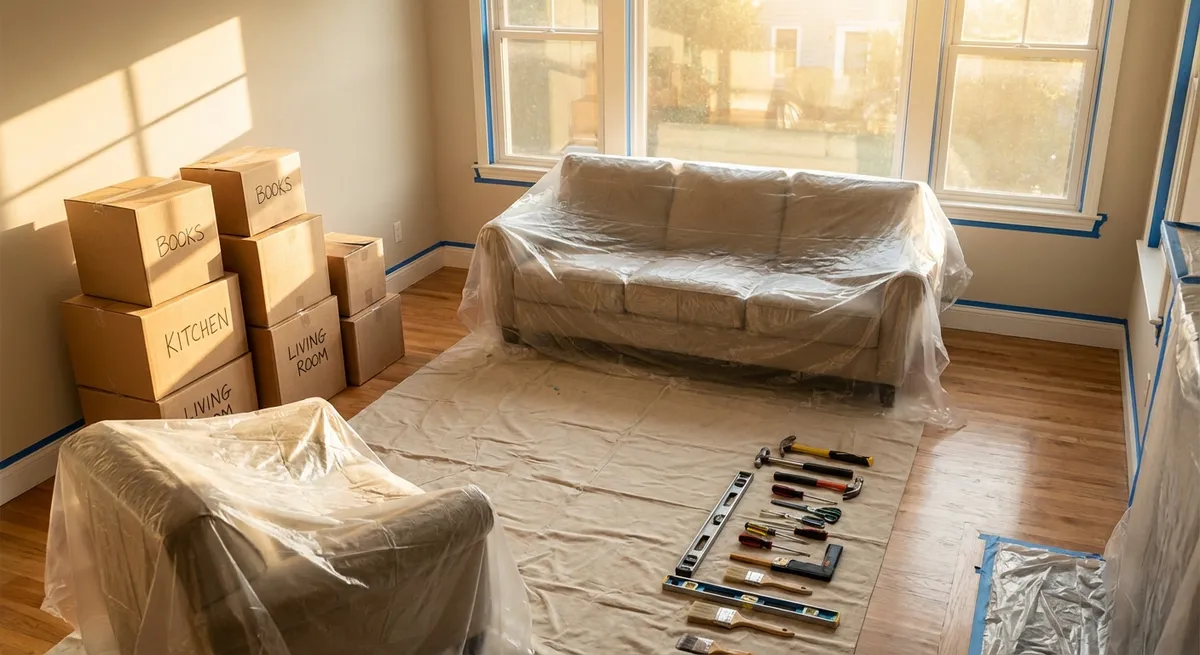
- Remove small furniture, lamps, rugs, and decor completely from the room.
- If large pieces (like a heavy dresser or sectional) must stay, slide them to the center of the room and wrap them in plastic sheeting.
- Take down curtains, blinds, and wall art; store hardware (screws, brackets) in labeled bags taped to the back of each item.
Protect what can’t move.
- Cover remaining furniture with thick plastic or old sheets, taping them at the bottom to keep dust out.
- Lay rosin paper or contractor’s paper over existing flooring if you aren’t replacing it. Tape seams so debris can’t get underneath.
- Protect vents and returns with painter’s tape and a layer of breathable material like a furnace filter or mesh to keep dust out of your HVAC system.
Disconnect what you’ll be working around.
- Turn off power at the breaker before you remove light fixtures or old outlets.
- Cap exposed wires with wire nuts and tuck them safely into boxes until you’re ready for final install.
- Remove switch and outlet covers and store them in labeled bags—“North wall – outlets,” etc.—so reassembly is easy.
Take photos before anything changes.
- Photograph each wall, ceiling, and floor from multiple angles.
- Capture close-ups of existing plumbing, electrical outlets, cable runs, and vents.
- These photos become a reference for what was where if you run into surprises later.
Step 2: Map the Room’s Bones (So You Don’t Fight Them Later)
A renovation goes much smoother when you understand what’s inside and behind the surfaces you’re changing.
Find the studs and structure.
- Use a stud finder to locate studs on all walls; mark them lightly with painter’s tape at eye level and near the baseboards.
- Note if studs are spaced 16" or 24" apart—this matters for hanging cabinets, TV mounts, or heavy shelves.
- Check which walls feel “solid” vs. “hollow” to help identify possible load-bearing walls (then confirm with a pro if you’re moving or opening walls).
Locate utilities and problem zones.
- Identify all outlets, switches, vents, plumbing lines, and thermostats. Sketch a simple floor plan and mark them in pencil.
- Use an inexpensive non-contact voltage tester to confirm where live electrical lines run before cutting or drilling.
- Look for prior repairs, stains, or cracks that might hint at water leaks, shifting, or poor insulation.
Check for code and safety issues before you build on top of them.
- Confirm GFCI protection in kitchens, bathrooms, laundry, and garages if you’re working near water.
- Note any DIY wiring “mysteries,” like multiple wires under one screw or outlet “daisy chains” that look messy—these may need correction.
- If your home was built before 1978, assume there could be lead-based paint and follow EPA-safe practices before sanding or demo.
Plan where new features will tie into existing systems.
- Decide where you want new lighting, outlets, or switches while you can still easily access walls.
- Check that your desired layout (for example, a kitchen island with power) matches where electrical and plumbing can realistically go.
- Avoid placing new built-ins or tall furniture in front of vents, returns, or access panels unless you plan a workaround.
Step 3: Fix the Hidden Flaws Before They Show Through
Renovation reveals flaws; good prep fixes them so they don’t ruin your finish work.
Assess walls and ceilings carefully.
- Run your hand over surfaces to feel bumps, dips, or loose tape joints in drywall.
- Look for hairline cracks at corners, around doors, and windows—common stress points.
- Check for nail pops (small circular bumps where drywall screws have moved).
Make targeted repairs instead of quick cover-ups.
- For nail pops, drive the existing screw slightly below the surface, add a new screw 1–2" above or below, then cover both with joint compound.
- For small cracks, use a flexible, paintable caulk in corners and along trim where movement is likely.
- For larger cracks in flat surfaces, widen them slightly with a utility knife, embed joint tape, then skim with compound.
Deal with moisture issues now, not after you paint.
- Stains on ceilings or walls usually mean a leak—track down the source and fix it before any cosmetic work.
- Use a moisture meter if you suspect dampness in basements or exterior walls.
- In bathrooms and laundry areas, verify the exhaust fan actually vents to the exterior, not just into the attic.
Upgrade what’s easy to reach while everything’s open.
- If you’re opening walls or ceilings, consider upgrading old wiring, adding blocking for future grab bars or wall-mounted features, and improving insulation.
- Add sound-deadening insulation between bathrooms and bedrooms or between living areas and home offices while you have access.
- Mark any added blocking locations on your floor plan and take photos—you’ll thank yourself later.
Let repairs cure fully.
- Follow manufacturer dry times for compounds, caulks, and fillers; rushing this step is what leads to visible seams and cracks later.
- Sand lightly between coats with a sanding sponge or pole sander and use a bright work light at a low angle to spot imperfections.
Step 4: Set Up a Clean, Efficient DIY Work Zone
A well-run renovation isn’t just about what you build—it’s about how you work in the space day to day.
Create a dedicated “dirty” zone and a “clean” path.
- Choose one area (garage, porch, or corner of the room) as your main cutting and sanding zone.
- Use plastic sheeting and zipper doors (or overlapping sheets) to separate dusty areas from the rest of the house.
- Lay down a runner (cardboard or rosin paper) along the path you’ll walk most often to reduce tracking dust.
Organize tools so you’re not constantly hunting for them.
- Set up a simple “work triangle”: tools in one area, materials in another, trash and scrap in a third.
- Keep frequently used tools in a single, portable toolbox or tote that you can move around the room.
- Use small bins or buckets labeled “hardware,” “electrical,” “plumbing,” etc. to keep fasteners and parts sorted.
Plan your material flow.
- Store long items (trim, baseboards, lumber) flat and supported at multiple points to prevent warping.
- Stack heavy materials like tile or flooring close to where they’ll be installed; avoid storing them in a way that blocks exits.
- Bring materials into the room only when you’re close to using them; this keeps clutter and damage risks down.
Control dust from the start.
- Use a shop vac with a fine dust or HEPA filter attached to tools whenever possible.
- Sweep or vacuum at the end of every work session—don’t wait until the project is almost done.
- Work from top to bottom: ceiling tasks first, then walls, then trim and floors, so falling dust and debris don’t ruin finished surfaces.
Build in a daily reset routine.
- At the end of each day, put tools back in the same spots, bag trash, and stack materials neatly.
- Make a quick written list of what you did and what’s next; this cuts your “where was I?” time tomorrow.
- Check that exits are clear and that nothing flammable is near heaters, water heaters, or pilot lights.
Step 5: Sequence Your Work for Fewer Do-Overs
A renovation that’s done in the right order feels smoother, costs less, and looks better.
Start with structural and rough-in work.
- Do framing changes, wall removals, and major layout shifts first while access is easy.
- Next, handle rough electrical, plumbing, and HVAC changes before closing anything up.
- Get all inspections (if required locally) done before you cover walls and ceilings.
Then close up and refine the shell.
- Install insulation, then hang drywall or repair existing surfaces.
- Tape, mud, and sand joints until surfaces are smooth; prime once everything’s dry and dust-free.
- Address any remaining cracks or defects you spot after priming—primer makes flaws easier to see.
Tackle floors at the right time.
- If you’re doing major ceiling and wall work, leave final flooring for later so it doesn’t get damaged.
- Many pros install hard flooring (like hardwood or LVP) before baseboards but cover it thoroughly; tile is often installed before trim as well.
- If refinishing existing hardwood, schedule that after the bulk of dusty work is done but before final trim touch-ups and final painting.
Finish with trim, fixtures, and paint.
- Install baseboards, casing, and other trim once floors are in or protected.
- Install cabinets and built-ins after walls are primed and reasonably finished but before final wall paint (so you can caulk and touch up cleanly).
- Do final painting last: ceilings first, then walls, then trim. Touch up scuffs at the very end of the project.
Reconnect, test, and do a final sweep.
- Turn power back on at the breaker and test all outlets, switches, and fixtures with a simple plug-in tester or voltage tester.
- Run water through all new or disturbed plumbing and check carefully for leaks.
- Remove protective coverings, clean windows and fixtures, and do a slow walk-through looking for missed caulk, paint holidays, or nail holes.
Conclusion
Successful DIY renovations aren’t just about big changes—they’re about disciplined prep and smart sequencing. When you strip the room correctly, understand what’s behind the walls, fix hidden issues, set up a clean work zone, and follow a clear order of operations, every task becomes easier and your results look more professional.
Use this five-step framework as your baseline for any room you’re planning to renovate. Adjust the details for your specific project, but keep the structure. That’s how you turn a chaotic remodel into a controlled, predictable upgrade you can actually enjoy living in when it’s done.
Sources
- [U.S. Department of Housing and Urban Development – Rehab a Home](https://www.hud.gov/program_offices/housing/sfh/rehab) - Overview of key considerations when rehabilitating or renovating a home
- [U.S. Environmental Protection Agency – Renovation, Repair and Painting (RRP) Program](https://www.epa.gov/lead/renovation-repair-and-painting-program) - Guidance on safe practices for older homes, especially regarding lead-based paint
- [Family Handyman – Home Remodeling Sequence](https://www.familyhandyman.com/project/home-remodeling-sequence/) - Practical explanation of recommended renovation order and project sequencing
- [This Old House – How to Prep a Room for Painting](https://www.thisoldhouse.com/painting/21016838/how-to-paint-a-room) - Detailed prep steps that apply broadly to wall and surface preparation
- [Habitat for Humanity – Home Maintenance and Repairs](https://www.habitat.org/home-maintenance-and-repairs) - General guidance for safe, practical home repair and improvement practices
Key Takeaway
The most important thing to remember from this article is that following these steps can lead to great results.


