Renovating your home doesn’t have to mean gutting rooms or blowing your budget. With a clear plan, a few essential tools, and realistic expectations, you can tackle meaningful upgrades that actually improve how your home looks, feels, and functions. This guide walks through five practical, step-by-step renovation processes that DIY enthusiasts can handle with some patience and preparation.
Each step focuses on real-world tasks you’re likely to face in a typical home update, from planning and prep to finishing details that make the work look professional.
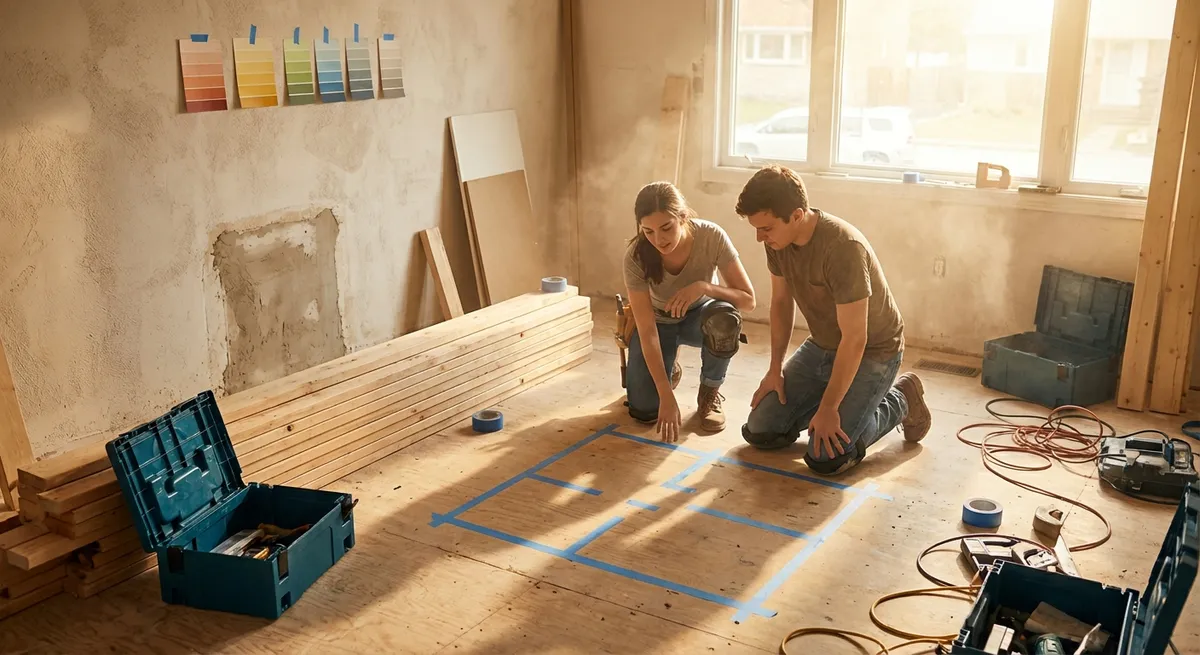
Step 1: Define the Project Scope Before You Touch a Tool
Jumping straight into demolition is how small projects turn into expensive headaches. Before you start, get specific about what you’re doing—and what you are not doing.
- Write one clear goal for the project. For example: “Update the living room to improve lighting and paint,” or “Refresh the bathroom vanity and flooring, no plumbing changes.” This helps you make decisions and avoid scope creep.
- Make a must-have and nice-to-have list. Must-haves might include fixing damaged drywall or replacing unsafe outlets. Nice-to-haves might be upgraded trim or new light fixtures. If the budget starts to tighten, you’ll know what can wait.
- Identify what stays and what changes. Decide if you’re keeping layout, cabinets, major fixtures, or flooring. Keeping plumbing and walls in place reduces complexity, cost, and permit requirements.
- Check if you need permits. Look up your city or county building department online. Structural changes, electrical work beyond simple fixture swaps, and moving plumbing often require permits and inspections. Don’t skip this—doing so can cause issues during resale and insurance claims.
- Document the current space. Take photos, rough measurements, and note problem areas (drafty windows, squeaky floors, damaged corners). This helps when buying materials and verifying progress.
Once you’ve defined the project scope, you’ll be able to estimate budget and time more accurately, and you’re less likely to end up living in a “half-finished” space for months.
Step 2: Build a Realistic Budget and Material Plan
A renovation usually fails not because of skill, but because of poor planning around costs and materials. A simple budget and material checklist will save you time and stress.
- Break the project into categories. Common buckets are: demolition, structural (if any), electrical/lighting, plumbing (if any), surfaces (drywall, flooring, tile), finishes (paint, trim, hardware), and contingency.
- Price materials first. Use home center websites to price out your materials: flooring per square foot, paint per gallon, trim per linear foot, etc. Add 10–15% extra for waste and mistakes, especially for flooring and tile.
- Don’t forget consumables and small items. Tape, primer, sanding sponges, caulk, joint compound, screws, anchors, and drop cloths add up quickly. Add a line in your budget for these so they don’t surprise you.
- Set a contingency fund. Plan for at least 10–20% of your total budget as a buffer. Hidden damage, code issues, or “while we’re at it” changes almost always appear.
- Decide what you’ll DIY and what you’ll hire out. For example, you might handle demolition, painting, and flooring yourself but pay a pro for electrical panel work or complex tile layouts. Get at least two quotes for any pro work and build those into your budget.
- Create a simple materials checklist. For each task (e.g., “paint living room”), list exactly what you need: primer, paint, painter’s tape, rollers, brushes, extension pole, tray liners, plastic sheeting. Take this list to the store or save it on your phone to avoid “one more trip” delays.
A solid budget and shopping plan keeps the project moving and lets you adjust on the fly without losing control of costs.
Step 3: Prepare the Space Like a Pro (So the Work Goes Faster)
Good prep is the difference between a renovation that feels chaotic and one that runs smoothly. It also protects the rest of your home from dust, damage, and mess.
- Clear out the room as much as possible. Remove furniture, wall decor, and rugs. If something has to stay, move it to the center and cover it with plastic and a cloth drop cloth on top for better puncture resistance.
- Protect floors and pathways. Use rosin paper or thick drop cloths on floors in the work area and traffic routes. Tape seams to prevent tripping and stop debris from getting in cracks and under thresholds.
- Create dust barriers. Hang plastic sheeting over doorways and tape it to the trim. Leave a flap you can open and close. For especially dusty work (like sanding drywall), consider using a zipper dust barrier or a simple “airlock” with overlapping sheets.
- Shut off utilities where necessary. Before working on outlets, switches, or fixtures, turn off power at the breaker and test with a non-contact voltage tester. For plumbing work, shut off the appropriate water supply and open a nearby faucet to relieve pressure.
- Set up a dedicated cutting and staging area. Pick a garage, driveway, or outdoor space (weather permitting) for cutting lumber, tile, or trim. Set up sawhorses and a work surface. This keeps noise, dust, and debris out of your main living space.
- Organize tools and materials. Group tools by task—painting tools in one bin, electrical tools in another. Keep screws, anchors, blades, and drill bits in labeled containers. When you can find what you need immediately, each task goes much faster.
Spending a half-day on prep can save you multiple days of frustration, re-cleaning, and accidental damage.
Step 4: Upgrade Surfaces for Instant Impact (Paint, Trim, and Fixtures)
Many renovations don’t require moving walls or plumbing. Updating surfaces—what you see and touch every day—can dramatically change a room with relatively low risk.
- Repair walls before painting.
- Fill nail holes and small dents with lightweight spackle.
- For larger cracks or gouges, use joint compound and mesh tape if needed.
- Sand smooth once dry and wipe away dust. This step is what makes the final paint look clean instead of lumpy.
- Use primer strategically.
- Prime over patched areas and any stains to prevent flashing or bleed-through.
- Use bonding primer on glossy surfaces like old trim or cabinets before applying new paint.
- On dark walls going to a light color, a primer can reduce the number of top coats needed.
- Cut in carefully, then roll.
- Start by “cutting in” along ceilings, corners, and trim with a 2–2.5" angled brush.
- While the cut-in paint is still wet, roll the main wall with a quality roller. This helps blend edges and avoid visible lines.
- Upgrade trim for a finished look.
- Consider replacing thin, damaged baseboards with taller, cleaner profiles.
- Measure each wall, cut trim with a miter saw (or miter box and hand saw), and test-fit before nailing.
- Use wood filler on nail holes, caulk gaps at the wall, then paint for a continuous, professional finish.
- Swap outdated fixtures.
- Replace yellowed outlet covers, old curtain rods, dated light fixtures, and worn door hardware.
- Turn off power at the breaker before changing electrical fixtures and follow manufacturer instructions carefully.
- Keep finish colors consistent (for example: all brushed nickel or all black) to make the space feel cohesive.
- Choose durable, washable finishes.
- For walls, consider eggshell or satin in busy rooms; for trim and doors, semi-gloss is easier to clean.
- In moisture-prone rooms like bathrooms, use paints labeled for high humidity and mold/mildew resistance.
By focusing on surfaces, you can give a room a dramatically updated look without getting into complex structural work.
Step 5: Install New Flooring with a DIY-Friendly Approach
New flooring is one of the most visible changes you can make, and many modern products are designed with DIY installation in mind. Proper planning and technique are key.
- Select the right flooring for your space.
- For kitchens, entryways, and basements, look at waterproof or water-resistant flooring such as luxury vinyl plank (LVP).
- For living rooms and bedrooms, laminate or engineered wood can balance comfort and durability.
- Check manufacturer recommendations for installation over concrete, radiant heat, or existing floors.
- Prep the subfloor.
- Remove old flooring as required (carpet, tack strips, staples, and nails).
- Check for squeaks; screw down loose subfloor panels into joists.
- Use a straightedge to check for high/low spots. Sand down high spots and fill low areas with floor-leveling compound as recommended by the manufacturer.
- Acclimate the flooring.
- Store unopened boxes in the room where they’ll be installed for the time specified by the manufacturer (often 24–72 hours).
- Keep the room within the recommended temperature and humidity range during and after installation.
- Plan your layout before cutting.
- Measure the room and dry-lay a few rows to see where seams will fall.
- Avoid ending with very narrow planks along a wall; adjust your starting cut if necessary to keep end rows at a reasonable width.
- Stagger end joints according to manufacturer guidelines (often a minimum offset of 6–8 inches) to improve strength and appearance.
- Install with consistent spacing.
- Use spacers along walls to maintain the required expansion gap, typically 1/4" around the room.
- Start against the straightest wall and work across the room.
- For click-lock flooring, angle and lock each plank carefully; use a tapping block and pull bar as needed—never hammer directly on plank edges.
- Finish edges and transitions.
- Install baseboards or shoe molding to cover expansion gaps at the walls.
- Use appropriate transition strips between different flooring types (e.g., from tile to LVP, or from LVP to carpet).
- Reinstall or adjust doors if needed; sometimes you’ll need to shave a small amount from the bottom to clear the new floor.
Taking your time with layout and subfloor prep will make the finished floor look intentional and help it last longer.
Conclusion
A successful renovation is less about dramatic “before and after” photos and more about thoughtful planning, solid preparation, and careful execution. By defining your project scope, building a realistic budget, prepping the space, upgrading high-impact surfaces, and tackling DIY-friendly flooring, you can significantly improve your home without overwhelming yourself.
Start with one area, move step by step, and treat each project as a chance to build your skills. Over time, your home—and your confidence as a DIY renovator—will both be noticeably upgraded.
Sources
- [U.S. Department of Energy – Home Weatherization and Energy Efficiency](https://www.energy.gov/energysaver/weatherize) - Guidance on improving home performance, helpful when planning renovation upgrades that affect comfort and efficiency
- [U.S. Consumer Product Safety Commission – DIY Home Improvement Safety Tips](https://www.cpsc.gov/Safety-Education/Safety-Guides/home-improvement-and-tools) - Covers essential safety practices when using tools and working on home projects
- [The Home Depot Project Guides](https://www.homedepot.com/c/projects) - Step-by-step tutorials and material guides for flooring, painting, and other common renovation tasks
- [Lowe’s DIY Projects & Ideas](https://www.lowes.com/diy) - Practical how-tos, planning advice, and product information for home improvement projects
- [National Association of Home Builders – Remodeling](https://www.nahb.org/consumer/remodeling) - Insights on budgeting, hiring professionals, and planning renovation work in line with industry standards
Key Takeaway
The most important thing to remember from this article is that this information can change how you think about Renovation.


