Renovations get expensive and stressful when decisions are made on the fly—paint colors that look wrong at home, layouts that feel cramped, or finishes that don’t hold up. Instead of guessing, you can “test-drive” the big decisions before you spend serious money or start tearing things apart. This approach saves time, cash, and a lot of frustration—especially for DIYers.
This guide walks you through practical, low-risk ways to trial your renovation ideas at home, with five clear, step-by-step mini-projects that fit real life and real budgets.
Start With a "Good Enough" Plan, Not a Perfect One
Most DIYers get stuck in two traps: jumping in with no plan, or obsessing over a perfect one. You don’t need architectural drawings to get started, but you do need a simple roadmap so you’re not improvising major choices mid-project.
Begin by defining what you want your space to do, not just how you want it to look. Do you need more storage, better lighting, safer stairs, or easier cleaning? Listing functional goals first helps you avoid pretty-but-impractical changes.
Then, sketch your room on paper or using a free app. Mark:
- Fixed elements (windows, doors, radiators, plumbing)
- Existing outlets and switches
- Traffic paths (how people naturally move through the room)
- Current pain points (dark corners, tight turns, clutter zones)
Your goal is not perfection; it’s to see your ideas on paper so you can try them cheaply before you commit with tools and materials.
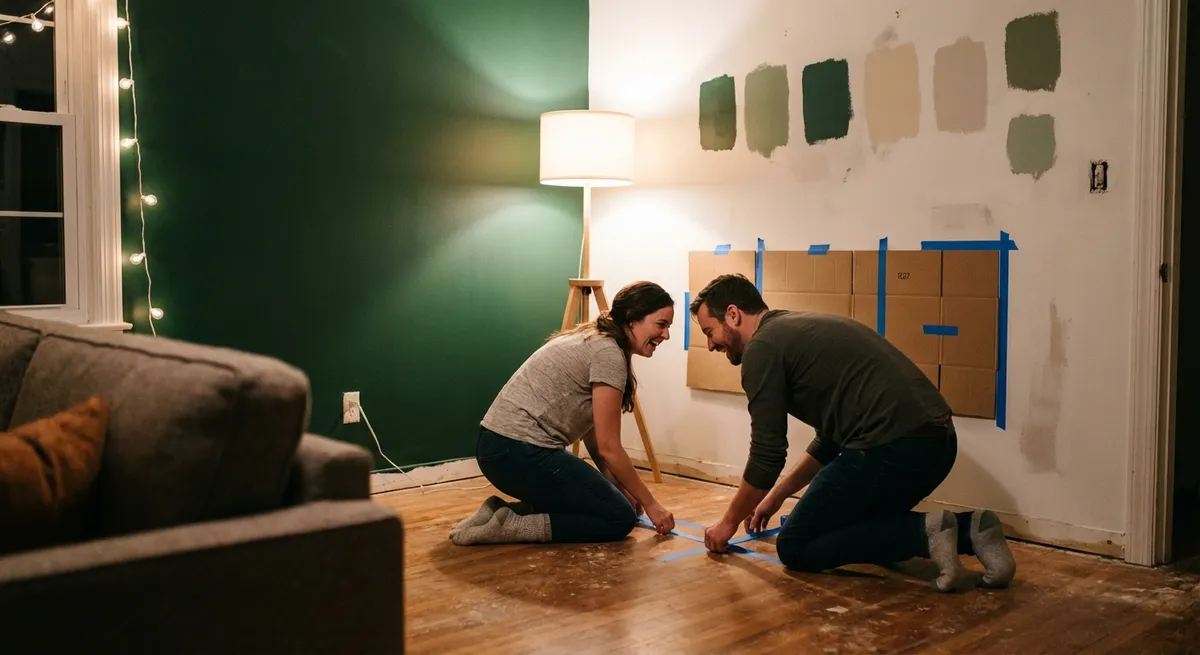
Step 1: Mock Up Your New Layout With Tape and Cardboard
Before you move a single cabinet or buy new furniture, build a life-size mockup. This shows you instantly if your layout will feel open, cramped, or awkward.
How to do it
Measure the room and key pieces
Measure walls, door swings, windows, and anything staying put. Then measure furniture, cabinets, or appliances you plan to add or move.
Create floor outlines with painter’s tape
On the floor, use low-tack painter’s tape to mark where new cabinets, an island, a vanity, or a sectional will sit. Include the depth and width, not just a simple line along the wall.
Mock up height with cardboard or boxes
Use moving boxes or scrap cardboard stacked to the right height to represent counters, islands, or tall storage. This helps you see how “boxed in” the room might feel.
Test everyday movements
Walk the way you actually live: - Carry a laundry basket through - Open cabinet “doors” (pretend with your arms) - Stand at the “sink” or “stove” and see if someone can pass behind you comfortably If it feels tight now, it will feel tight later—only more expensive.
Adjust until movement feels easy
Shift the tape and boxes until: - Main walkways are at least ~36 inches wide - You can open cabinet doors without blocking paths - Doors don’t collide with each other or major furniture Take photos of layouts that work so you can refer back when you’re building for real.
Pro tip: Do this for at least a full day. Live with the mockup to see if daily habits reveal problems you missed initially.
Step 2: Test Paint Colors and Finishes in Real Life
Paint and finishes look very different in your home than on a screen or under store lighting. Instead of guessing from tiny chips, run a real-world test that costs a few dollars but can save you from repainting an entire room.
How to do it
Narrow your options to 3–4 choices
Choose a very light, a mid-tone, and a slightly darker option in the same family. For finishes (matte, eggshell, semi-gloss), pick what seems right for the room’s use: - Matte/eggshell: living rooms, bedrooms - Semi-gloss: trim, doors - Satin or semi-gloss: kitchens and baths
Buy sample cans, not full gallons
Get sample sizes of each color. If samples aren’t available, ask for the smallest size possible; you only need enough for a few large swatches.
Paint big, separated test patches
On at least two different walls, paint swatches about 2’ x 2’ each, leaving a few inches of existing wall color between them. If you’re changing finishes, label each swatch with painter’s tape (“Color A – eggshell,” “Color B – satin”).
Check at different times of day
Look at your samples in: - Early morning light - Midday - Evening with lights on Some colors will suddenly look muddy, too blue, or too yellow at specific times.
Decide by elimination, not perfection
Cross off the colors that are clearly wrong: too dark, too bright, too sterile. Choose the one that looks good most of the time, not perfect in one very specific light.
Pro tip: If you’re choosing flooring or countertop, put your sample board next to the painted swatches. Colors can change drastically when paired with different materials.
Step 3: Trial Your Lighting Plan Before Installing Anything Permanent
A great renovation can still look dull or harsh if the lighting is wrong. Before you start cutting holes for new fixtures or buying expensive recessed lights, simulate your future lighting and see how it feels.
How to do it
List what happens in each area
For example, in a kitchen: chopping food, reading recipes, kids doing homework, late-night snacking. Each activity may need a different type of light (task vs. ambient vs. accent).
Use temporary plug-in lights as stand-ins
Buy or borrow inexpensive clamp lights, floor lamps, or plug-in pendant lights. These become your “test” fixtures without any electrical work.
*Position lights where you think you want them long term
- Clamp lights where recessed lights or under-cabinet lights might go - Floor lamps where you picture wall sconces - Plug-in pendants where you want island or dining lights
Live with the setup for at least a week
Pay attention to: - Shadows when you’re cooking, reading, or working - Glare on screens or glossy surfaces - Whether the room feels flat, harsh, or cozy at night Adjust brightness with different bulbs (warmer 2700–3000K vs. cooler 4000–5000K).
Mark keeper locations before you remove anything
Once the layout feels right, mark fixture positions on the ceiling or walls with painter’s tape and a marker. Note the bulb color temperature and wattage that felt best so you can replicate it when you install permanent fixtures.
Pro tip: Aim for layered lighting—overhead + task + accent—rather than one super-bright central fixture. Your trial period will show you where each type is truly needed.
Step 4: Practice New Techniques on a “Sacrifice” Surface
Trying something new—tiling, drywall repair, trim work—directly on your visible walls or floors is a fast way to end up with obvious mistakes. Instead, use a cheap, hidden, or removable “sacrifice” surface to sharpen your skills first.
How to do it
Choose a low-risk practice area or material
Good options: - A scrap piece of drywall or plywood - The backside of a closet wall - An old piece of furniture or a spare cabinet door - Off-cut pieces of tile, trim, or flooring
Learn from a single trusted source first
Before practicing, watch or read instructions from one high-quality source (not a mix of conflicting tips). Official manufacturers, university extensions, or major home centers often have reliable tutorials.
Walk through the full process start to finish
For example, for tiling practice: - Cut a few tiles - Spread thinset on a board - Set tile with spacers - Let it cure - Apply grout - Clean haze This shows you all the steps and drying times without pressure.
Document what didn’t go well
Note common issues: lippage (uneven tiles), visible joints, drips, rough cuts, or sanding marks. Those problems are almost guaranteed to show up in the real project if you don’t correct them now.
Adjust tools or supplies before the real job
Maybe you need a higher-quality blade, a different sandpaper grit, a different grout float, or better lighting while you work. Fixing your setup now is far cheaper than repairing a finished wall or floor.
Pro tip: Keep your practice board as a reference. If you ever need to match a previous technique or color, you have a physical sample of what worked.
Step 5: Run a “Mini-Reno” to Test Durability and Daily Use
Some renovation choices look amazing on day one but fail under real, messy, everyday life. Before you commit to expensive materials or a full-room overhaul, test your ideas in a small, contained way.
How to do it
Pick one small, high-traffic test zone
Examples: - A single entry wall or mudroom corner - A short backsplash section behind a coffee station - One bathroom vanity instead of a whole bathroom - A laundry or utility nook
Use the same type of materials you plan for the bigger project
If you’re considering peel-and-stick tiles, LVP flooring, or a certain cabinet paint, use those exact products in your mini-reno area.
Install it as if it’s the real job
Don’t cut corners. Follow recommended surface prep, primers, adhesives, and cure times. This shows you the true* effort and skill level required for a full-space install.
Stress-test it for at least a month
During normal life, watch how the materials hold up to: - Moisture and steam (bathrooms, kitchens) - Dirt, pet claws, kids, or dragging bags - Frequent cleaning with your usual products Look for peeling, scratching, warping, or stain resistance.
Decide whether to scale up, modify, or ditch the idea
If it holds up and you still like the look, you’ve got a proven winner. If it fails, you’ve only sacrificed a small area—and you’ve saved yourself from making the same mistake on an entire room.
Pro tip: Take before/after photos and note exactly what products and techniques you used. When it’s time to scale up, you’ll have a tested recipe instead of starting from scratch.
Conclusion
Renovation doesn’t have to be a gamble. When you test layouts with tape and cardboard, sample colors and light in real conditions, practice techniques on scrap, and trial materials in small zones, you trade guesswork for evidence.
This “test before you tear out” mindset:
- Catches design problems when they’re cheap to fix
- Builds your DIY skills in low-pressure situations
- Protects your budget from expensive mistakes
- Gives you more confidence when it’s finally time to commit
Instead of hoping your renovation turns out the way you picture it, you’ll know how it will look, feel, and function—because you already lived with the trial version.
Sources
- [U.S. Department of Energy – Lighting Choices to Save You Money](https://www.energy.gov/energysaver/lighting-choices-save-you-money) - Explains lighting types, color temperatures, and how to plan efficient, effective lighting for your home.
- [Sherwin-Williams – How Light Affects Color](https://www.sherwin-williams.com/en-us/homeowners/color/learn/how-lighting-affects-color) - Breaks down how natural and artificial light change the appearance of paint colors throughout the day.
- [Home Depot – How to Plan a Kitchen Layout](https://www.homedepot.com/c/ab/how-to-plan-a-kitchen-layout/9ba683603be9fa5395fab9013f94c77) - Provides practical guidance on spacing, clearances, and workflow that you can simulate with tape and mockups.
- [Lowe’s – Tile Installation: A DIY Guide](https://www.lowes.com/n/how-to/install-tile) - Step-by-step instructions and best practices for tiling, helpful when practicing on a “sacrifice” surface before the real project.
- [University of Missouri Extension – Home Maintenance and Repairs](https://extension.missouri.edu/programs/home-maintenance-and-repairs) - Educational resources on home projects and durability considerations that support planning and testing renovation choices.
Key Takeaway
The most important thing to remember from this article is that following these steps can lead to great results.


